
Have you ever wished you could bring a photo to life—add movement, a bit of context, and tell a story in just a few seconds? That’s exactly why image-to-video generation is catching on. For creators, educators, and marketers, it’s a way to get more value out of the visuals they already have.
Instead of relying on complex editing software or hiring a professional, many are now turning to AI-powered tools. These models can take a static image, a short description, and quickly turn it into a moving scene. Tools that support Kling AI make this possible in a matter of minutes. You don’t need to be a video expert—just bring your idea, and the model does the technical part for you.
This approach is especially useful for people working on tight timelines or with limited resources. Whether you’re planning a short video for social media, creating classroom material, or showcasing a product, image-to-video tools can help you do more—without starting from scratch.
What Is the Kling AI Video Model?
Kling is one of the newer AI video models developed by Kuaishou, a tech company based in China. It’s been designed to turn written prompts and images into short videos that feel like they were filmed with a real camera.
What makes Kling different from many other models is its focus on movement. It handles depth, shadows, and body physics in a way that gives the final video a more natural look. Think about scenes with wind, walking, or even camera angles like zooms or pans—that’s the kind of detail Kling is built to handle.
It’s especially useful for concept designers, creative professionals, and anyone working on ideas that involve motion—like ad samples, short scenes, or story previews. Even though it’s still growing in popularity, Kling has already shown strong results for people who want to bring their visuals to life using a little help from AI.
Bonus: Top 7 AI Video Generation Models Compared: Kling, Veo and other AI Models
How to Create a Video from an Image with Kling AI Video Model Option
Creating videos from images doesn’t have to take hours or require advanced software. With Simplified AI “Image to Video” tool, you can turn a still visual into a moving story in just a few steps. Here’s a detailed breakdown of how to do it:
Step 1: Sign Up or Log In and Open the AI Magic Tools
To begin, head over to Simplified AI Image to Video website. If you’re a new user, sign up for a free account. If you already have one, simply log in.
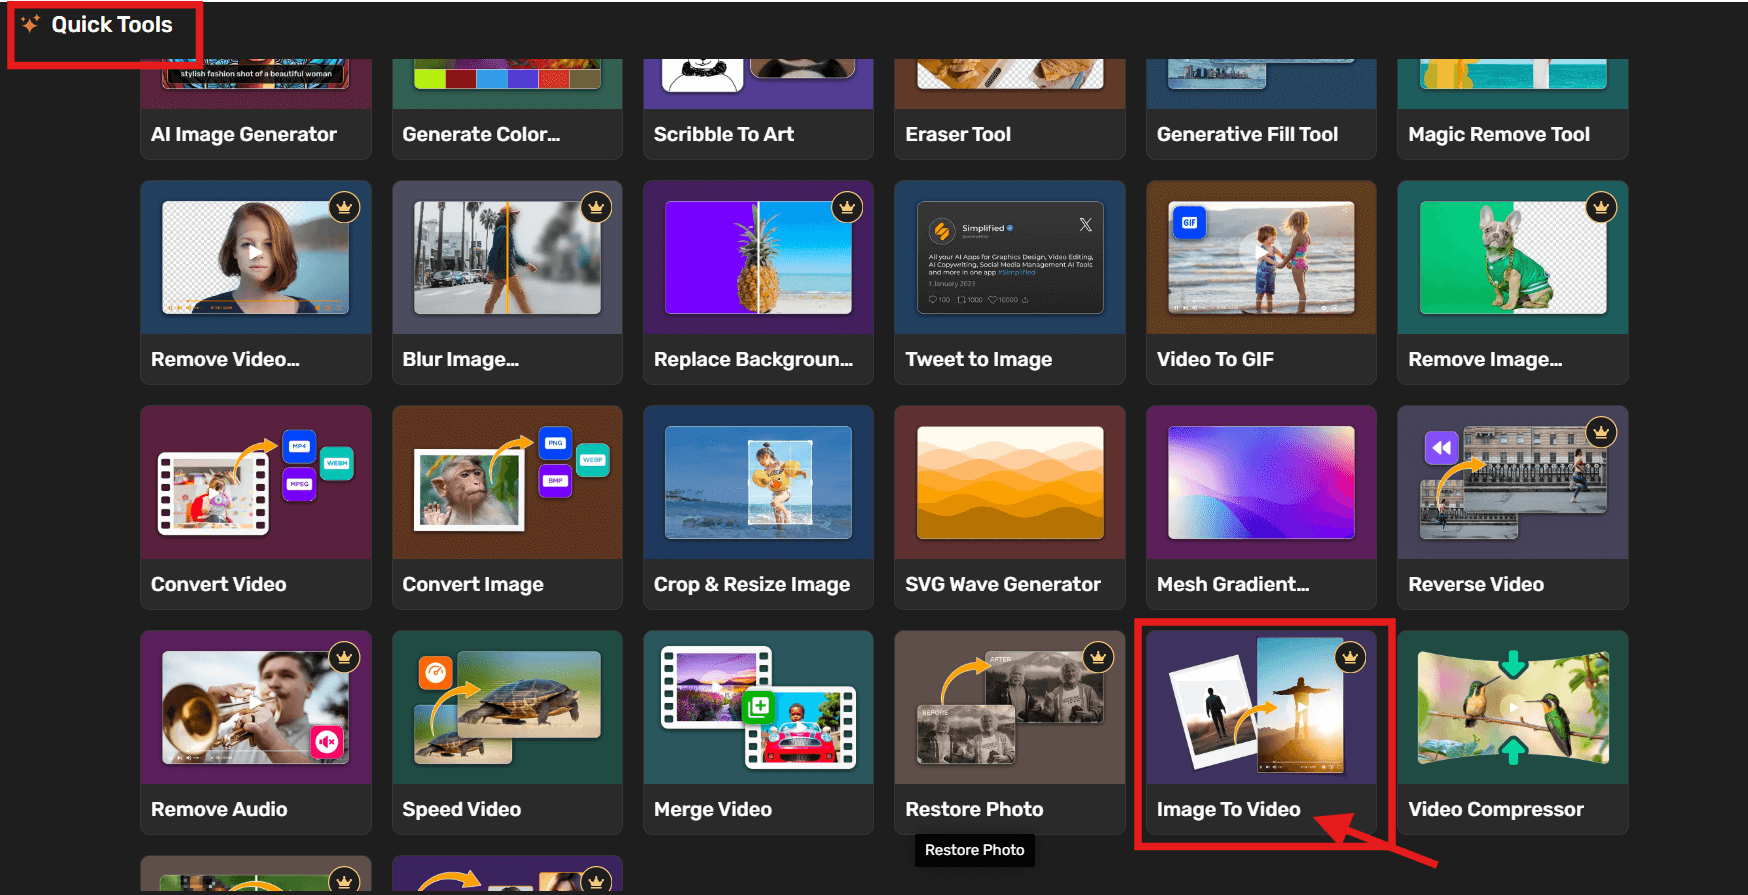
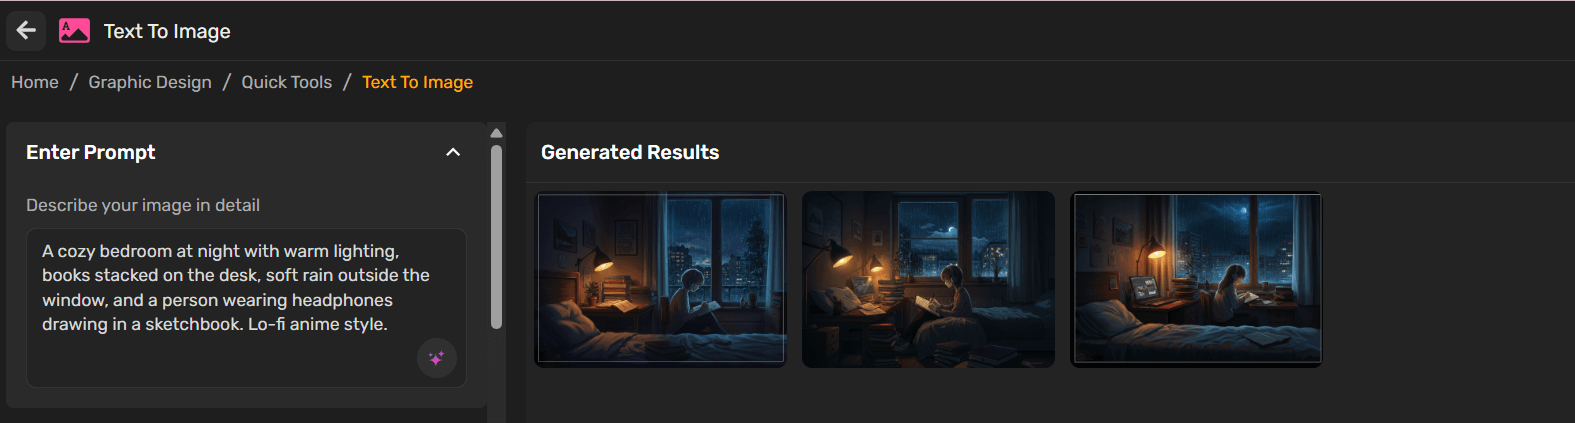
Once inside the dashboard. Select “Graphic Design” or go to the “Quick Tools” section. This is where Simplified keeps its collection of AI-powered features. From there, click on “Image to Video” to start your project.
Step 2: Upload an Image, Enter a Prompt, and Choose Video Settings
Next, upload the image under “Upload first frame” section you want to bring to life. Simplified supports the following file formats: .png, .jpg, .jpeg, .bmp, and .webp.
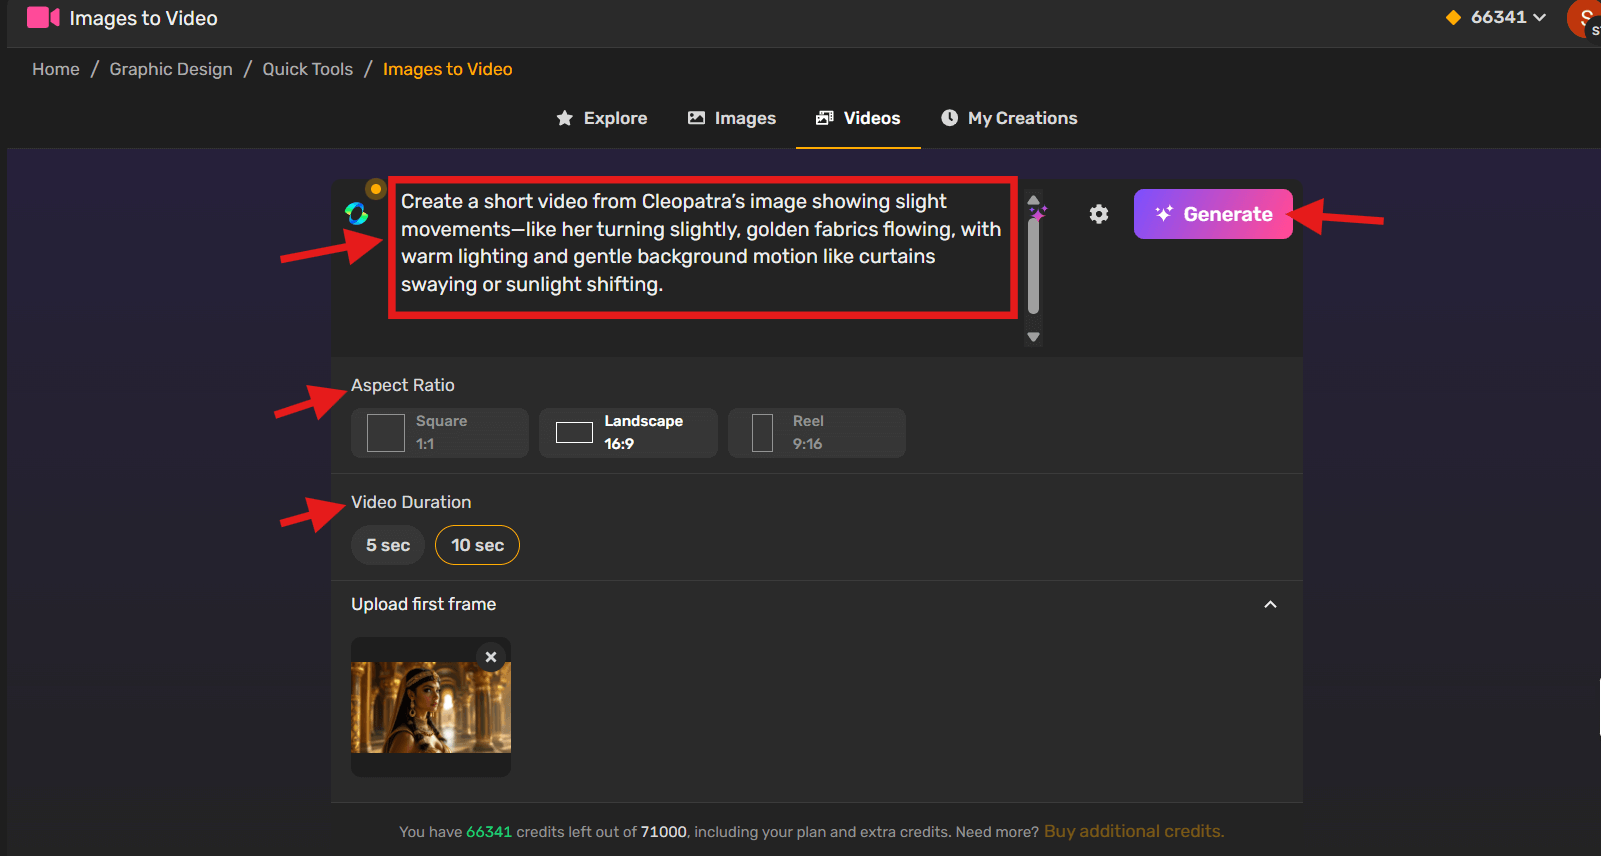
Then, in the prompt box, type a short text description that tells the AI what kind of scene or motion you want the image to convey.
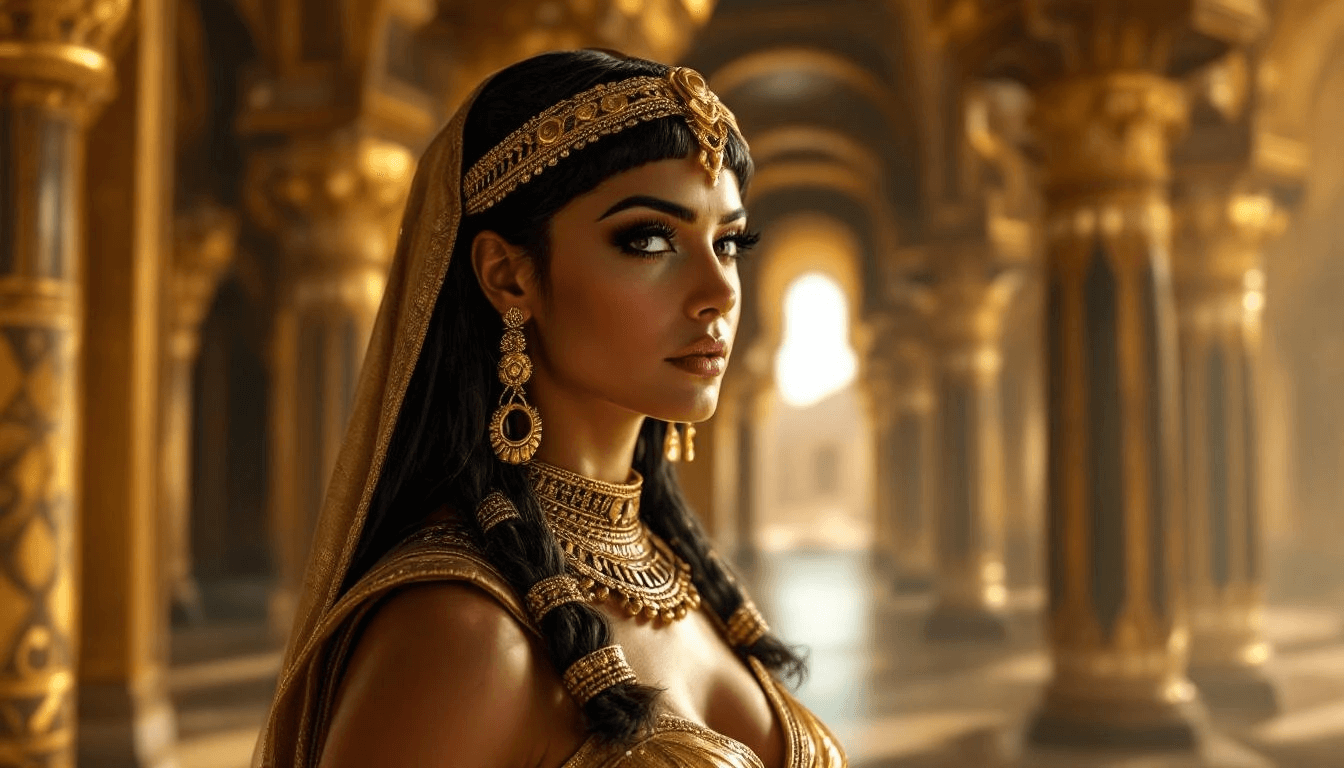
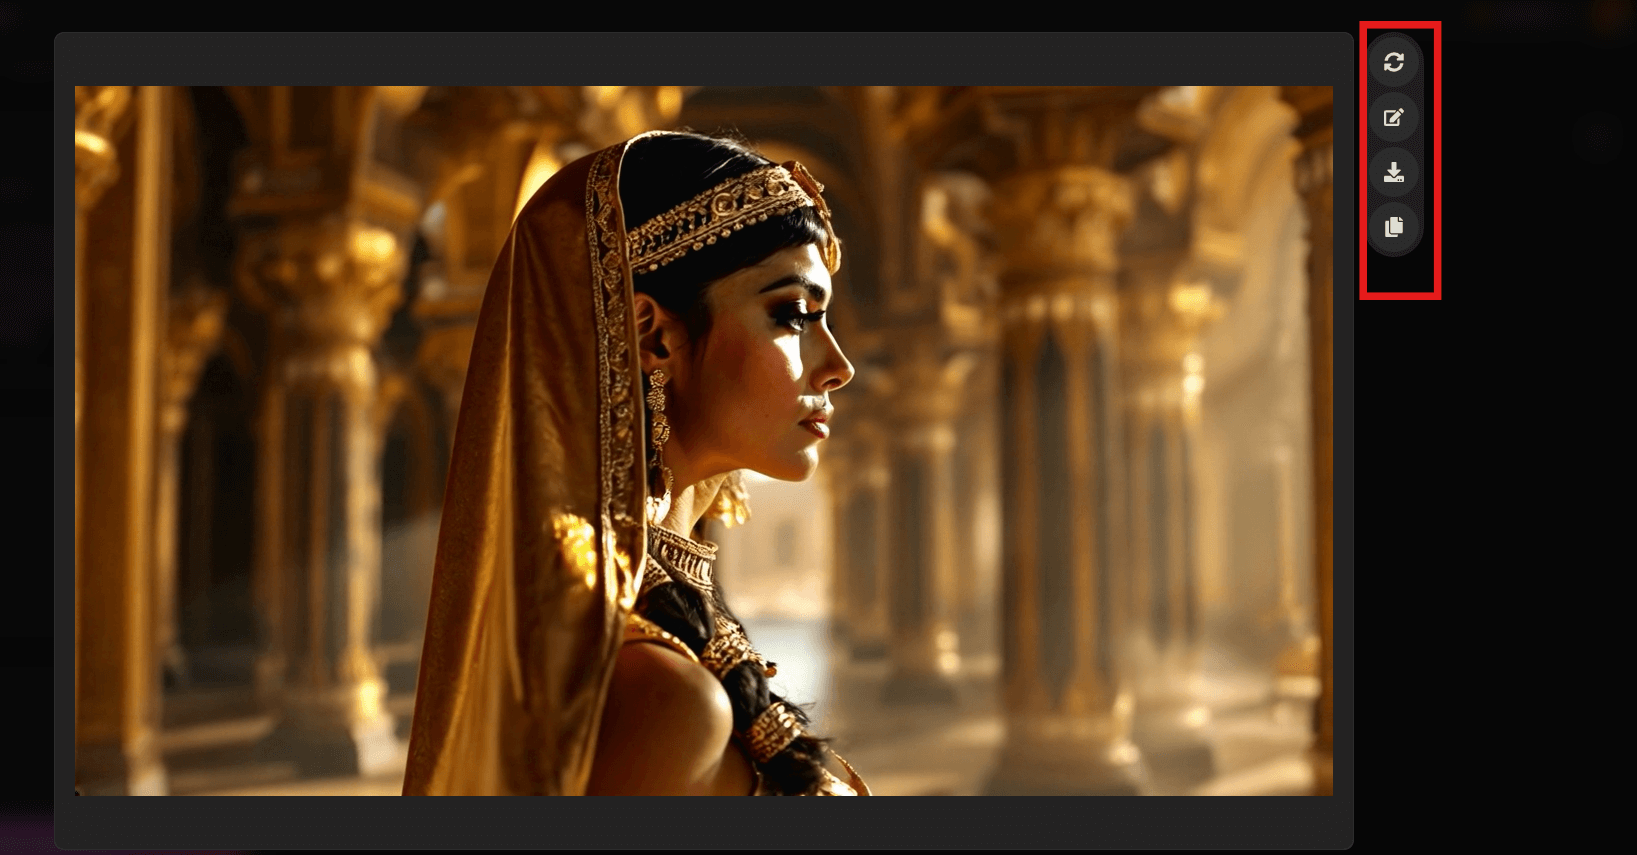
For example, Prompt we used to generate Cleopatra moving video :
“Create a short video from Cleopatra’s image showing slight movements—like her turning slightly, golden fabrics flowing, with warm lighting and gentle background motion like curtains swaying or sunlight shifting.”
After that, choose your aspect ratio based on where you want to use the video (e.g., 9:16 for Instagram Reels or 16:9 for YouTube). You’ll also be asked to select a video duration—pick something short and impactful, usually between 5 to 10 seconds for best results.
Bonus: 11 Next-Level AI Image Generators for Visual Creation
Step 3: (Optional) Select Kling AI Video Model for Advanced Results
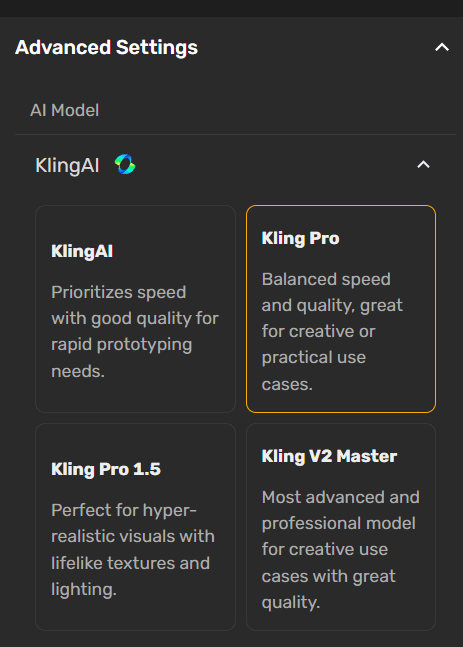
Want to add more realism or dynamic camera motion to your video? You can choose the Kling AI video model setting for a more cinematic output. This step is optional, but ideal if you’re aiming for something beyond simple transitions.
This advanced setting gives the AI more control over how movement, perspective, and scene transitions are handled. It’s optional, but great for creators who want their video to feel more dynamic or cinematic. Once everything is set, hit “Generate” and let the tool do the rest.
Step 4: Review the Generated Video Output
In a few moments, your image will be transformed into a short video clip. You’ll be able to preview it instantly.
Watch the result carefully to see how well your image and prompt came together. Look out for the animation style, object motion, and overall clarity.
If you want to generate different versions of your video from the same prompt, simply click on “Generate Variations” to explore more styles and options.
Step 5: Refine Your Prompt or Image and Regenerate
If the video doesn’t quite match your vision, no worries. You can go back, edit the text prompt, upload a different image, or tweak your aspect ratio and duration.
- 🔁 Generate Variations: Tap to explore alternate video versions based on the same prompt.
- ✏️ Edit: Make changes to your prompt, image, or settings before generating again.
- 📋 Copy Prompt: Quickly copy the text prompt to reuse elsewhere.
Simplified allows multiple revisions, so you can continue refining until you’re satisfied. Once done, you can download the video or use it directly in your Simplified design or content project.
Bonus: 10 Must-Try Stable Diffusion Prompt Generators
Tips for Better Results
1. Write a clear and descriptive prompt
The AI uses your text to understand what to generate, so be as specific as possible. Instead of saying “a woman in nature,” try “a woman in a red dress walking through a misty forest at sunrise.” Include elements like setting, lighting, subject action, colors, and mood to help the AI shape a better scene.
2. Use high-quality, focused images
Your image is the base for the video, so avoid blurry or overly dark visuals. Images with a clear subject, good lighting, and minimal distractions in the background work best. Make sure the subject is centered or composed in a way that fits your intended outcome.
3. Choose the right aspect ratio and duration
Before generating the video, think about where it will be used. For example:
- 9:16 for Instagram Reels or TikTok
- 1:1 for feed posts
- 16:9 for YouTube or web embeds
Also, short videos (5–10 seconds) are easier to generate and tend to be smoother and more suitable for quick consumption.
4. Test and Update your prompt
If the first result isn’t quite right, don’t hesitate to adjust your input. Small changes like adding a lighting style (e.g., “golden hour” or “studio lighting”) or camera detail (e.g., “slow zoom in”) can refine the output. Most AI tools allow multiple attempts with small prompt tweaks.
Final Thoughts
Turning images into videos with AI isn’t just a trend—it’s a practical option for creators who want to do more with less. Kling’s video model gives movement and mood to your visuals without requiring deep video editing knowledge. Whether you’re working on social content, creative samples, or educational clips, it’s a tool worth exploring when you want to bring your ideas to life.


")


