
You’ve probably noticed it too — your social feeds are flooded with eye-catching, short-form videos that look like they were pulled straight out of a dream. From TikTok edits to Instagram Reels and YouTube Shorts, there’s a new wave of content — and much of it isn’t made by hand anymore.
Here’s the secret: a lot of this stuff is powered by AI.
Specifically, we’re seeing the rise of Image-to-Video AI tools — platforms that can take a single image, pair it with a short prompt, and turn it into a full-blown video sequence. You don’t need a video editing background. You don’t even need to be a designer.
In this guide, I’m going to walk you through exactly how this works — from writing the right prompt to picking the best tools and creating your first image-to-video clip.
Whether you’re a content creator trying to keep up with trends, a marketer looking to speed up campaigns, or just someone curious about AI tools — this is for you.
Let’s get started.
What Exactly Is Image to Video AI?
At its core, Image-to-Video AI is a tool that takes a still image and turns it into a moving video clip using a prompt you write. That prompt could describe motion, style, emotion, or even camera angles — and the AI tries to bring it all to life.
How It Works (Quick Overview):
- Input: One static image + a short written prompt
- Output: A short video clip based on your image and prompt
- Powered by: AI models trained to understand both images and natural language
These tools often use things like multimodal transformers or text-to-video diffusion models — that’s the techy part under the hood. You don’t need to understand it deeply to use it, but it helps to know that the AI is combining what it “sees” in the image with what it “reads” in your prompt.
Where People Use It:
- Quick video content for social media (Reels, Shorts, etc.)
- Animating product images for ads
- Visual storytelling (short scenes, characters, mood pieces)
- Creative branding and concept demos
It’s fast, it’s flexible, and it’s catching on fast — especially among creators who want to make more content without adding more production time.
Why Use Image to Video AI?
Let’s be honest — making good videos takes time, money, and usually some editing skills. But image-to-video AI is flipping that script a bit. Here’s why more people are giving it a try:
1. It’s Way Faster
Instead of spending hours editing footage or building out scenes, you just upload an image, type a few words, and hit go. That’s it. Whether you’re building content for social media, ads, or a quick concept test, it shaves hours off the process.
2. Saves You a Lot of Money
You don’t need to bring in a video editor or animator for every short clip anymore. AI tools give you solid results without the price tag of a full production team. If you’re working with a tight budget, this makes a big difference.
3. You Decide the Style
Want something that looks cinematic? Or maybe something animated, dreamlike, or realistic? You can guide the entire mood just through the prompt. It gives you room to experiment and try out different creative directions without starting from scratch each time.
4. No Fancy Tools Needed
This is probably the best part — you don’t need to know After Effects or any design software. These platforms are built so you can just drop in an image, write a few sentences, and let the tool do the rest.
5. It’s Great for Fast-Paced Teams
If you’re part of a marketing or creative team, this can take a lot of pressure off. Need a dozen quick videos for a campaign? Reuse one image and just change the prompt. Done.
AI Tools That Turn Images into Videos Using Prompts
There are now several tools that can help you go from a static image to a moving video — all by just typing a few prompts. Here are a few popular ones worth checking out:
1. Simplified
Simplified AI image to video tool allows users to upload a static image and generate short videos simply by writing a prompt. It supports various video styles, including cinematic, animated, surreal, or realistic scenes. The tool is ideal for creators who need fast results for marketing campaigns, social media content, or concept mockups. It runs directly in your browser—no installation or editing software required.
Notable features:
- Multiple AI model options (like Kling Pro and Google Veo 2)
- Frame-by-frame control for more precise animations
- Custom aspect ratios and video durations
- Good for teams and individuals with limited production resources
2. Runway (Gen-2)
Runway’s Gen-2 is a powerful text-to-video platform that lets users animate still images using natural language prompts. It’s especially suited for creators who want more creative control or are looking to produce concept art, trailers, or cinematic shorts. With its intuitive interface and advanced generative capabilities, Runway remains a top choice among digital artists and filmmakers.
Notable features:
- High-end visual output with cinematic effects
- Timeline-based video editing support
- Custom camera motion and scene transitions
- Frequently used in music videos and creative storytelling
3. Pika Labs
Pika Labs offers a simple yet powerful solution for generating motion from static images. You upload an image, add a text prompt, and Pika creates a short video clip with camera movement or stylistic changes. Its speed and ease of use make it a favorite among social media teams, marketers, and digital creators who need to produce engaging content fast.
Notable features:
- Straightforward UI for beginners
- Camera movement and mood customization
- Ideal for narrative-driven or aesthetic clips
- Suitable for TikToks, Reels, and promo visuals
4. Kaiber
Kaiber is built for creators who want to experiment with visual storytelling, especially in music videos or conceptual projects. You start with a still image, describe the desired motion and style, and Kaiber generates a short, visually-rich animation. It’s popular among artists, musicians, and NFT creators who want their visuals to align with specific themes or audio.
Notable features:
- Supports syncing visuals with music tracks
- Offers stylized outputs like anime, fantasy, and abstract
- Fast preview and export options
- Frequently used for experimental storytelling
5. LeiaPix
LeiaPix focuses on giving still images a sense of movement using depth-based animation. While it doesn’t offer full video generation like the others, it creates smooth camera effects that simulate motion. Think of it as a lightweight tool for adding life to static visuals—great for profile content, visual storytelling, or enhancing presentation material.
Notable features:
- Adds parallax-style motion to photos
- Quick exports for use on social platforms
- No complex prompt needed—works from image depth
- Better suited for subtle animation than full scenes
How to Write a Good Prompt for Image to Video Creation
If your prompt is vague, your video will be too. But the good news? Writing a solid prompt is more about being clear than being clever.
Think of the prompt as giving simple directions to a creative assistant. The more grounded your description, the better the AI can follow it.
Here’s what works:
1. Set the scene clearly
Mention what’s in the frame. Don’t just say “a city” — describe what kind of city, what time of day, and what’s happening.
Example 1:
“A rainy night in Tokyo with neon signs reflecting on wet streets. Pedestrians walk under umbrellas. The camera slowly moves past a ramen shop.”
Example 2: (for storytelling content)
“A foggy morning in old Prague, with trams moving on cobblestone streets. Street lamps flicker. The sky is soft gray, and a man in a long coat walks alone.”
Prompt 3: (for a product background)
“A clean, minimal kitchen with sunlight coming through the window. A glass blender sits on the counter, with fresh fruit beside it. The background is calm and white.”
Why it works: These give the AI clear visuals — location, mood, objects, and lighting.
2. Mention movement or camera direction
Motion is a big part of video. If you want the scene to move, describe how — like zooming, panning, or tracking.
Example 1:
“A beach at sunset. The camera moves from left to right, following a girl running along the shoreline as waves crash behind her.”
Example 2: (for marketing)
“A slow zoom-in on a luxury wristwatch lying on a marble surface. The metal reflects soft light, and a ticking sound fades in subtly.”
Prompt 3: (for cinematic content)
“The camera pans upward from grass to reveal a large medieval castle surrounded by misty hills. Birds fly across the sky as the sun rises.”
Why it works: These guide the motion, not just the subject.
3. Pick a visual style
Tell the AI what kind of look you’re going for — realistic, cartoon, cinematic, pencil sketch, etc.
Example 1:
“A hand-drawn pencil sketch style of a boy flying a kite in a grassy field under a blue sky.”
Example 2: (for explainer content)
“2D flat animation style of a girl sitting at a desk working on a laptop, with icons like messages and checkmarks popping around her.”
Prompt 3: (for aesthetic reels)
“Anime-style scene of cherry blossom petals blowing across a schoolyard in spring. A school building in the background. The wind moves slowly.”
Why it works: The AI can adjust visuals better when it knows the intended style.
4. Use simple language, no fluff
Skip poetic language. Just say what you want to see. Aim for one detailed sentence that paints a clear picture.
Example 1:
“A 3D animated robot walking through a factory, sparks flying in the background, with a side camera angle.”
Prompt 2: (for social media promos)
“3D render of sneakers bouncing on a black stage with flashing neon lights. Camera spins around while music pulses.”
Prompt 3: (for mood-based scenes)
“An old train moves through a snowy forest. Snowflakes fall onto the windows. Inside, a child looks out quietly, wrapped in a blanket.”
Why it works: This creates motion, mood, and meaning — not just an image.
Final Prompt Tip:
Stick to around 20–30 words. If you can read it aloud in 5–7 seconds and still see the full picture in your mind, it’s probably good. Break it into:
- Motion (How should it move?)
- Subject (What’s shown?)
- Action (What’s happening?)
- Style (How does it look?)
How to Create Image to Video AI with Prompts
Step 1: Go to Simplified’s AI Video Generator Tool
Visit the Simplified website and log in. From your dashboard, find the “AI Video Generator” in the tools section.
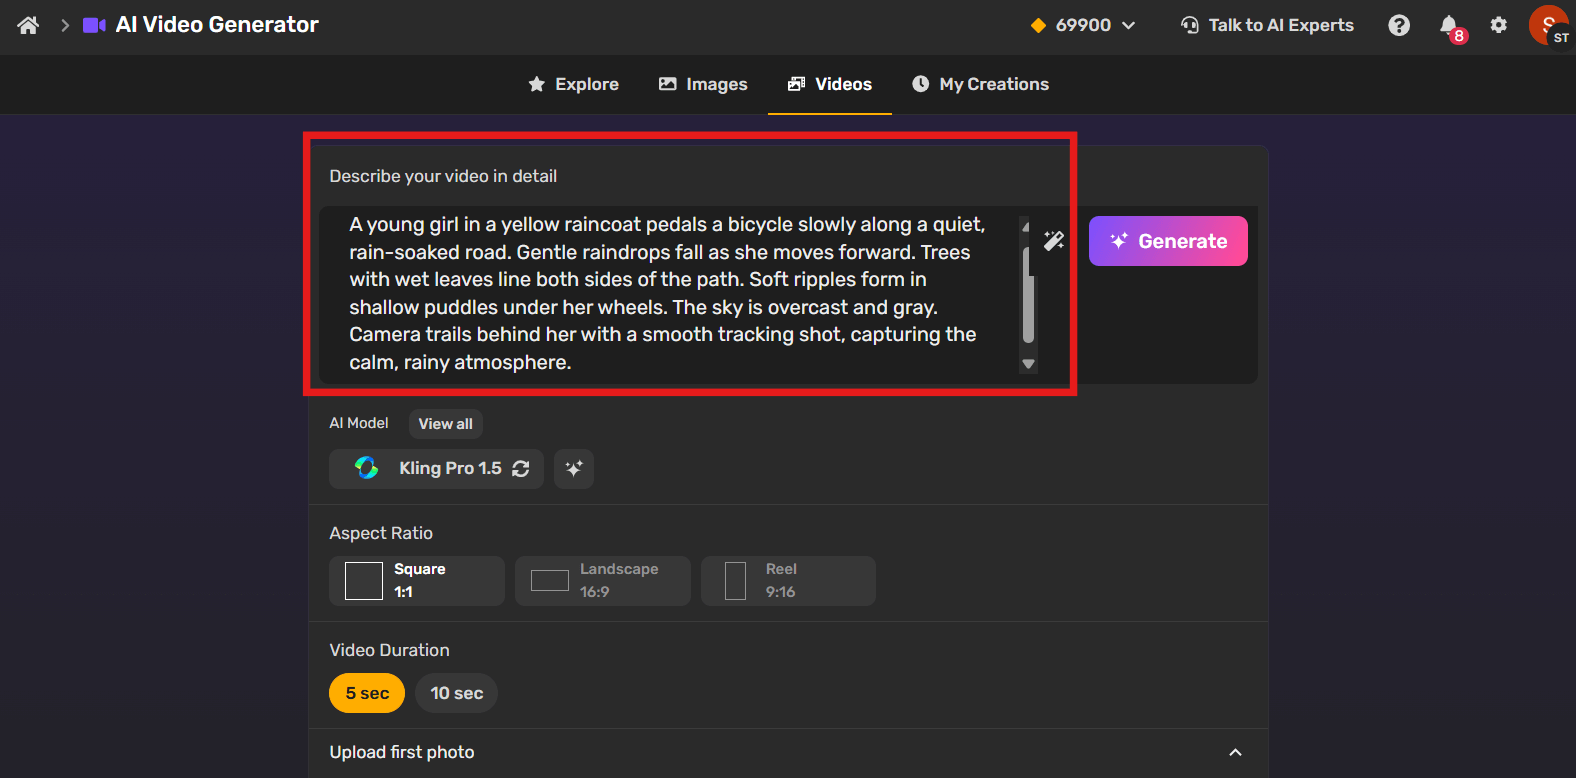
Step 2: Add Your Prompt
Write a clear and descriptive prompt that tells the AI what to animate. I have already provided you excellent tips above, for how to write good prompt for a perfect video creation.
Prompt i used to create the video:
“A young girl in a yellow raincoat pedals a bicycle slowly along a quiet, rain-soaked road. Gentle raindrops fall as she moves forward. Trees with wet leaves line both sides of the path. Soft ripples form in shallow puddles under her wheels. The sky is overcast and gray. Camera trails behind her with a smooth tracking shot, capturing the calm, rainy atmosphere.”
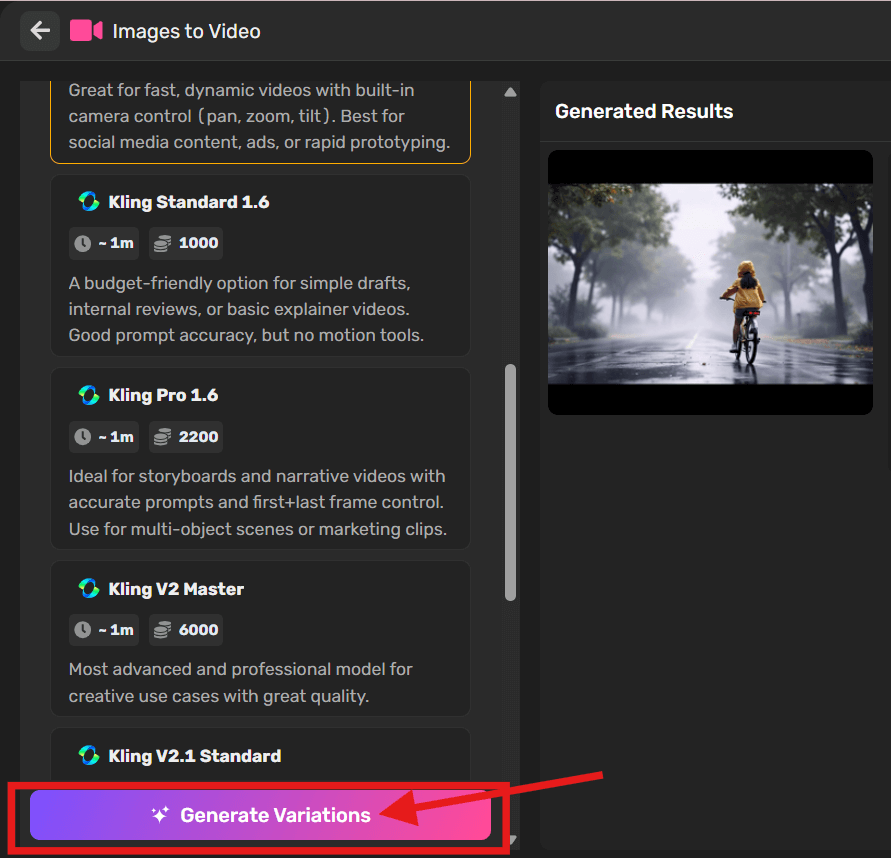
Step 3: Choose AI Model, Aspect Ratio, and Video Duration
Once your prompt is in, pick the AI model that fits your needs. Here’s a breakdown of available Kling and Google Veo 2 options:
1. Kling Models (within Simplified)
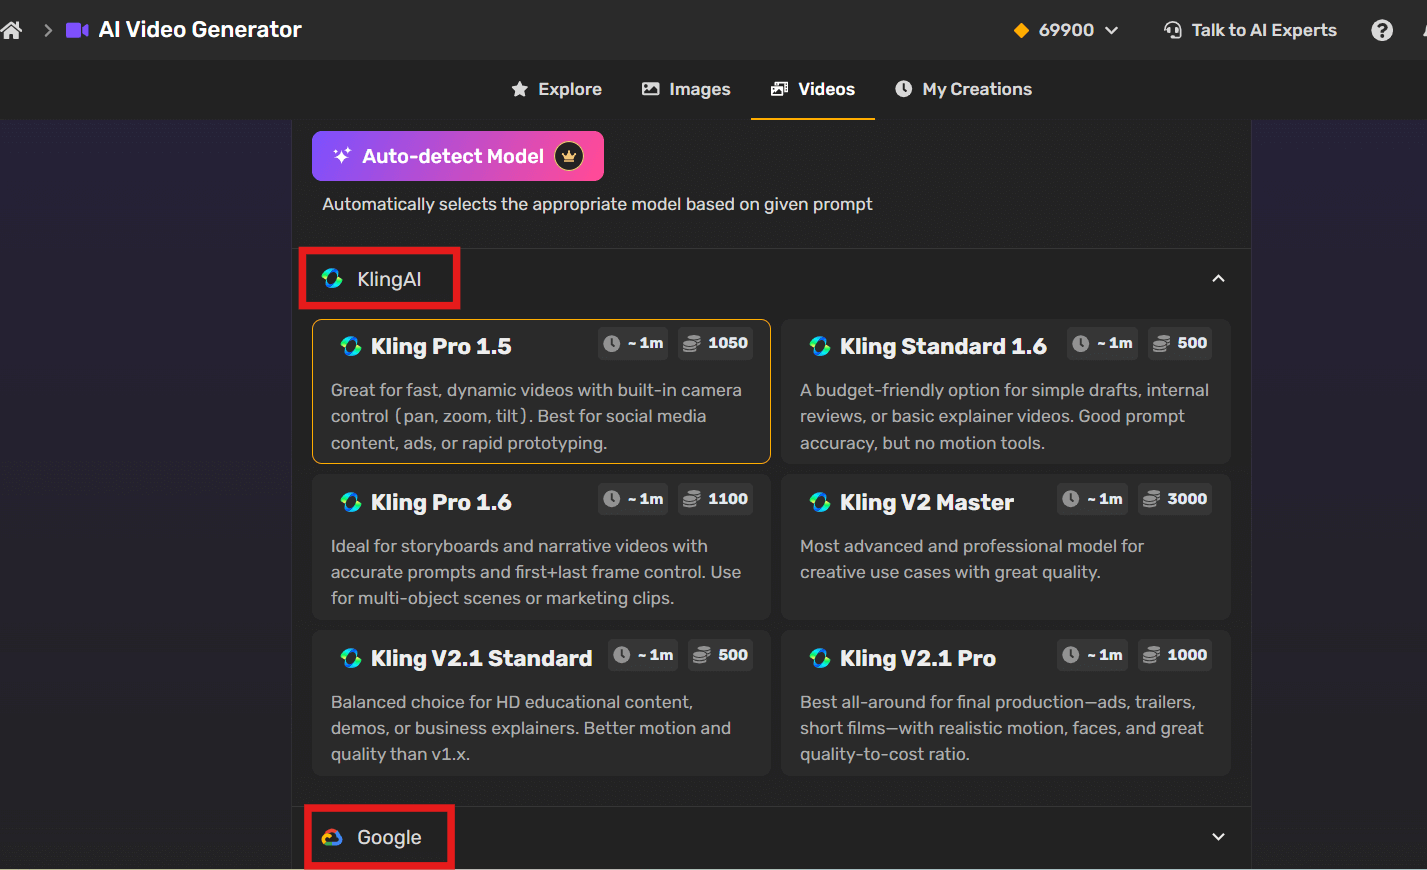
| Model | Video Duration | Credit Use | Best For |
|---|---|---|---|
| Kling Pro 1.5 | ~1 min | 1050 | Dynamic videos with motion (pan, zoom, tilt). Great for ads and social media. |
| Kling Standard 1.6 | ~1 min | 500 | Simple video drafts. Accurate prompts, no motion tools. |
| Kling Pro 1.6 | ~1 min | 1100 | Storyboard-style videos with scene control. Good for marketing or multi-object scenes. |
| Kling V2 Master | ~1 min | 3000 | Advanced, creative output. High quality for professional use. |
| Kling V2.1 Standard | ~1 min | 500 | Balanced quality for explainers, product demos, or tutorials. |
| Kling V2.1 Pro | ~1 min | 1000 | Realistic visuals and motion. Ideal for final productions like trailers or promos. |
2. Google Veo 2 (if enabled on platform)

Aspect Ratio: Choose from Square, Landscape, or Reel
Video Duration options: 5 or 10 seconds
Step 4: Upload Your Image & Click Generate
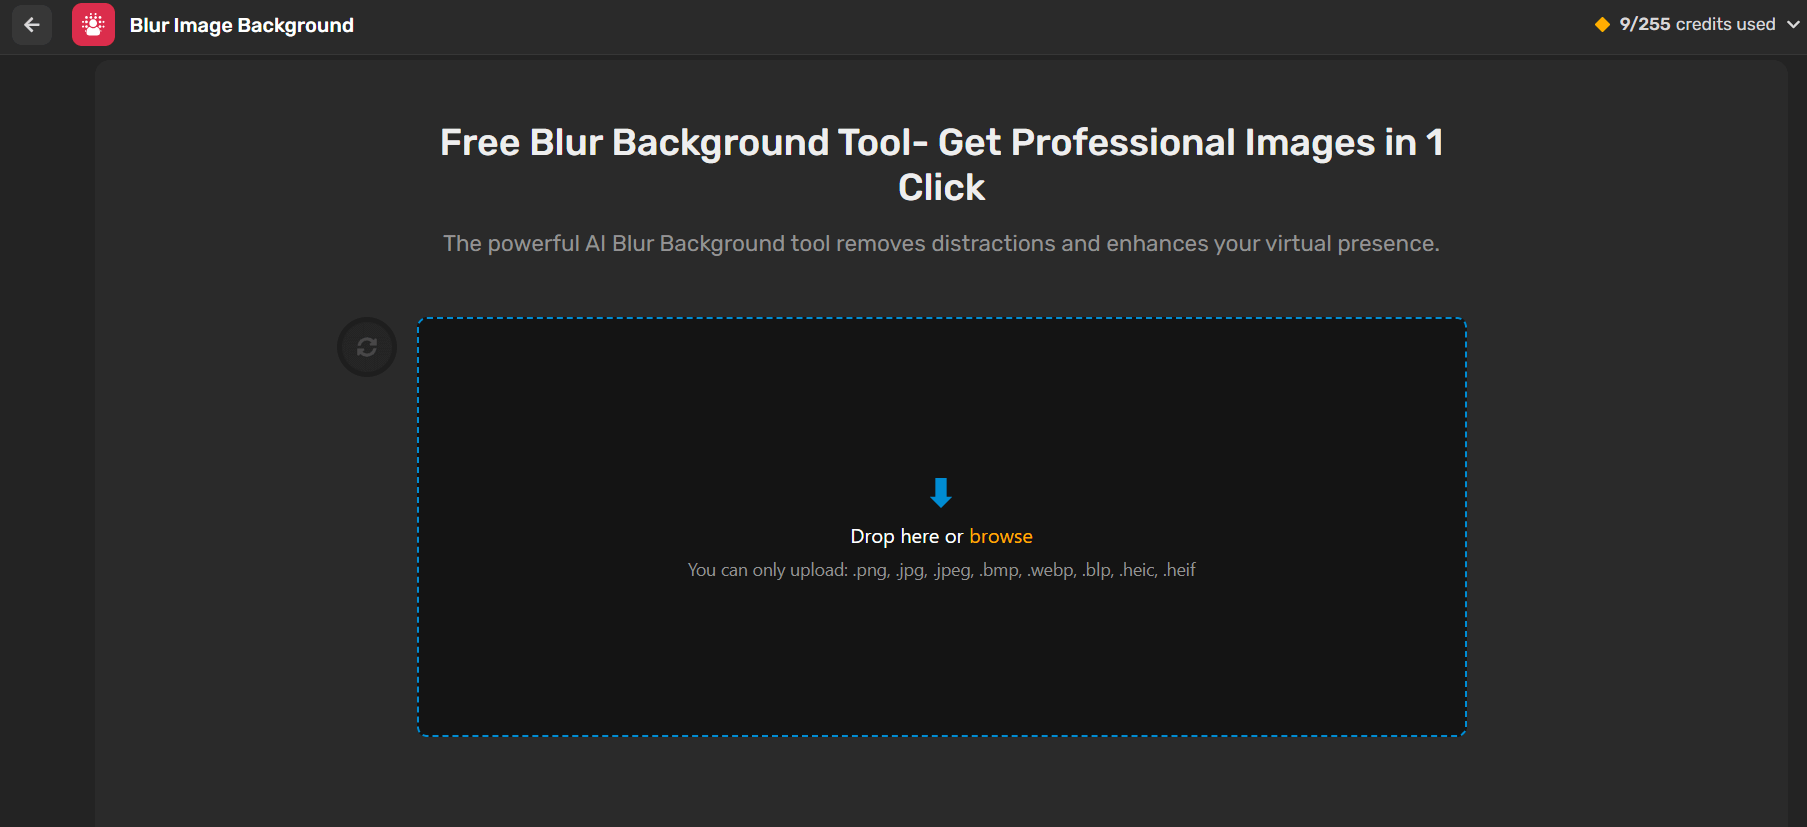
Once your prompt and model are set, upload the image you want the AI to work from.
Image which i used is this:
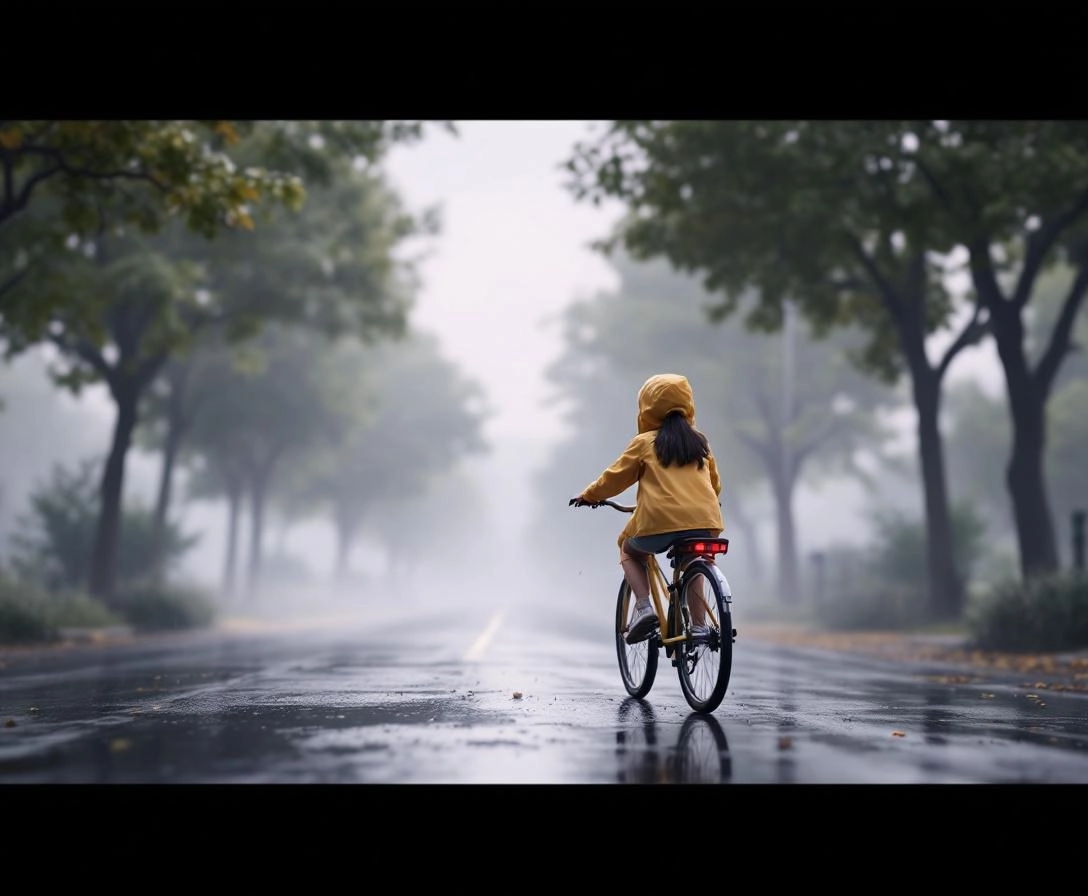
What to keep in mind:
- File Size Limit: Max 10 MB
- Image Quality: Use a clear, high-resolution image
- Subjects: People, objects, or scenery — just make sure the subject is visible
- Backgrounds: Clean or detailed, both can work depending on your prompt
After uploading, just click the “Generate” button.
⏳ Most videos take about 30–90 seconds to generate, depending on the model and server load.
Step 5: Review the Generated Video
Once the video is ready, it’ll appear in your project dashboard or preview panel.
Here’s what to check:
- Motion Accuracy: Did the camera movements (zoom, pan, etc.) match your intent?
- Subject Focus: Is the subject in frame and clear throughout?
- Frame Transitions: Are the beginning and ending frames aligned with your narrative (especially if using Kling Pro 1.6 or V2.1 Pro)?
If something feels off — a jittery transition, the subject looks distorted, or the motion isn’t right — don’t worry.
You can improve it by tweaking your prompt or changing the model.
Step 6: Refine Your Prompt and Generate Multiple Variations
Didn’t get what you expected? Try these quick fixes:
- Add Detail like instead of “Gentle raindrops” you can use “Heavy raindrops“
- Include Motion
- Use Frame Control (for Kling Pro 1.6)
Just update and re-run — small changes can make a big difference or click on “Generate Variations“.
Step 7: Download or Share
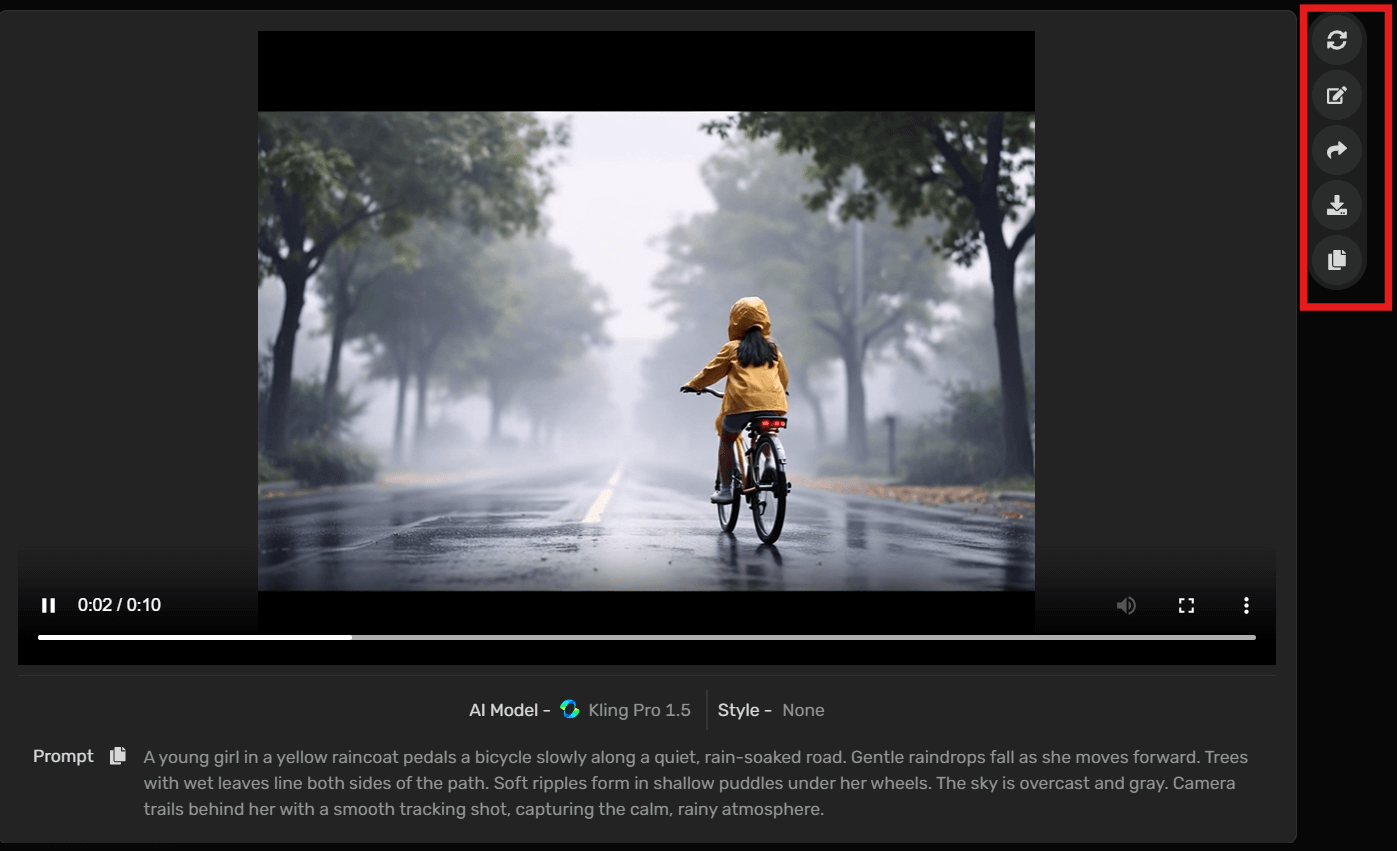
Once you’re happy with the video:
- Click Download to save it to your device
- Or publish on social media directly
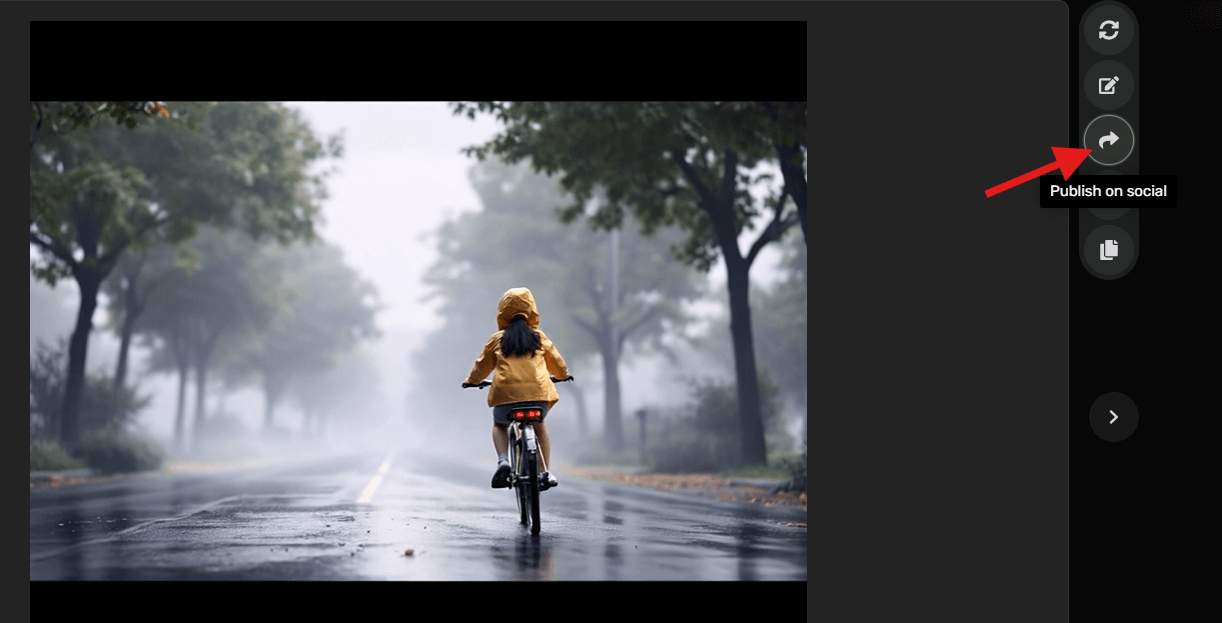
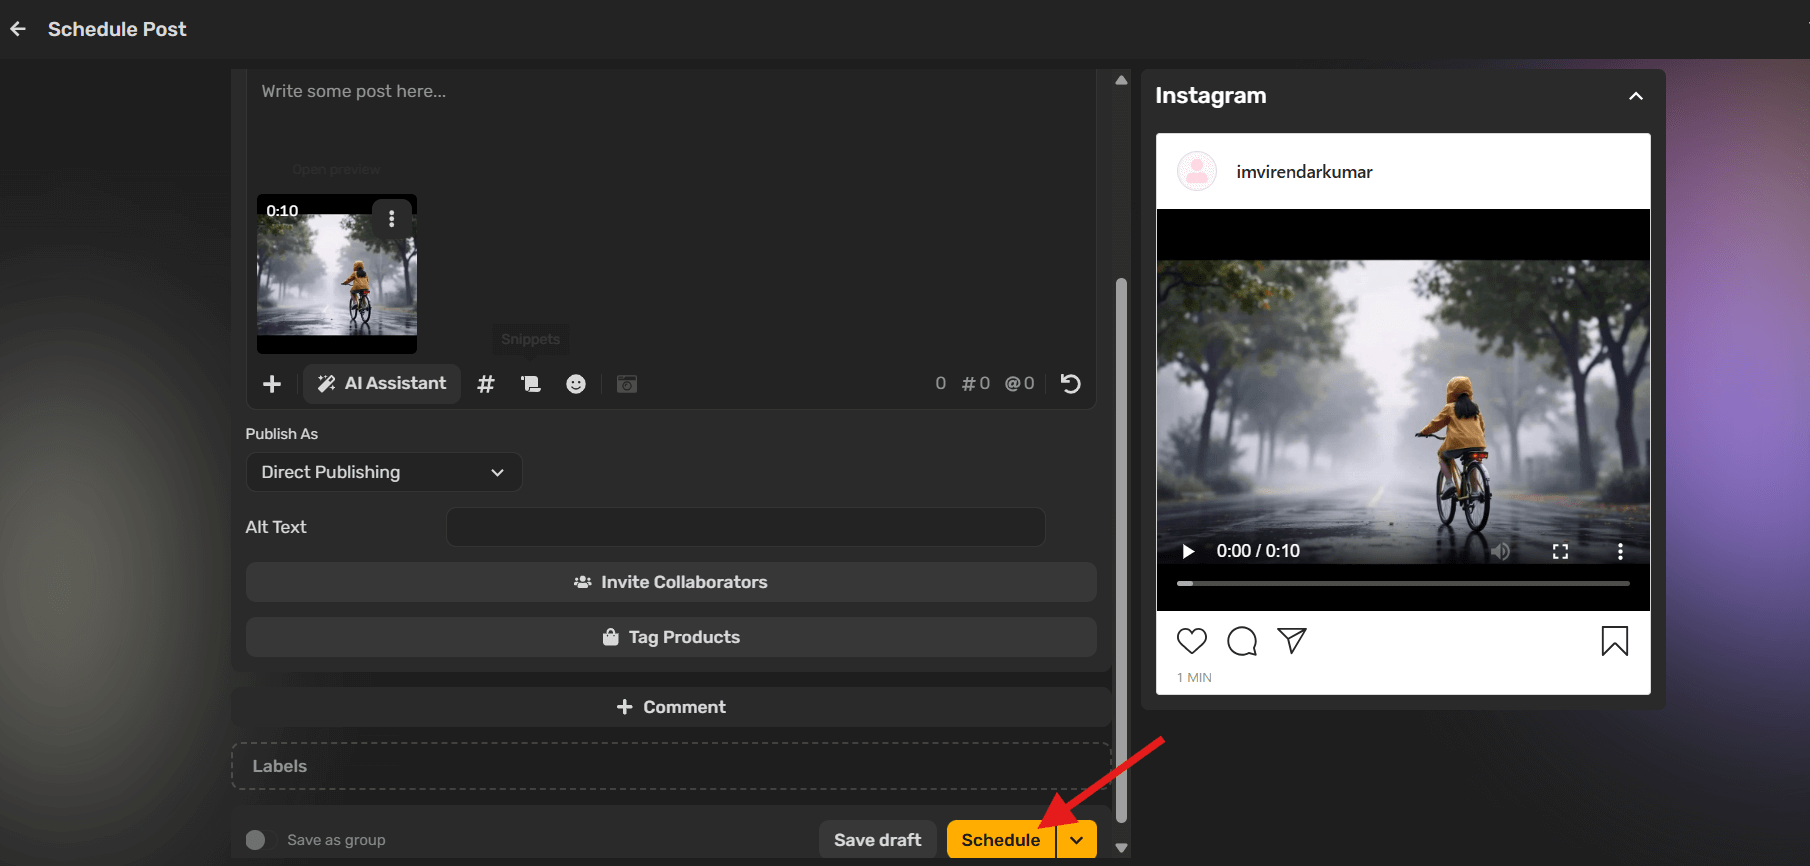
Your AI generated video is now ready to use — no editing required.
How You Can Achieve Better Results in Your Image to Video Creation Process
After you have typed your prompt there are some minor adjustments that can go a long way to what the AI returns. That assists is as follows:
1. Make use of Reference Images
Wherever your platform allows (as Simplified does), match your prompt to an image. This is to ensure the AI is able to match colors, shape, or mood better.
E.g.: Post a picture of a comfortable living room and caption:
To that add flickering fireplace, gentle snow falling outside the window, cozy light.
2. Make Prompts Concentrated
The effort to put everything can rather go wrong. Stay with one thought, or scene.
Weak: A busy city, people walk, cars move, there is a festival, it is like the work of Pixar.
Improved: A Pixar like, street view of food carts at night market. Cosy lights are suspended. There are people queuing to be served with skewers.”
3. Apply Lighting Descriptions
Tone and realism are altered by lighting. Provide such information as:
- “Golden hour sun rays”
- “The cool fluorescent lighting The cool fluorescent lighting”
- “Candlelight glow”
These assist the AI to comprehend tone.
4. Preview and Reword
Make a single run on your prompt, check how it works and then make one piece change.
Example:
Original: Rainy night, cars driving by,: Gray
Bettered: Rainy night Tokyo. Night lights and wet road. A taxi passes slowly by.”
5. Do Not Pile On The Adjectives
An extra detail is not the same as being clearer. Engage in the use of specific nouns and verbs rather than stressing on a list of adjectives.
Rather than: A magical forest- very colorful and beautiful beyond imagination
Attempt: A magical forest of shining mushrooms, vines that are purple and fireflies that fly in the dusk.
The Future of Image to Video AI
You know what’s exciting? Image-to-video AI is just getting started. Right now, you type in a prompt and wait. But soon, you’ll just speak your idea. Yep—voice prompts are on the way, making the whole process feel way more natural and hands-free.
And get this—real-time editing is also coming. Instead of waiting for a video to render just to tweak one part, you’ll be able to adjust it on the fly. It’s going to save so much time. Plus, working with others will get easier too. Imagine co-editing prompts with your team in real time—no back-and-forth files, just smooth collaboration.
Another cool improvement? Frame consistency. If you’ve used these tools, you’ve probably seen objects randomly vanish or change. Future models are getting way better at keeping elements stable across the video. That’s a big deal if you’re working on stories or professional content.
But hey, it’s not all fun and games. There are ethical concerns—deepfakes, misinformation, misuse. As creators, we’ve got to stay responsible. Luckily, AI platforms are already adding safeguards like digital watermarks.
Wrapping Up
Look, good prompt writing really matters. A few well-chosen details can totally change how your video turns out. Don’t stress if you mess it up the first few times—experimenting is part of the process.
If you’re curious where to begin, I’ve put together a simple workflow you can try. You might be surprised how quickly you start creating videos you actually like.


")
")


")


