
While both disciplines, design and content writing, require different skillsets, their marriage makes for stunning media! If you’re reading this, you’re likely an experienced blogger but with little knowledge of design. Or perhaps you want to save time and money on designing and focus on your writing! Either way, you’ve come to the right place. In this guide, we’ll walk you through how to make beautiful graphics for your blog, quickly and easily, with Simplified’s advanced AI software. Let’s begin!
Why Are Blog Graphics Important?
The importance of visual media stretches far beyond aesthetics. You might be an excellent blogger, but if your content isn’t reaching your intended audience, then you’re essentially typing in a void. And we have the numbers to confirm this – blogs with graphics for every 75-100 words have a share rate of 200%!
Why you Shouldn’t Overlook the Importance of Visual Content:
- Visual Content is King: Humans are highly visual creatures; we process images faster than we do text, as fast as 13 milliseconds!
- Give Structure: Blogs with attractive graphics are easier to read and absorb. This is because they break up chunks of text and give your readers some breathing space before moving on.
- Highlight Important Points: When it comes to data, in-post graphics are the way to go. If there’s something you want your readers to see, put it into a mini infographic instead of the main post body. That way, they can get the most important information without having to read through a lot of text.
Related: How To Write A Blog Post Using AI Content Generator
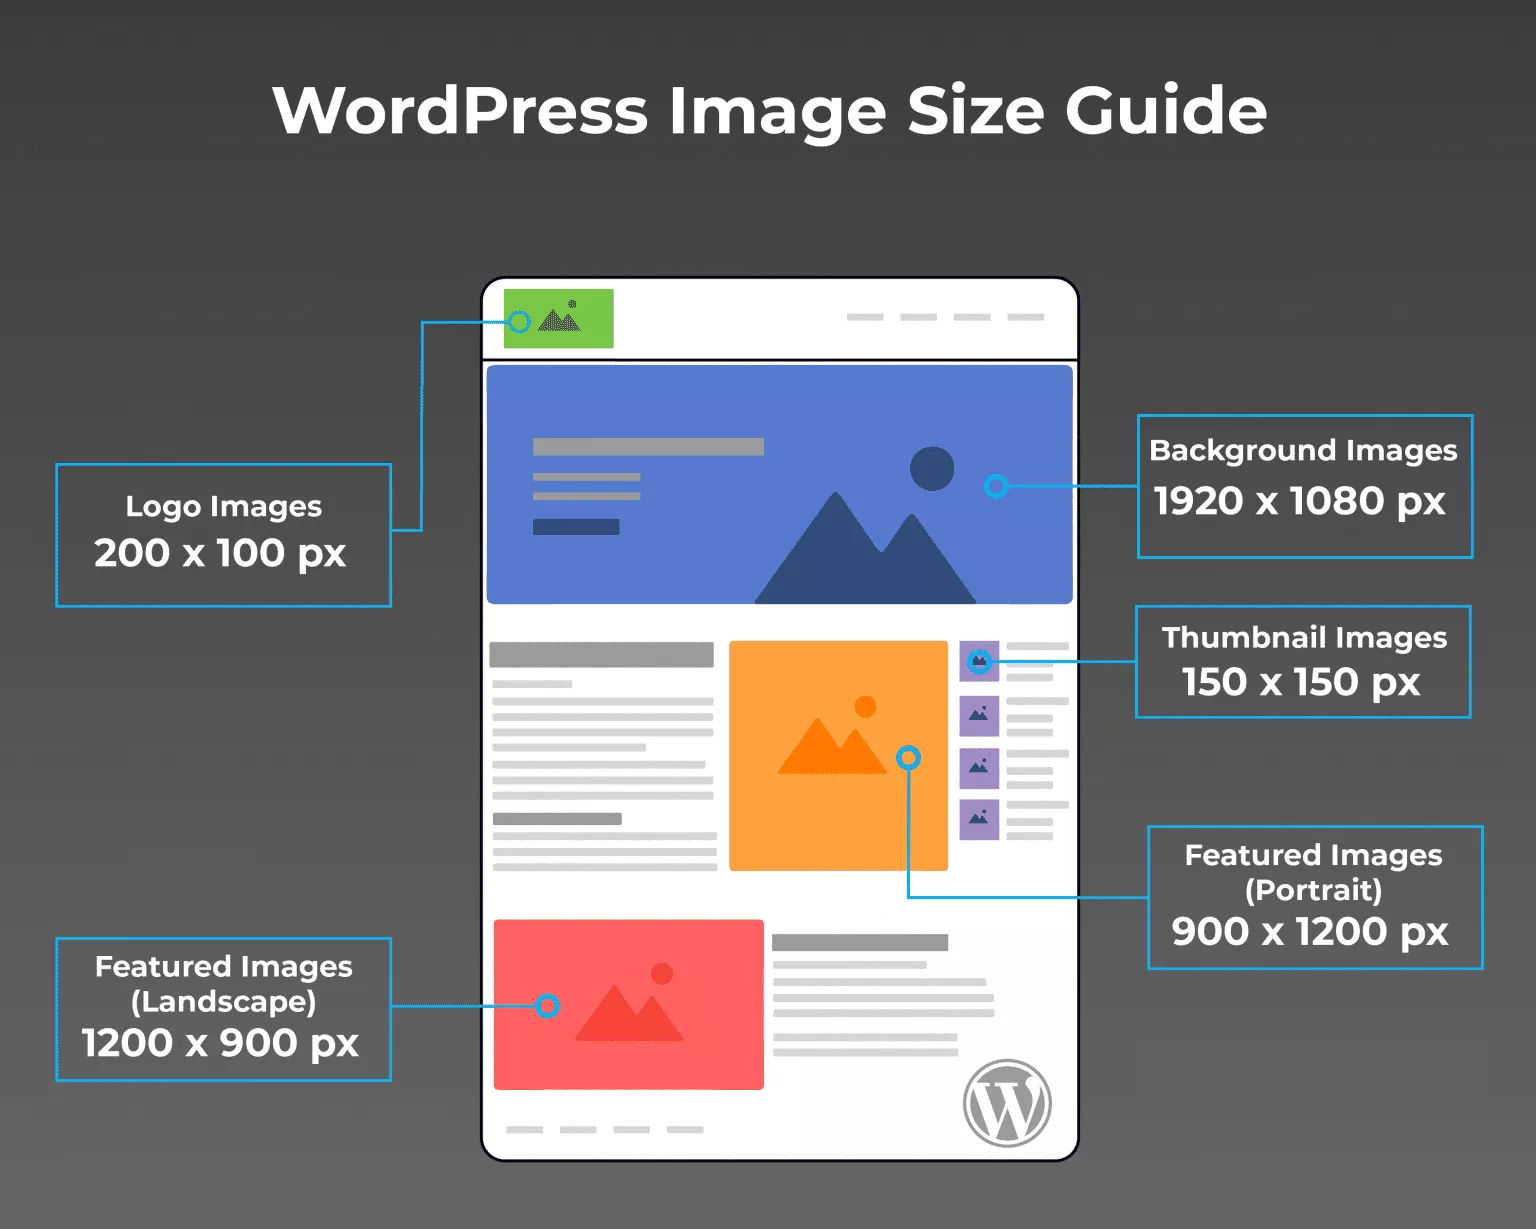
A Short Guide to Blog Graphics Sizes
Whichever platform you prefer for blogging, they likely all have different requirements for blog graphics sizes. For example, WordPress’s image sizes are as follows:
3 Tips For Optimizing Graphics for Your Blog
- Size the blog graphics only as large as your blog content width. For instance, if your blog content is 700 pixels wide, a larger blog graphic size isn’t necessary since it’ll be shrunk.
- Experiment with different JPEG or PNG qualities to see what works best for you. We recommend saving the images to your local drive somewhere around the 80% quality mark.
- Resizing your graphics can affect their quality, so be sure not to make them too small before uploading them to your blog. If you need to enlarge them, the results will be pixelated and blurry.
How to Create Graphics for Your Blog + Free AI Tool!
Even if you’ve never played around with a design software before, Simplified’s AI will make designing blog graphics as easy as pie!
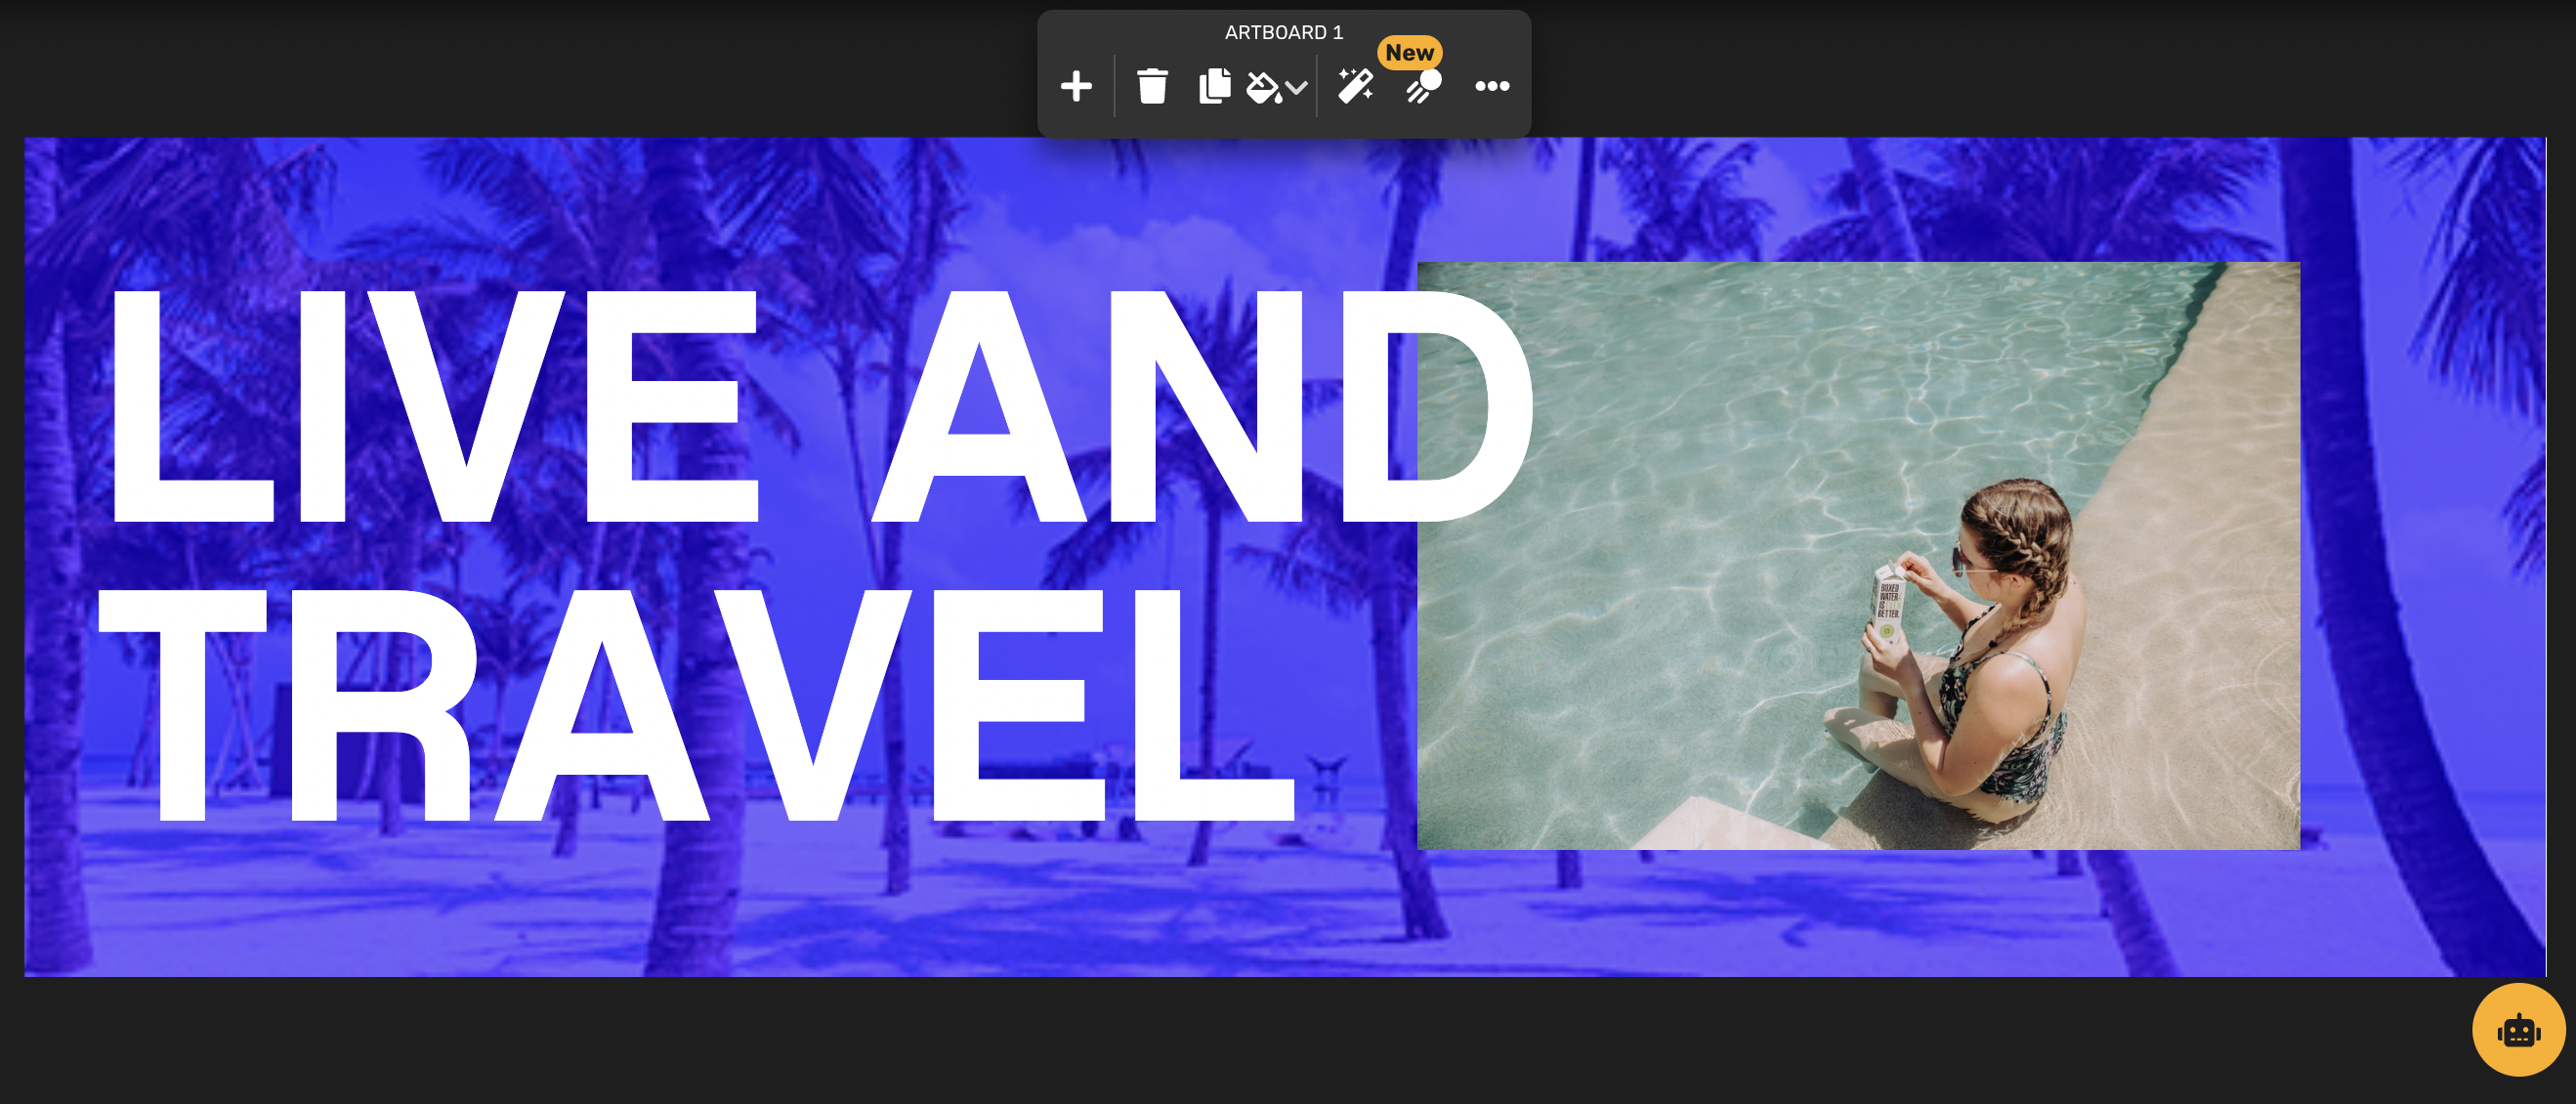
Customized Header Images
The header image for your blogs should be clean, simple, and bold. Basically, you want to offer your audience a glimpse into your content without giving too much away.
You can create a similar stunning graphic for your blog by keeping these design tips in mind:
- First, pick a dominant color for your background if you’re not using an image. In the example above, it’s yellow.
- Make clever use of illustrations available to you from the Simplified Library to add a little whimsy to your design.
- Choose 2-3 brand fonts to use consistently across all of your blog graphics. This will help you to build a solid brand identity and over time, your audience will know it’s you!
- Make sure that the text isn’t too big that it crowds other graphical elements or too small that it’s unreadable.
If you want to create well-balanced and symmetrical designs that are visually attractive, read our guide on the golden ratio!
Creating header images for your blog on Simplified: First, log into your Simplified account and select Design Templates as below, or you can start from scratch!
Next, from the different tabs of templates, choose “Covers & Headers”. Alternatively, click the yellow “Custom Size” button from the right-hand corner if you’ve figured out your blog graphics sizes.

Here’s a blog graphic example for your header image generated on Simplified:
Related: 7 Easy Ways to Create Accessible Graphic Design
In-Post Graphics
Not every type of content is suited for visualization. Say, if you’re writing a personal essay, then you can’t condense the story into an image. When creating in-post graphics, stick to the following kinds of content:
- Data that is easily chartable, such as statistics that can be made into a pie-chart.
- Quotes
- Key highlights, for example, the best books to read in April.
- Important one-liners or other information that you don’t want your audience to overlook.
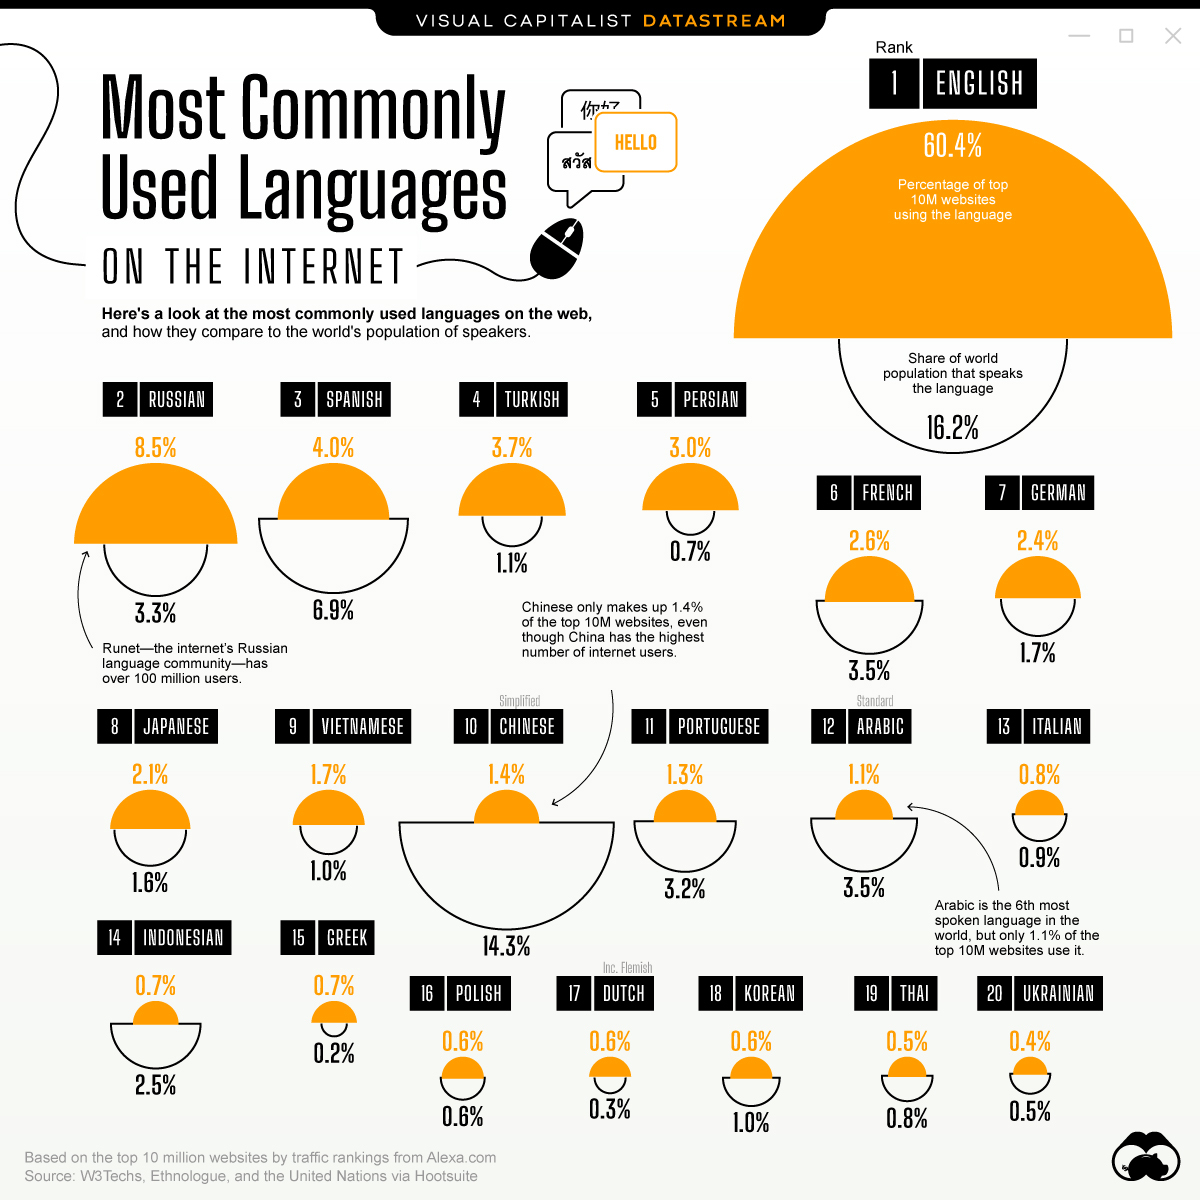
For example, take a look below at this beautiful graphic that incorporates the most used languages on the internet instead of listing them out in plain text:
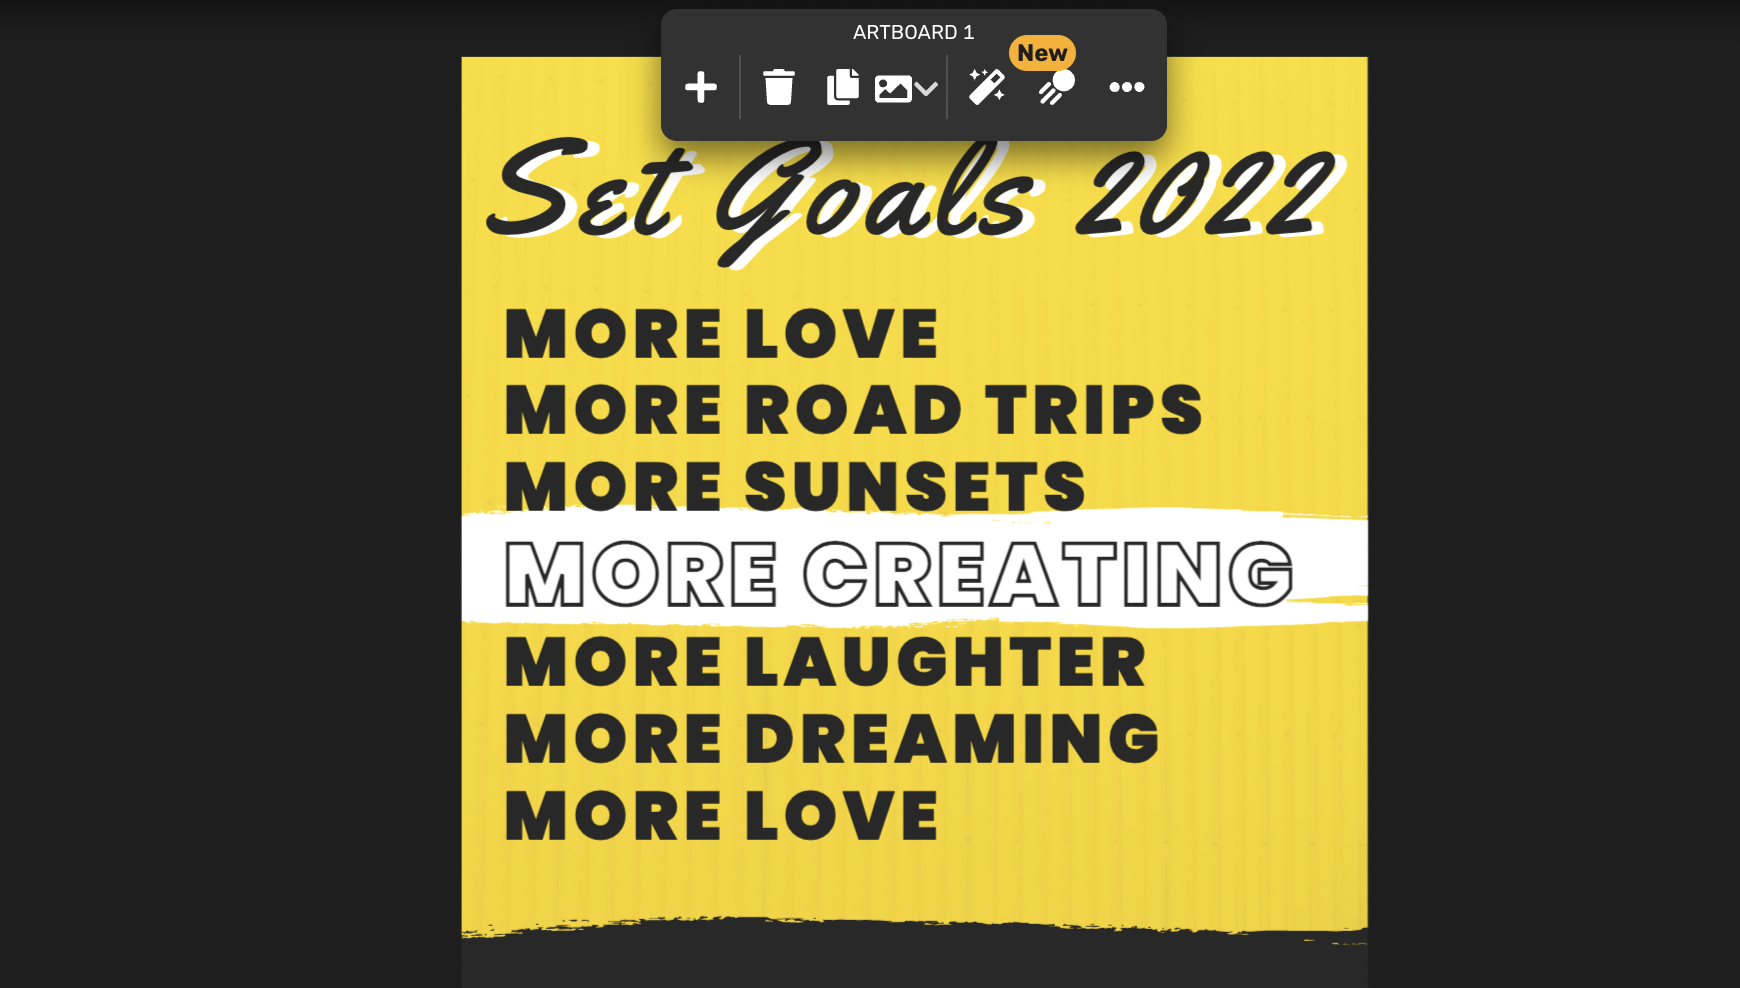
Simplified’s advanced AI design software can help you make your in-post graphics readable and stunning. You can choose from existing templates or create your own magic! Here’s an example:
Related: 15 Tips On How To Create Catchy & Clickable Blog Titles (Free AI-tool Included)
In Sum: Graphics For your Blog
When you’re designing blog graphics, it’s important to size your designs to the optimized dimensions of the platform you’re using. The importance of visual content reveals itself in higher readability and increased engagement! Don’t be shy to mix and match different element to create your signature style that is unique to your identity.
Get started with Simplified today and become a part of the future of graphic design!


![10 Best AI Image Restoration Tools to Try in 2025 [Free & Paid]](https://siteimages.simplified.com/blog/Best-AI-Image-Restoration-Tools-01.png?auto=compress&fit=crop&fm=png&h=400&w=400 "10 Best AI Image Restoration Tools to Try in 2025 [Free & Paid]")
![How to Use Photoshop AI Generative Fill Feature [2025]](https://siteimages.simplified.com/blog/How-to-Use-Photoshop-AI-Generative-Fill-01-1.png?auto=compress&fit=crop&fm=png&h=400&w=400 "How to Use Photoshop AI Generative Fill Feature [2025]")
![20 Podcast Thumbnail Ideas to Boost Your Show’s Visual Appeal + Best Practices [2025]](https://siteimages.simplified.com/blog/Podcast-Thumbnail-Ideas-to-Boost-Your-Show-02-1.png?auto=compress&fit=crop&fm=png&h=400&w=400 "20 Podcast Thumbnail Ideas to Boost Your Show’s Visual Appeal + Best Practices [2025]")


