Did you know that the average person remembers 80% of what they see but only 20% of what they read? This makes visuals a powerful tool for storytelling. But what if you could take your images to the next level and turn them into captivating videos? Thanks to advancements in artificial intelligence (AI), transforming static photos into dynamic videos has never been easier.
Whether you’re a content creator, marketer, or someone looking to experiment with AI technology, this step-by-step guide will show you how to use AI to create videos from images. With just a few clicks, you can bring your photos to life, adding motion, music, and creativity to your visual projects. Ready to get started? Let’s dive into the process.
How AI Create Video From Image: Step-by-Step Guide
Step 1: Get Access to AI Image to Video Tool
Start by heading to the Simplified website. If you haven’t used it before, you’ll need to sign up for a free account. Already registered? Just sign in.
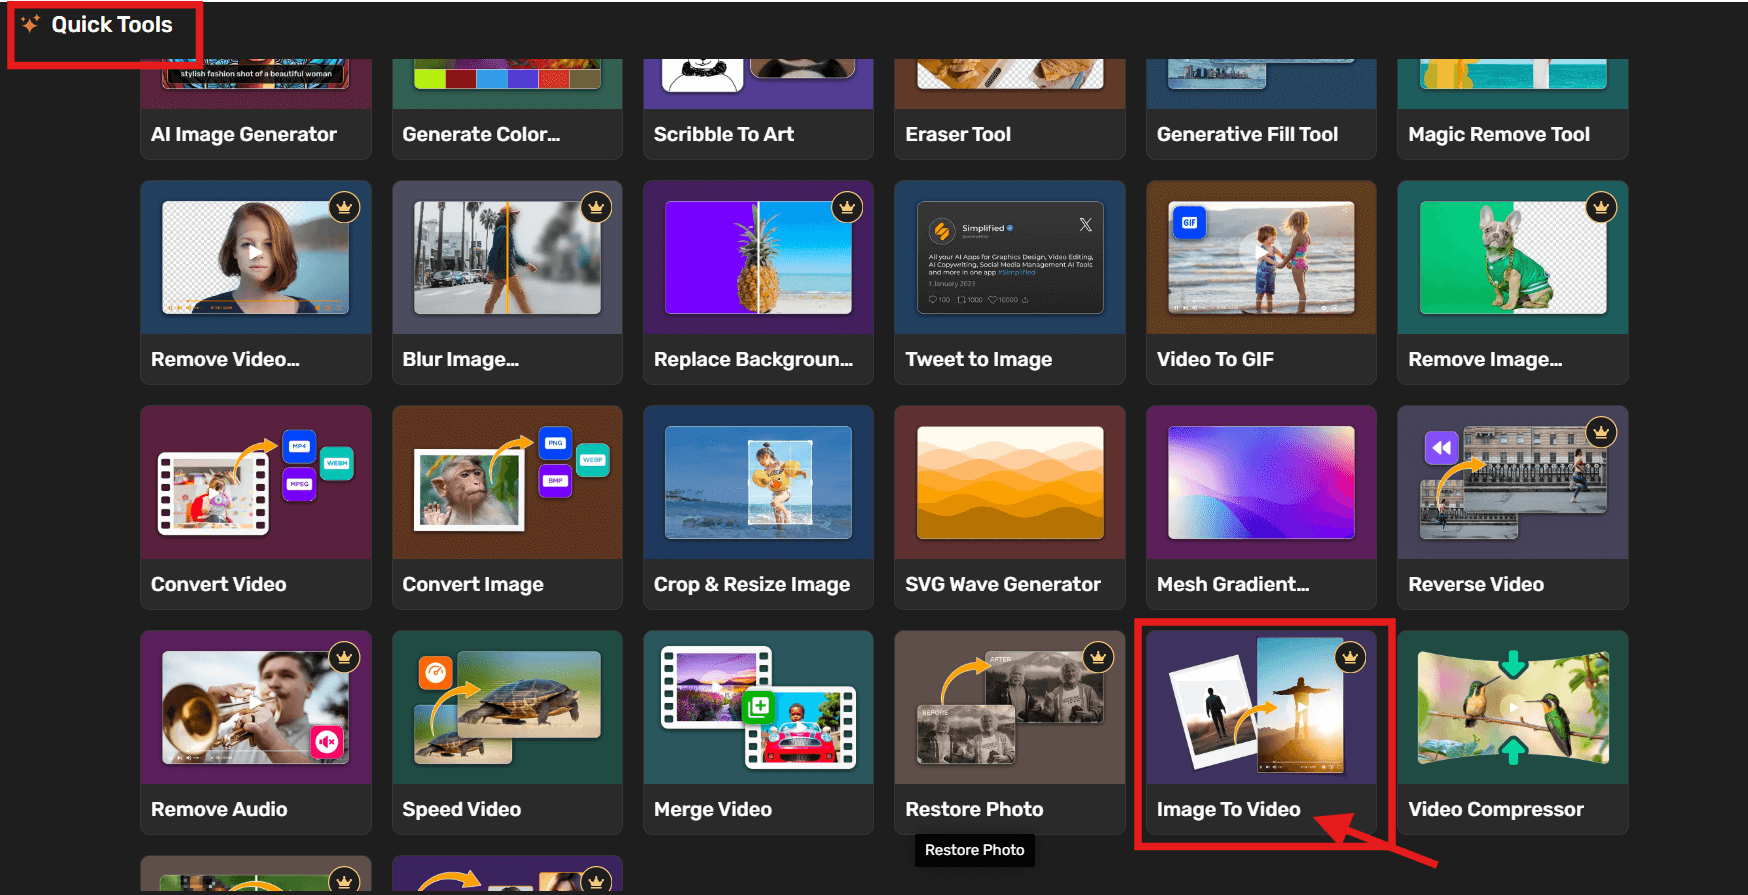
Once you’re in, Select “Graphic Design” or go to the “Quick Tools” section. This is where you’ll find various AI tools. Click on “Image to Video” to begin your project.
Bonus: How AI Content Tools Help Marketers Scale Content Creation
Step 2: Upload Your Image, Add a Prompt, and Adjust Video Preferences
Choose the image you want to animate and upload it under the Upload First Frame area. Most AI tools support a variety of formats, including .png, .jpg, .jpeg, .bmp, or .webp:
Tips for Uploading Images:
- Ensure the images are of high quality to avoid pixelation in the final video.
- Organize your images in the desired sequence before uploading.
- Double-check the formats supported by the platform to ensure compatibility.
Once you’ve selected your images, upload them into the tool. The upload process is usually quick, depending on the size of the image.
In the prompt box provided, enter a short description explaining how you’d like the image to move or what kind of scene it should represent.
Video Prompt we used:
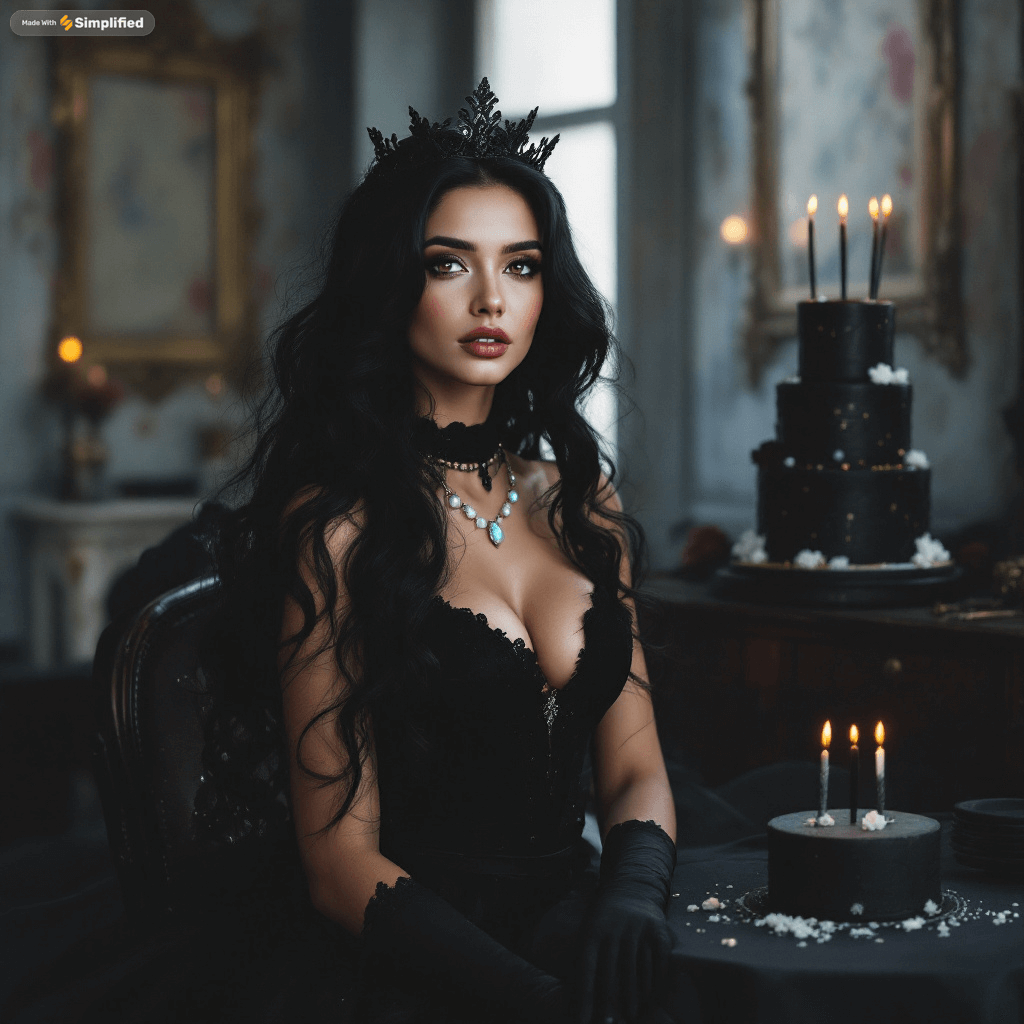
A beautiful girl with long wavy black hair, wearing a black crown, elegant black dress, big black gloves, and an opal necklace sits beside a three-tiered black birthday cake in a vintage room. She slowly stands up from her chair and gracefully walks toward a large antique window as soft light streams in. The camera follows her with a smooth side pan, capturing the movement of her dress, subtle lighting on her face, and the intricate vintage decor. The atmosphere is moody and elegant, with gentle shadows, ambient dust, and rich textures.
Next, choose the aspect ratio that best suits your platform—1:1, 9:16 works well for Instagram Reels, while 16:9 is more suitable for YouTube. You’ll also need to select the length of your video. Short clips—around 5 to 10 seconds—tend to work best.
Step 3: Preview the Video Clip
Once processed, you’ll get a preview of your animated video. Take a moment to watch it and see how closely it reflects your input.
Pay attention to how objects move, the style of animation, and the clarity of the visuals.
If you’re interested in exploring more versions based on the same input, use the “Generate Variations” option to see alternative results.
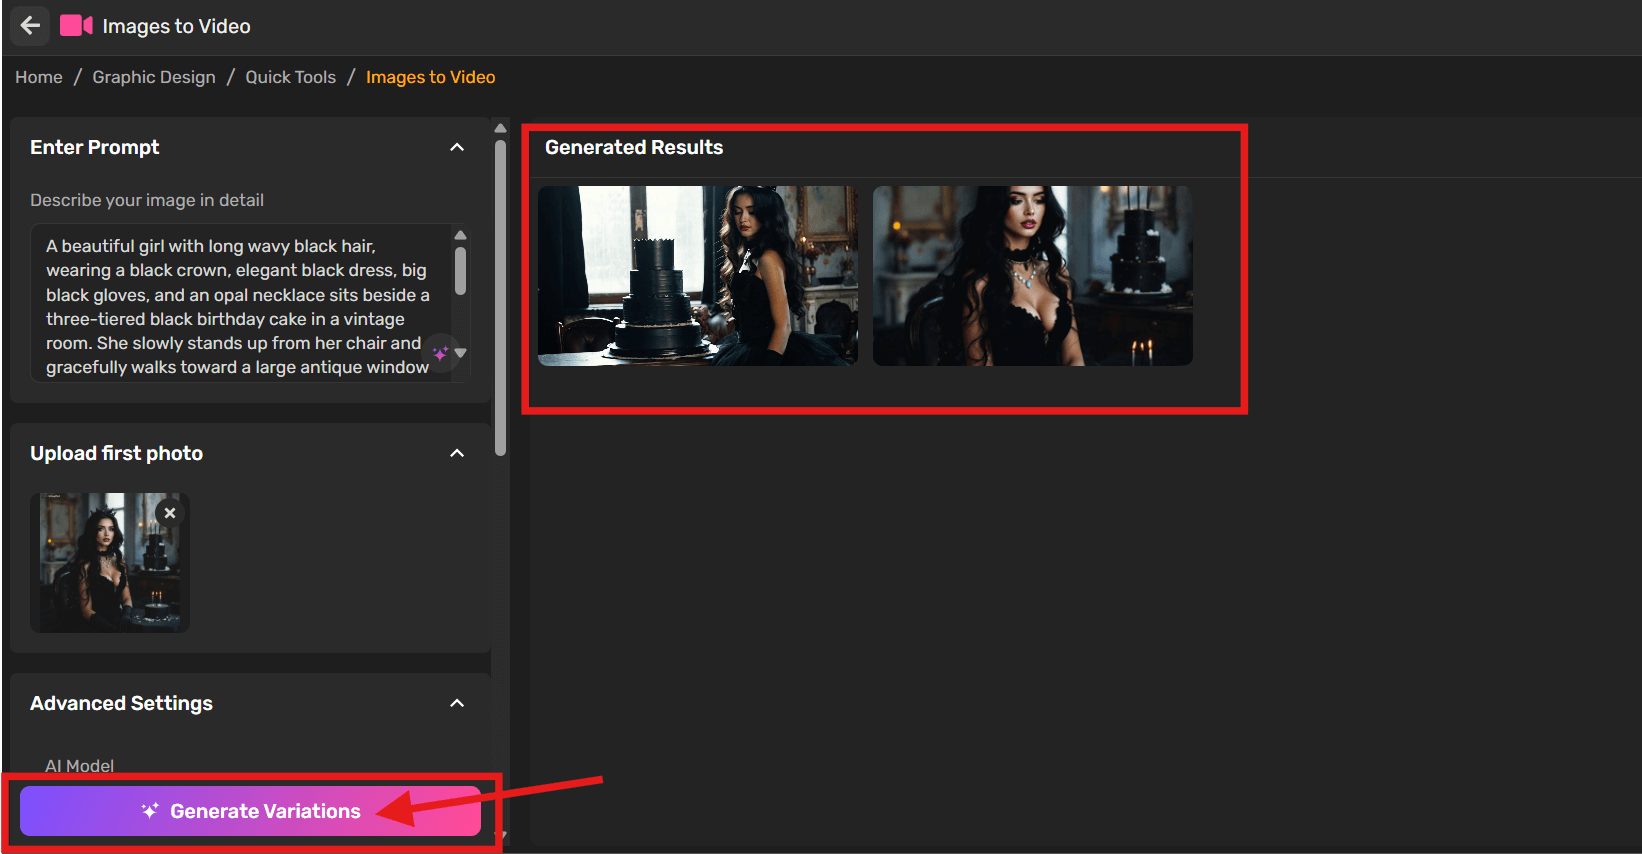
Step 4: Edit the Prompt, if Necessary
Not happy with how it turned out? You can update the prompt, upload another image, or change the video settings.
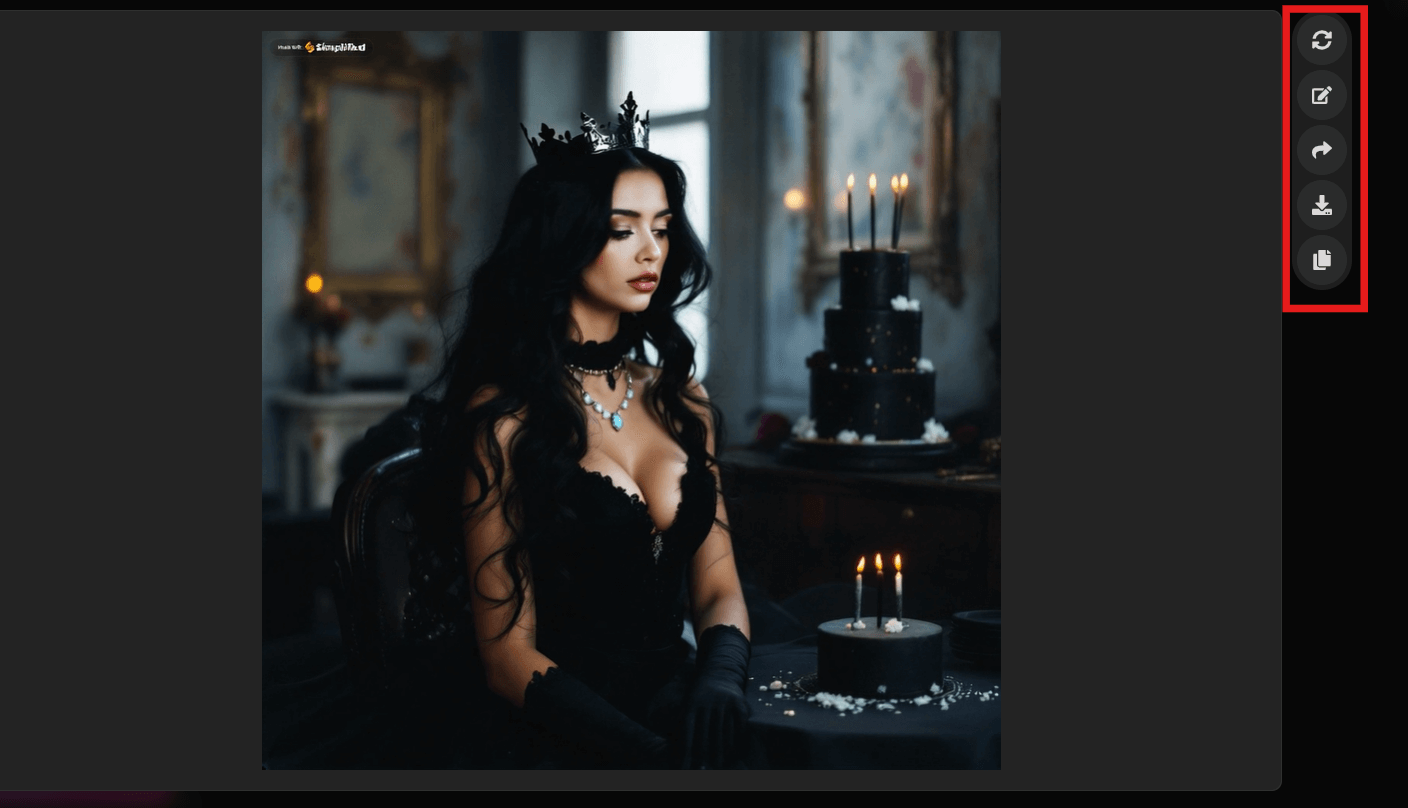
- Generate Variations – Try out other visual variations using the same text prompt.
- Edit – Go back and fine-tune the prompt, image, or settings.
- Copy Prompt – Use this option to reuse your text elsewhere if needed.
You can go through as many revisions as you like until the final result fits your expectations. When you’re done, download the video or integrate it into your existing design or project within Simplified.
Bonus: 20 Best AI Video Editors for Professional-Quality Editing [Free & Paid]
Additional Enhancements to Consider
While the above steps will give you a basic video, you can take it a step further with these optional enhancements:
1. Add Smooth Transitions: Incorporate transitions like fades or slides to make your video look polished and professional.
2. Include Captions and Text Overlays: Adding text can help convey key messages, titles, or descriptions to complement your visuals.
3. Use Background Music: A well-chosen soundtrack can elevate your video’s impact. Many AI tools offer a library of royalty-free music to match different moods and styles.
4. Experiment with Animations: Give your static images a touch of motion with animations like zoom-ins, rotations, or other dynamic effects.
Why Choose AI for Video Creation?
AI has revolutionized video creation by making it faster, easier, and more accessible. Here’s why you should consider using it:
- Saves Time: AI automates many processes, reducing manual effort.
- Professional Results: The output is sleek, visually appealing, and ready to share.
- Beginner-Friendly: No advanced skills are needed—AI tools guide you every step of the way.
- Creative Freedom: Experiment with effects, music, and transitions to create videos that suit your style.
Bonus: How to Sharpen And Restore an Old Photo: Easy Steps And Tools
Best Practices for AI Image to Video Conversion
To get the best results, keep these tips in mind:
- Use High-Resolution Images
High-quality visuals ensure your video looks sharp and professional. - Tell a Story
Arrange your images to create a narrative or communicate a clear message. - Optimize Video Length
Keep your videos short and impactful, especially for social media. - Preview and Edit
Review your video before finalizing it to make necessary adjustments.
Conclusion
Creating videos from images using AI is a game-changer for content creation. By following this step-by-step guide, you can easily transform your static photos into dynamic, engaging videos suitable for personal or professional use.
Whether you’re crafting a social media post, a marketing campaign, or a personal project, AI tools make the process straightforward and enjoyable. Ready to give it a try? Start exploring AI image-to-video tools today and see your photos come to life!

