
Design is a personal process, and each element within your design reflects your brand’s identity and who you are trying to reach! When using media like photographs and images in your designs, it is important to make every element your own. This may include having to crop images to suit your marketing collateral better! We’ve made this simple for you – crop and clip away!
What Is Cropping?
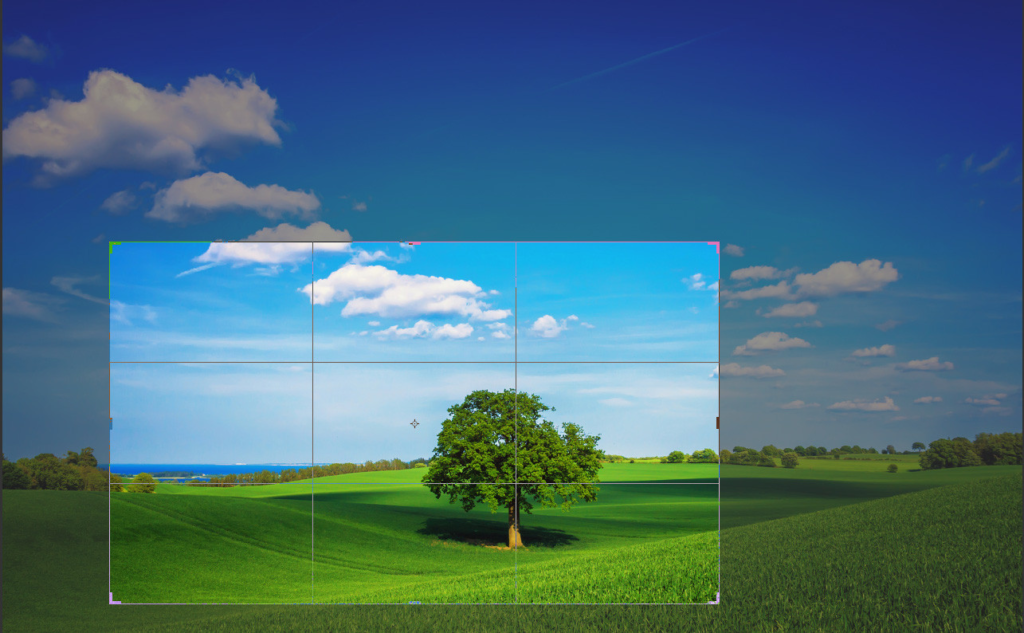
Cropping is a design tool used to resize and focus images to best fit your designs.
How is the ‘crop images’ feature helpful?
- Focus: Have you ever had to remove pesky white borders on an image you download from another website? Those borders are called negative space. Cropping the image will highlight the focal point of your media and bring attention to the composition.
- Resize: When you crop an image using Simplified, the file size of the image also reduces! Not every image can be used in its original dimensions or file size. Cropping makes sure that your images fit well with the rest of your design.
- Alter Composition: Let’s say that you want to use an image in your design that is currently optimized for another platform, such as background wallpaper on your laptop, like a picture of a flower or some trees. With the cropping feature, all you have to do is decide which element needs to be in the forefront and cut out the rest of the negative space!
Let’s Get Cropping on Simplified!
Follow these 4 simple steps to successfully crop images on your artboard:
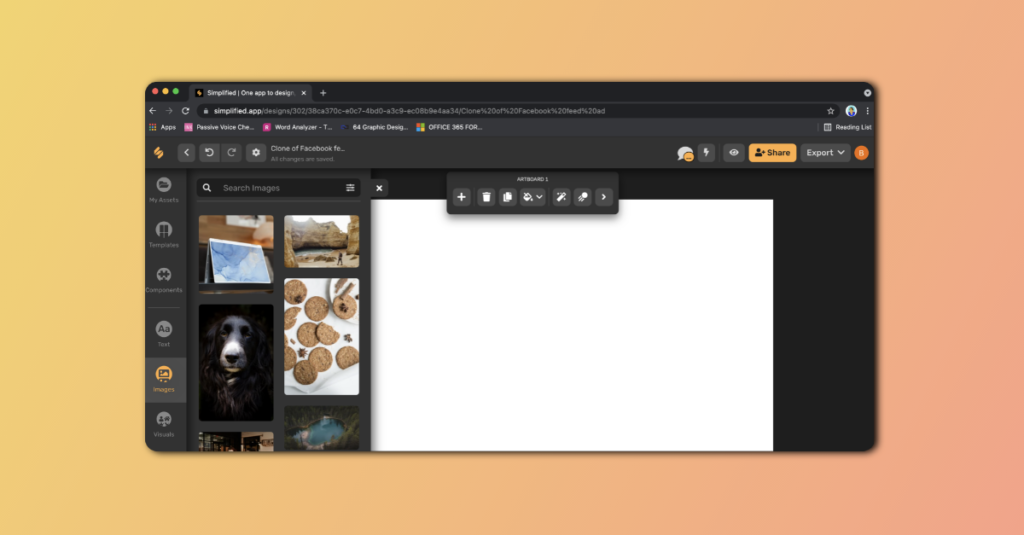
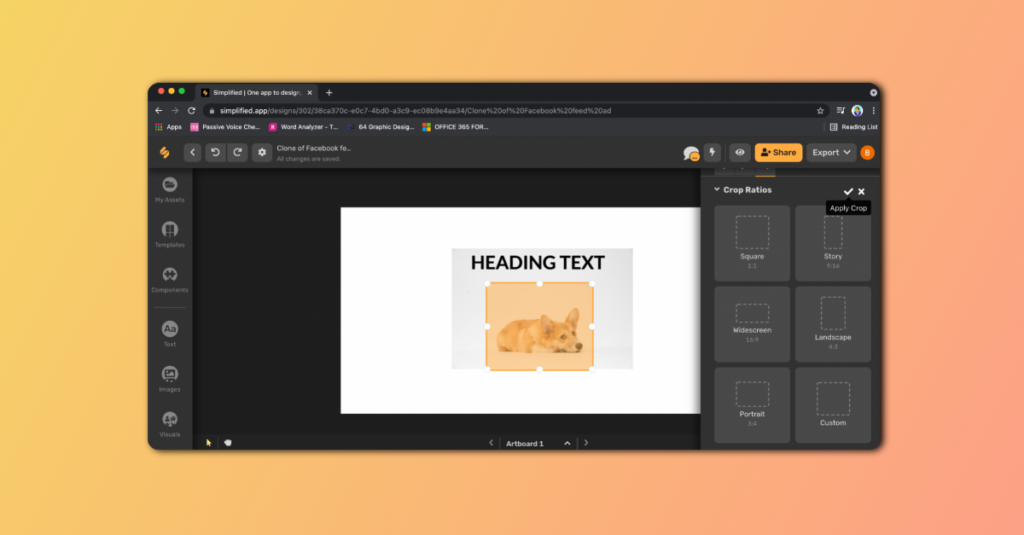
Step 1: From the left sidebar menu, choose “Images”.
TIP: Want to use your own media? Copy anything from anywhere and paste on Simplified!
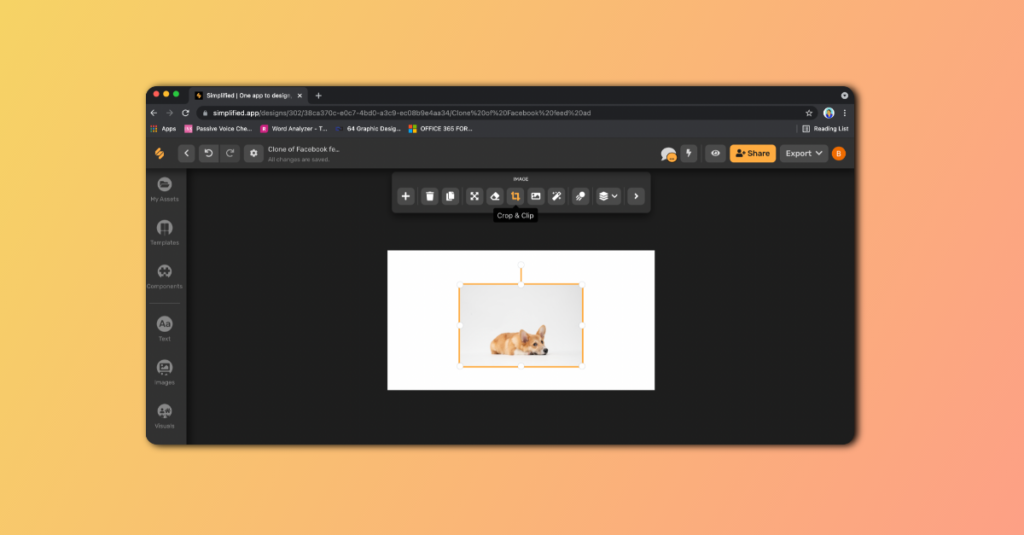
Step 2: Click on your image to reveal a top menu! Click on the “Crop and Clip” icon.
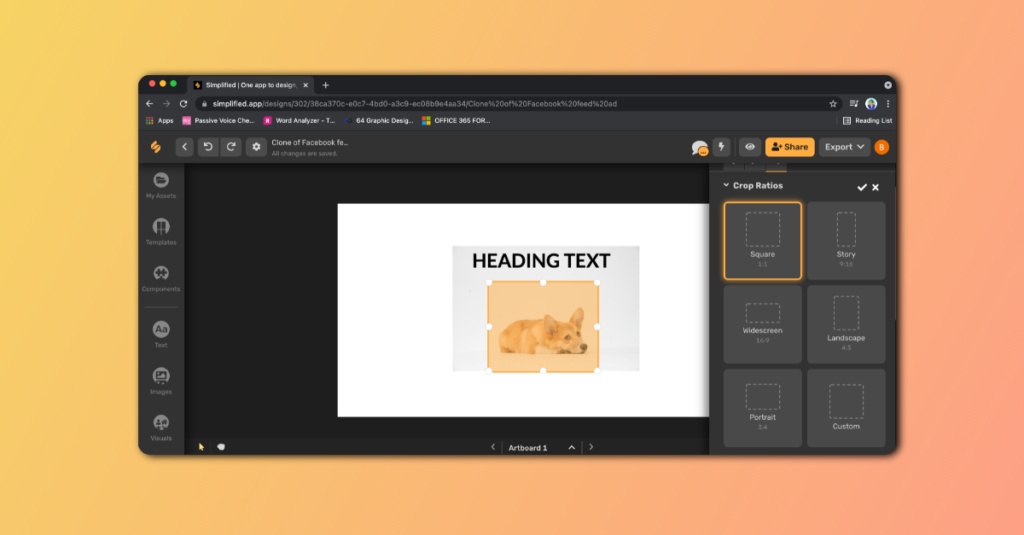
Step 3: From the sidebar on the right, choose the dimensions optimized for social media platforms and marketing channels!
Step 4: Go ahead and click on the “Apply Crop” command to reveal your newly edited image!
Related: Fun Ideas Of Earth Illustrations To Use In Your Next Design
Crop Images on Simplified – Custom Sizes
What if you just need to quickly crop an image without knowing the optimized dimensions for social media platforms? We have a fix for that too!
- Follow Step 1 + Step 2 from the guide above.
- Pause at Step 3, and choose “Custom” in the bottom right corner of the right sidebar.

- Drag the corners of the selected image until you reach the dimensions you have in mind.
- Click “Apply Crop”!
What Is Clipping?
Clipping shapes on Simplified means to resize images using our software to fit them into frames and shapes of your choosing. The commands for cropping images and clipping shapes are groupoed together because both of these functions are used to change the size of the images to fit your artboard!

How is the ‘clipping shapes’ feature helpful?
- Detection of Visual Information: Clipping automatically extracts the important visual elements from images to focus on.
- Makes Designs More Fun: Clipping images into shapes creates clear boundaries within your design and adds playfulness!
- Two Elements in One: The command cojoins two design elements as one object: image and shape. This also helps create space on your artboard and move the newly clipped shaped locked as one object.
Let’s Get Clipping On Simplified!
Follow these 4 simple steps to clip your images into shapes!
Step 1: Click on your image to reveal a top menu! Click on the “Crop and Clip” icon.

Step 2: From the “Clipping Shapes” menu, choose a shape you’d like for your image!
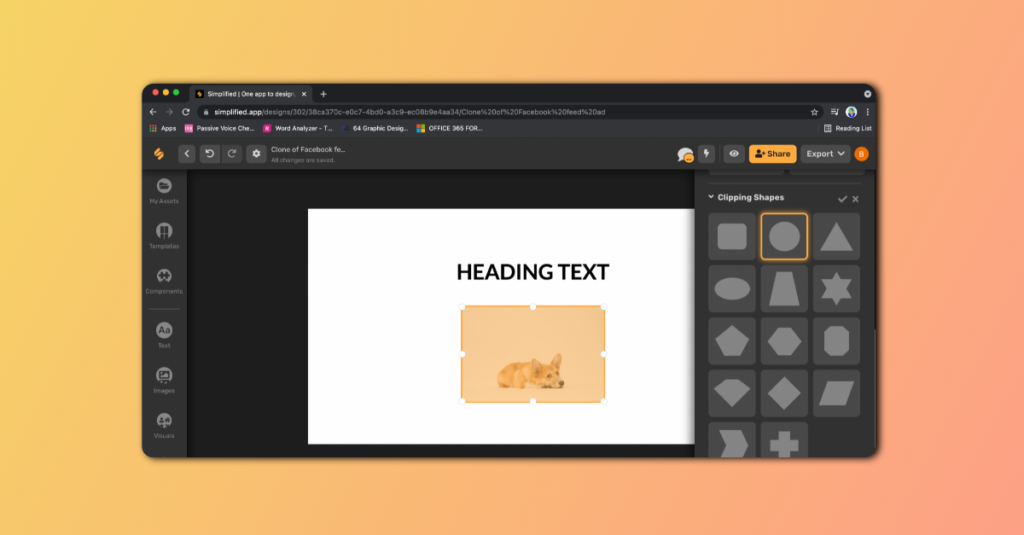
3: Drag the selection with your cursor to select a focal point.
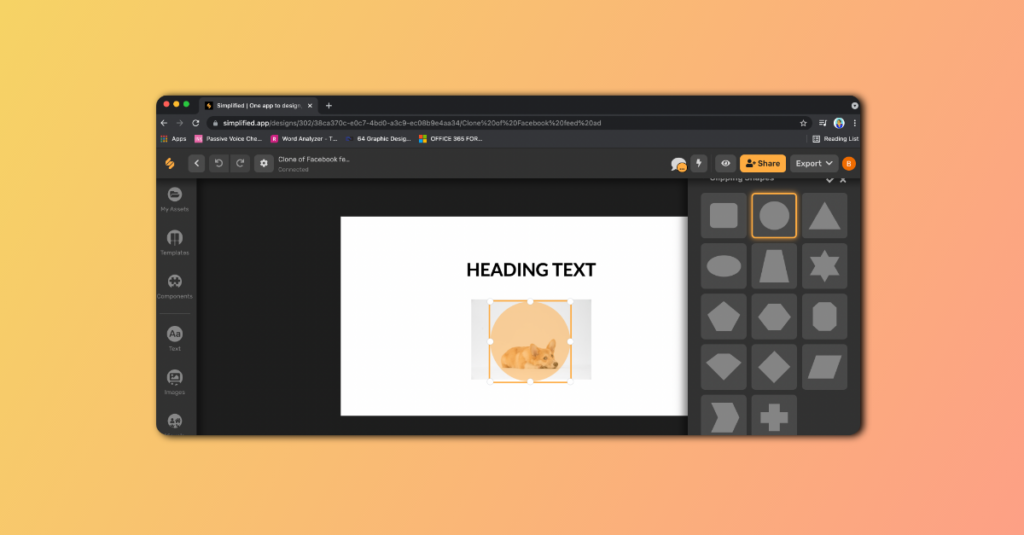
Step 4: Go ahead and click on the “Clip Image” command to reveal your clipped shape!
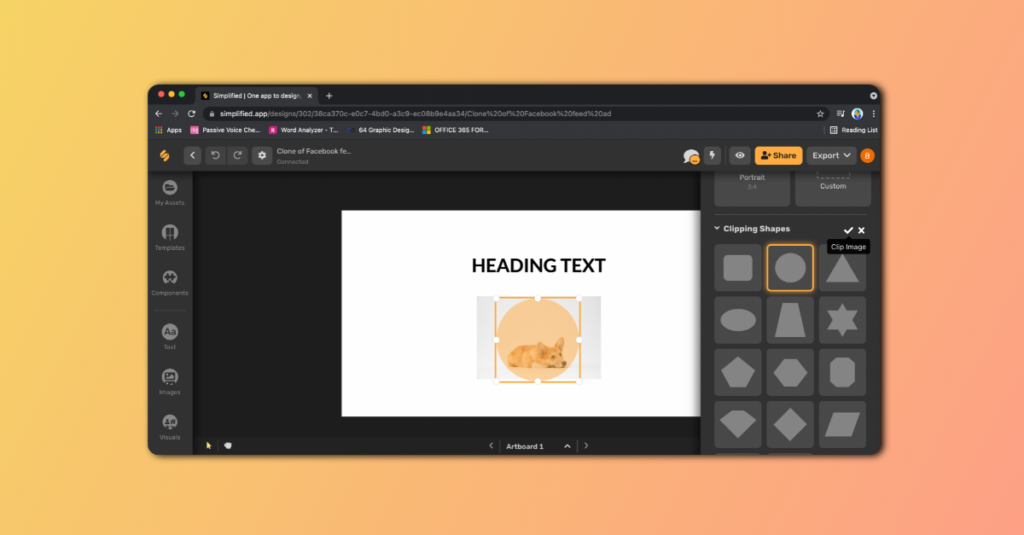
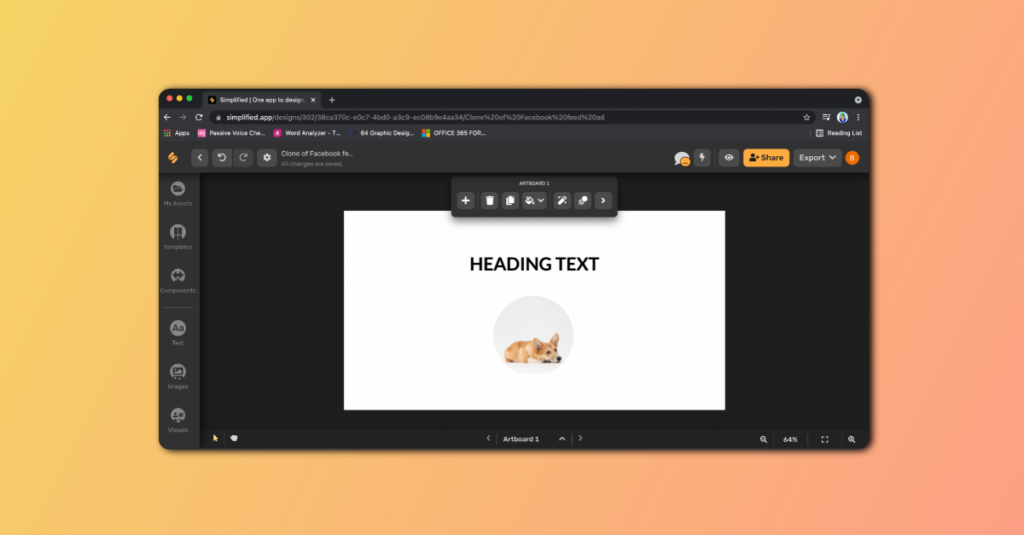
That’s all! Our cute little corgi is now in a clipped circle!
TIP: Feeling inspired to use photographs in your design? Read this blog for helpful tips!


![10 Best AI Image Restoration Tools to Try in 2025 [Free & Paid]](https://siteimages.simplified.com/blog/Best-AI-Image-Restoration-Tools-01.png?auto=compress&fit=crop&fm=png&h=400&w=400 "10 Best AI Image Restoration Tools to Try in 2025 [Free & Paid]")
![How to Use Photoshop AI Generative Fill Feature [2025]](https://siteimages.simplified.com/blog/How-to-Use-Photoshop-AI-Generative-Fill-01-1.png?auto=compress&fit=crop&fm=png&h=400&w=400 "How to Use Photoshop AI Generative Fill Feature [2025]")
![20 Podcast Thumbnail Ideas to Boost Your Show’s Visual Appeal + Best Practices [2025]](https://siteimages.simplified.com/blog/Podcast-Thumbnail-Ideas-to-Boost-Your-Show-02-1.png?auto=compress&fit=crop&fm=png&h=400&w=400 "20 Podcast Thumbnail Ideas to Boost Your Show’s Visual Appeal + Best Practices [2025]")


