With the iPhone, you can now easily make a GIF in less than 30 seconds. This is a huge time saver for people who want to create GIFs for their website or blog. There are many different ways to make a GIF on your iPhone, but not all methods are created equal.
In this article, we will try three different methods of making a making a GIF on your iPhone and tell you which one is the best and why, including a list of pros and cons. Let’s get started.
At a Glance:
- How To Make a GIF on an iPhone Using a Saved Photo
- How to Create a GIF on an iPhone Using a Shortcut From a Video
- How To Make a GIF on an iPhone Using the Simplified App
- Start Creating Today.
How To Make a GIF on an iPhone Using a Saved Live Photo
Your iPhone undoubtedly comes with several apps that make creating seamless and efficient. One of those apps is the iPhone’s Live Photo app. With your Camera and Live Photo app, you can take pictures that can be converted into a few moments of live action.
1. Tap on the Photos app on your iPhone to see all your saved photos.

2. Tap on the ‘Albums’ icon at the bottom of your screen to view all of your albums.

3. Scroll down to Media Types and click on Live Photos to choose the specific photo for your GIF. It will open in its own tab.
4. Swipe up on the Live Photo to choose an effect. You can choose Live, Loop, or Bounce.

5. Tap the Send icon to export your completed GIF to send in Messenger, your email, or on your social media.

Pros: It’s an app that is already on your phone. It can animate any picture.
Cons: The frame rate is really low, and it takes up a lot of space.
Bonus: 5 Best AI GIF Generators
How To Create a GIF on an iPhone Using a Shortcut From a Video
Similar to creating a GIF in Live Photo, creating GIFs from a shortcut on your iPhone is easy as you don’t have to add any third-party tools. Follow the steps below to create a GIF on your iPhone using a shortcut.
1. Go to the Shortcuts app and click the plus sign in the top left-hand corner to start adding parts.

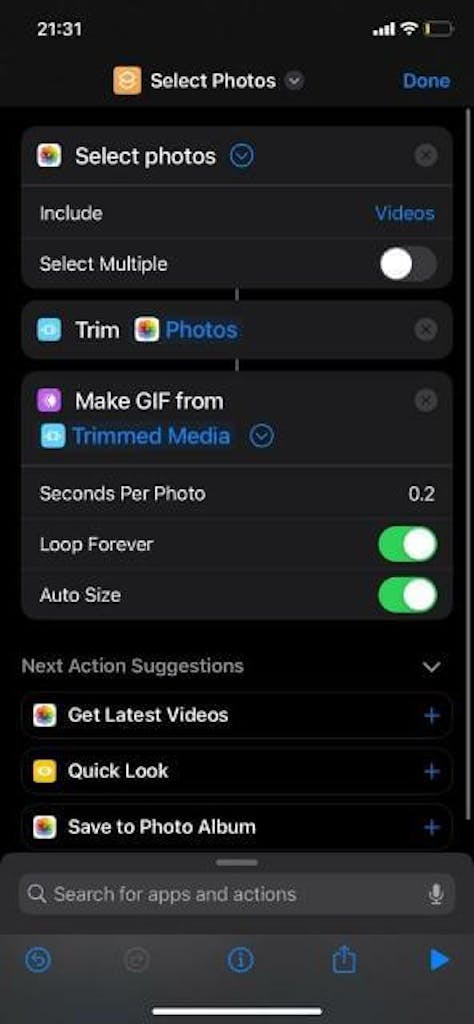
2. In the search bar, type in “Select Photos” and drag it over to the right.
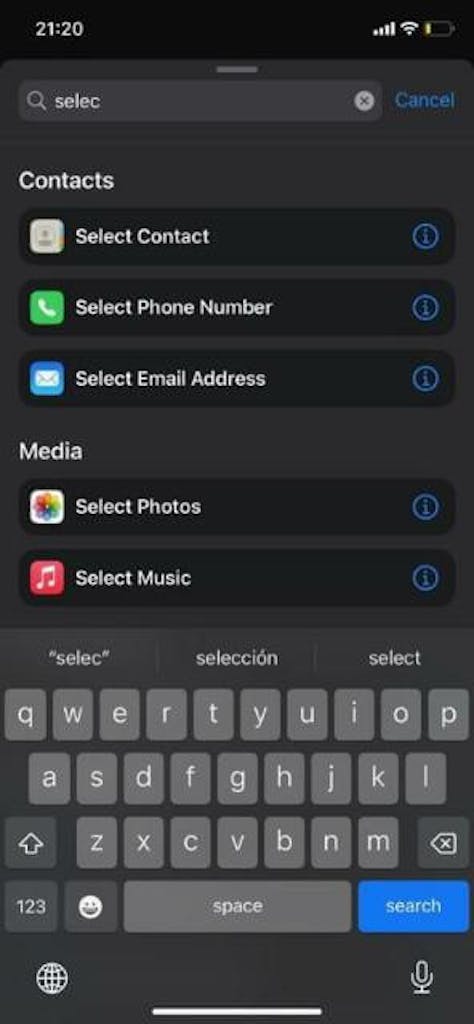
3. Click on “Show More” to go to Include, and remove “Images” and “Photos” to only display “Videos.”

4. Go back to the Search bar and search for “Trim Media” and drag it over to the right to connect it to your photo.

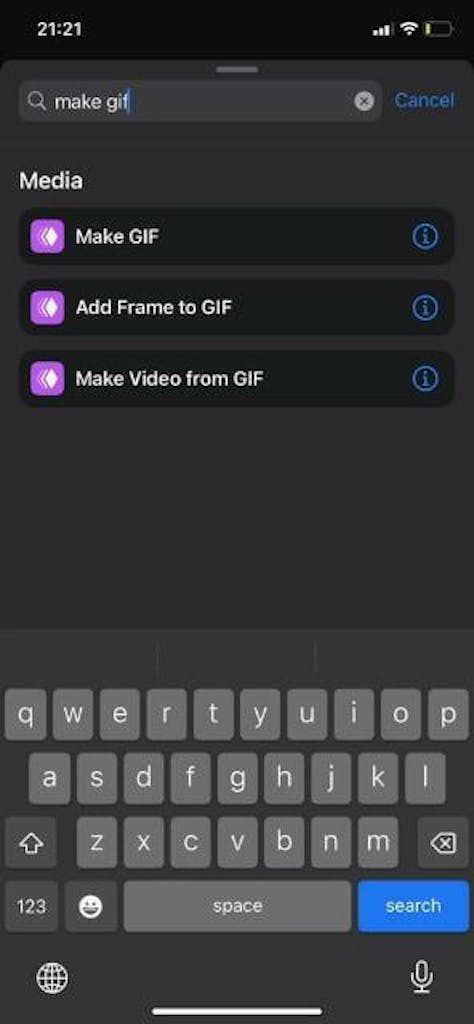
5. Go back to the Search bar and search for “Make GIF” and drag it over to the right to connect to both your photo and “Trim Media.” Click on “Show More” and choose the length of your video (the shorter the length, the better the quality).
6. Go back to the Search Bar and add a “Quick Look” and drag it over to the right to connect to the steps above. Click on “Show More” and set it to “Full Screen.”

7. Click on the three dots at the top to name your GIF and click “Play” in the top right-hand corner. From there, you can choose your specific video as well as from a plethora of animations.

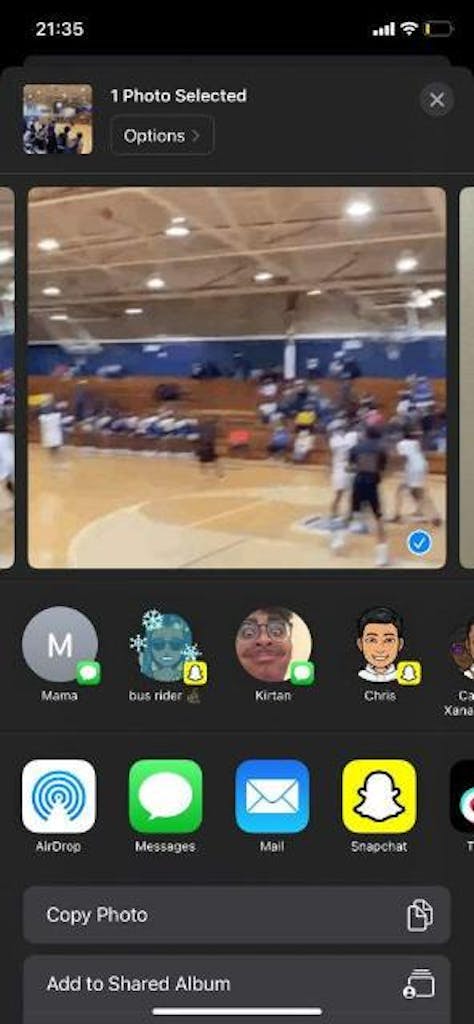
8. Finally, click “Share” in the upper right-hand corner to save it to your phone, send it in a message or email, or publish it directly to social media.
Pros: It’s already on your iPhone. It can animate any video.
Cons: There are entirely too many steps. The animations are limited.
How To Create a GIF on an iPhone using Simplified
Simplified is another app you can use to blow your audience away with your wit and charm. You can create GIFs, videos, social media posts, and more. Follow the steps below.
1. Download and open your free Simplified app from the Apple Store.
2. Choose a custom GIF template or choose a photo or video from My Assets.
3. Mix and match from a plethora of music samples, fonts, visuals, and animations. Find what you want, click on it, and hold it down for a few seconds. You can even optimize the size so that it looks best on mobile devices.
4. Save it to your iPhone or publish it directly on your preferred social media channels.
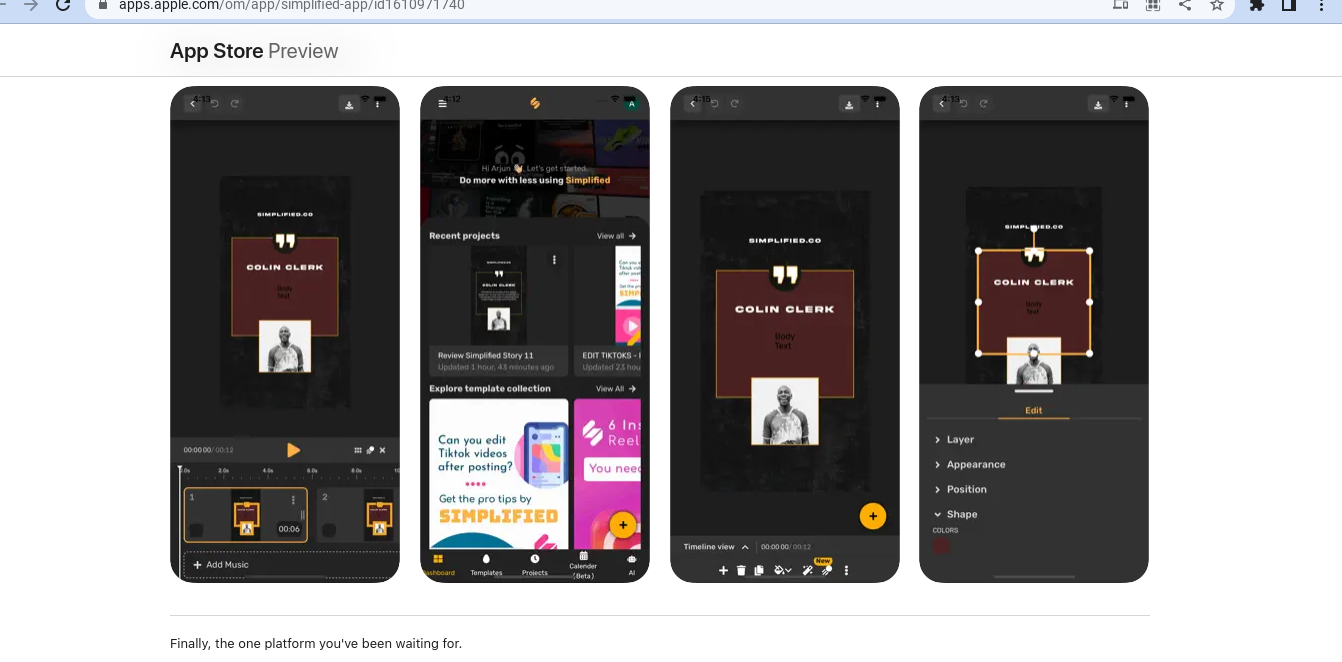
Pros: You can easily install it on your iPhone. There are many GIF templates and animations to choose from that can be added with just a few taps.
Cons: With quick installation and ease of use, there are no cons to the Simplified app as it provides a one-stop shop for all your GIFF-ing needs.
Create Your GIF Today with the Simplified App
GIFs are created pieces that combine photos and videos and make them come alive. The Simplified app provides one simple location to not only create GIFs but also social media posts, videos, marketing ads, and more.

![7 Best AI Image Restoration Tools to Try in 2024 [Free & Paid] 7 Best AI Image Restoration Tools to Try in 2024 [Free & Paid]](https://siteimages.simplified.com/blog/Best-Free-Paid-AI-Image-Restoration-Tools-01.png?auto=compress&fit=crop&fm=png&h=400&w=400)
![How to Use Photoshop AI Generative Fill Feature [2024] How to Use Photoshop AI Generative Fill Feature [2024]](https://siteimages.simplified.com/blog/How-to-Use-Photoshop-AI-Generative-Fill-01-1.png?auto=compress&fit=crop&fm=png&h=400&w=400)
![20 Podcast Thumbnail Ideas to Boost Your Show’s Visual Appeal + Best Practices [2024] 20 Podcast Thumbnail Ideas to Boost Your Show’s Visual Appeal + Best Practices [2024]](https://siteimages.simplified.com/blog/Podcast-Thumbnail-Ideas-to-Boost-Your-Show-02-1.png?auto=compress&fit=crop&fm=png&h=400&w=400)
