
Did you know that a simple blur effect can turn an ordinary photo into a captivating masterpiece? By softening the background, you can instantly make your subject pop and reduce distractions—whether it’s a stunning portrait, a sleek product shot, or your latest creative endeavor. Curious how to achieve that perfect blurry background without needing advanced skills or tools? This guide will walk you through straightforward steps to bring your photos to life with the perfect blur effect.
Why Blur the Background?
Blurring the background is a technique that focuses attention on the subject by creating a soft, out-of-focus backdrop. This method works well in the following scenarios:
- Portrait Photography: Makes the person the center of attention.
- Product Imagery: Highlights the product by removing distractions.
- Nature Photography: Isolates a flower, animal, or any element from its surroundings.
- Social Media Content: Gives a professional touch to photos shared online.
How to Blur the Background of a Picture: Step-by-Step Guide
Blurring the background doesn’t require technical expertise or expensive tools. Here’s how to achieve a blurry background using a user-friendly platform:
Step 1: Login to the Simplified App Dashboard

Log in to your Simplified account to get started. If you’re new, signing up is simple and quick. Once inside, you’ll find yourself on the dashboard, where all of Simplified’s tools and features are readily available.
Step 2: Click on AI Design

From the dashboard, locate and select the AI Designer option. This will guide you to various editing tools available.
Bonus: How to Remove or Change Background in Video Without Green Screen
Step 3: Open the Quick Tool and Select Blur Image Background
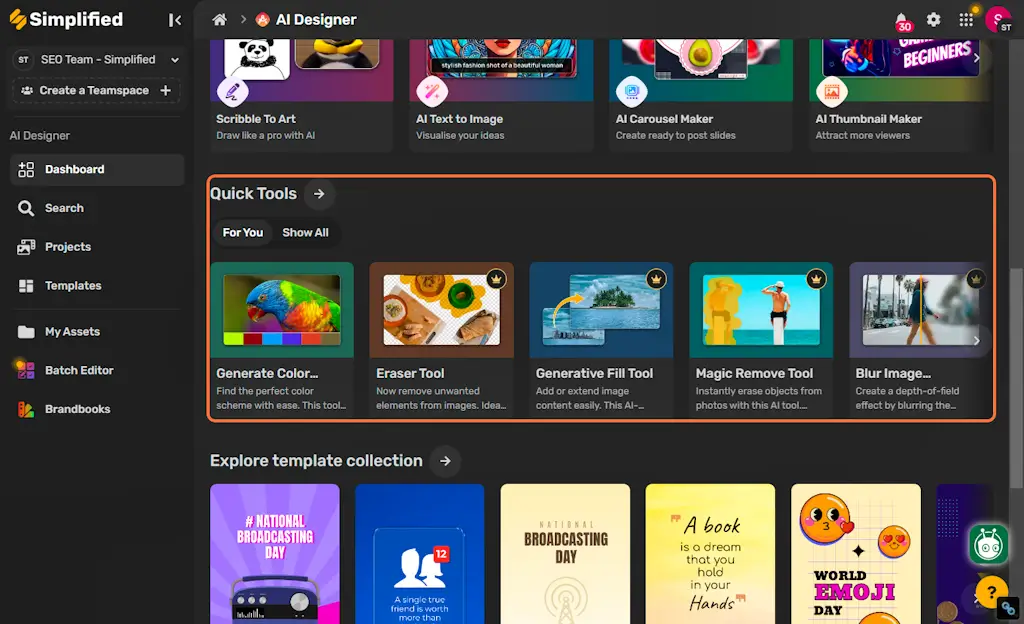
Under AI Designer, navigate to the Quick Tools section, where you’ll find several features for fast editing.
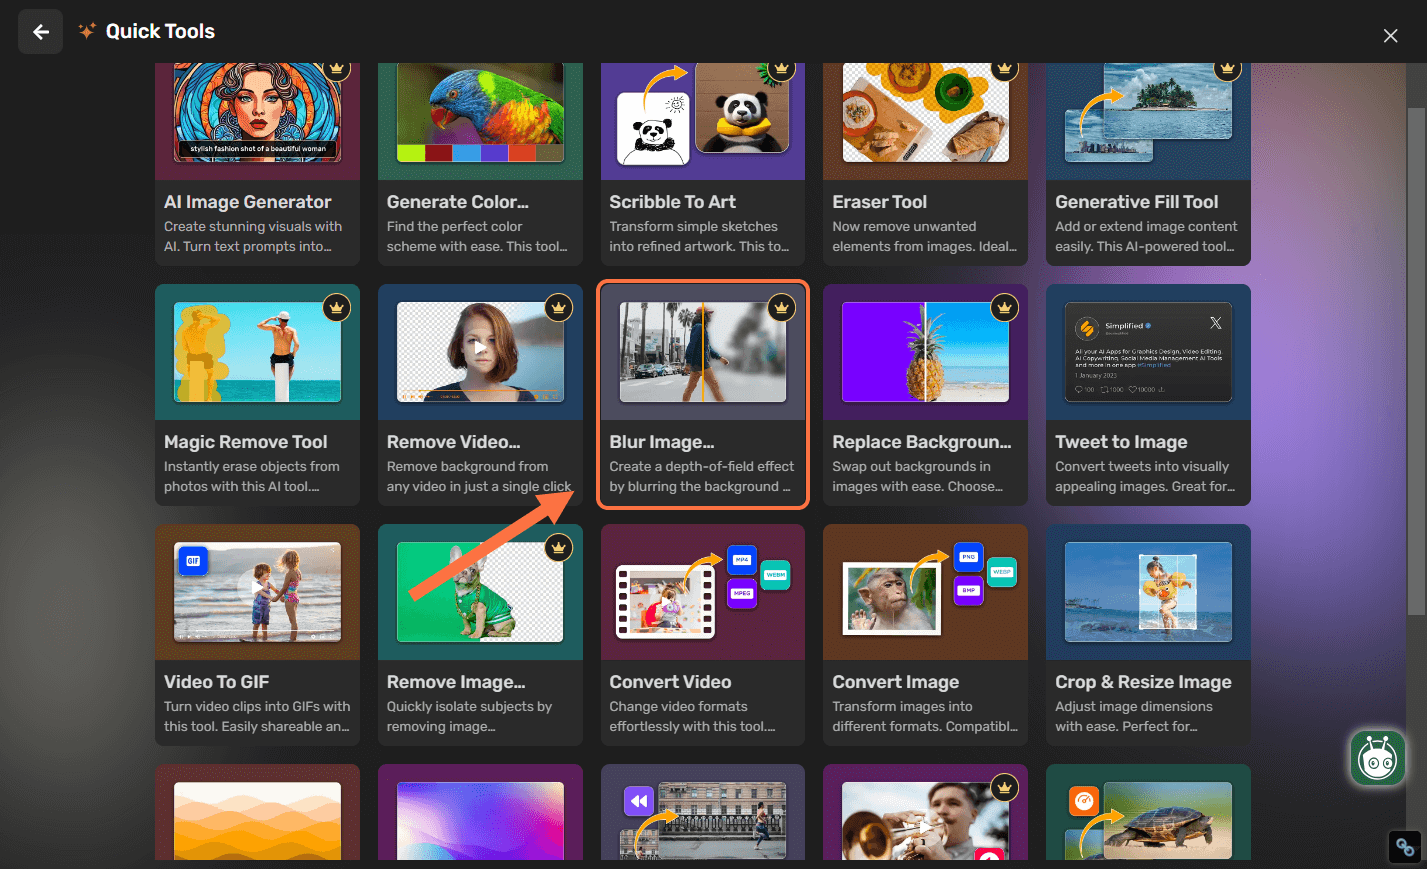
Choose the Blur Image Background feature among all. This tool is designed to simplify the process of blurring a photo’s background.
Step 4: Upload Image
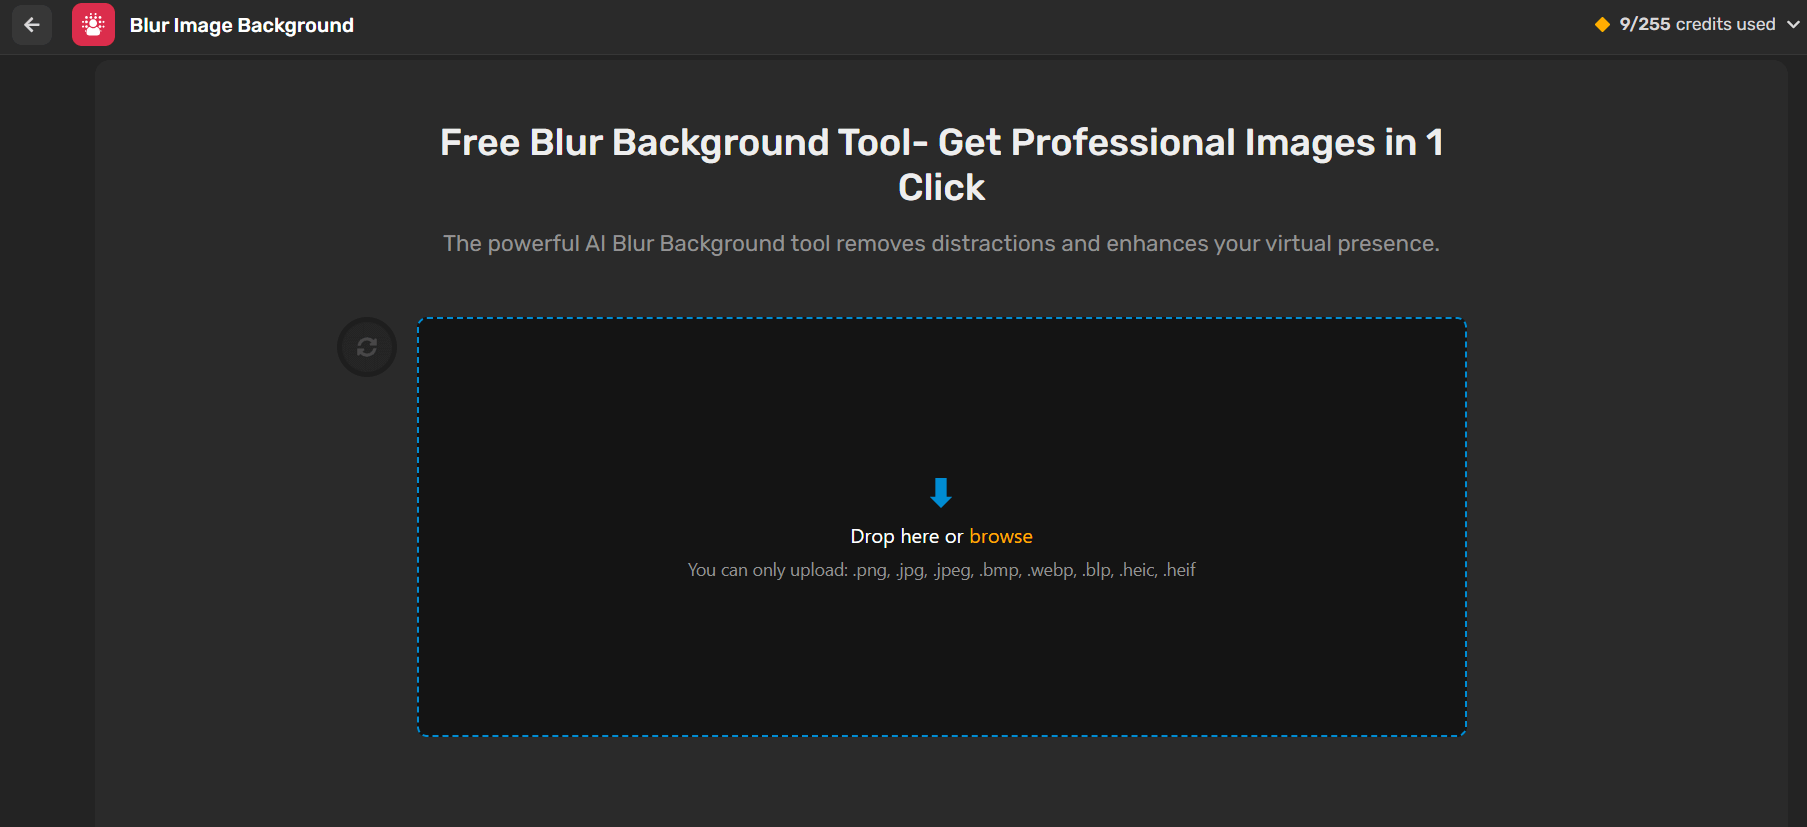
Upload the photo you want to edit. You can either drag the image into the workspace or select it from your device. You can only upload: .png, .jpg, .jpeg, .bmp, .webp, .blp, .heic, .heif formats.
Step 5: Adjust the Amount of Blur
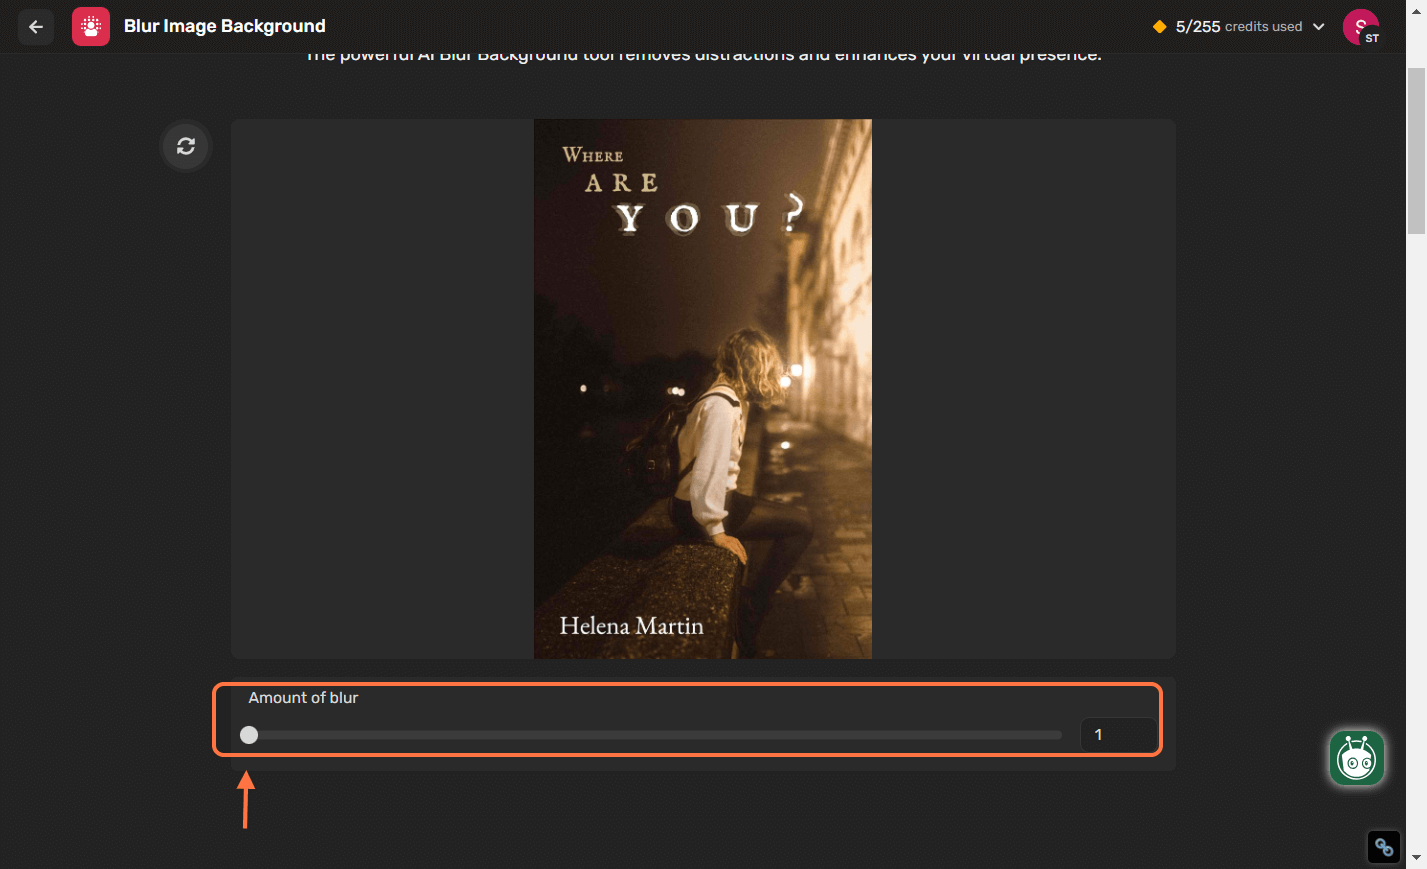
Use the adjustment slider to control how much blur you want to apply. You can preview the changes to decide what works best for your image.
- Subtle Blur: Ideal for professional and realistic results.
- Strong Blur: Creates a more dramatic and artistic effect.
Bonus: 7 Background Design Ideas To Create Amazing Creative Designs
Step 6: Download the Image or Open Editor for Further Changes
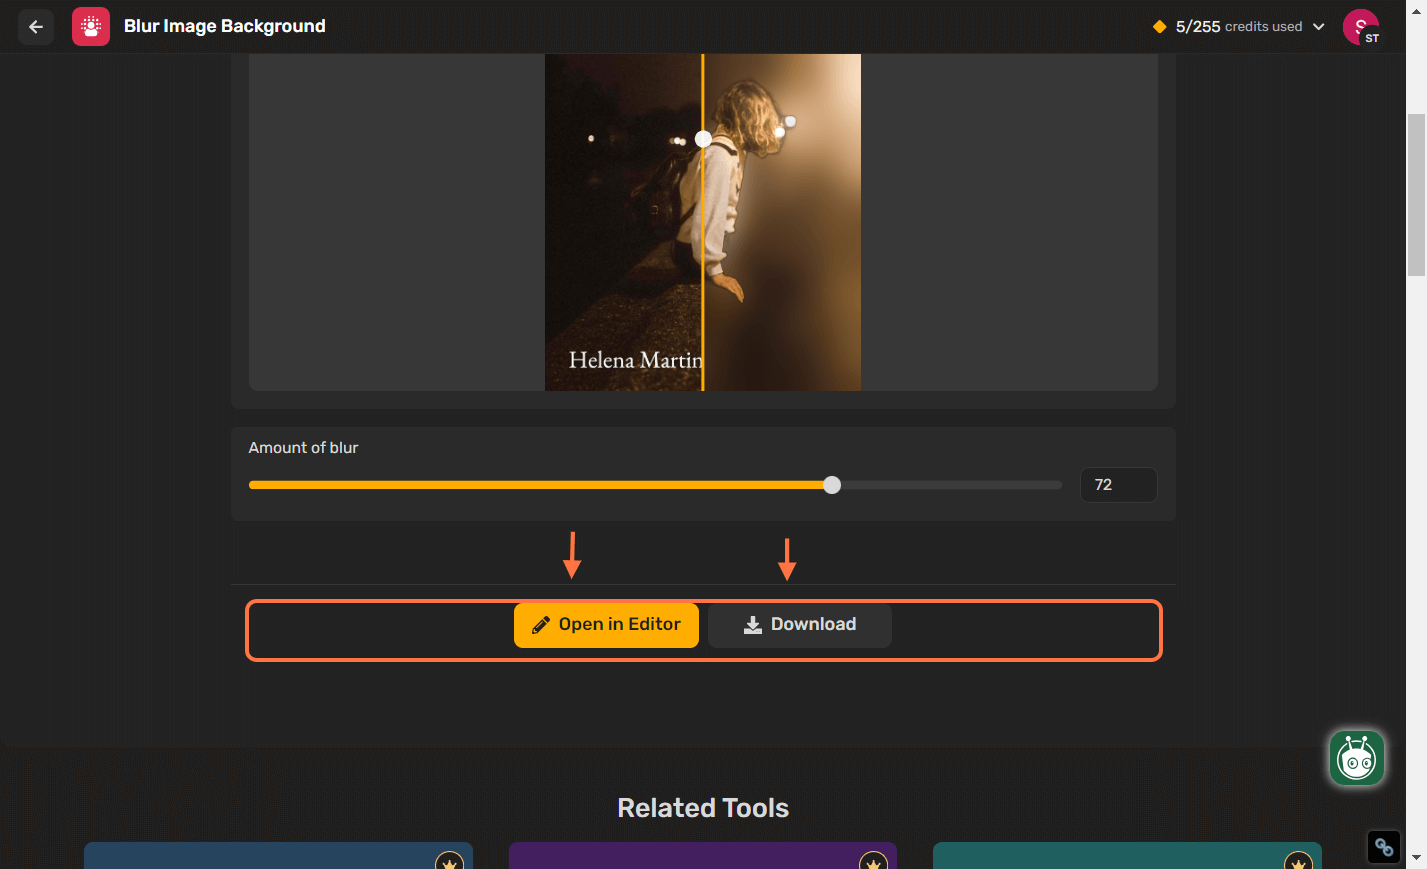
Hit the Download button to save the edited image to your device. It will be saved in a common format that’s ideal for sharing or uploading across various platforms. If you want to enhance the image further, click Open Editor to access advanced editing options. Add text, overlays, or make additional adjustments to perfect your photo.
Tips for Creating the Perfect Blurred Background
Blurring a background effectively involves more than just applying a tool. Consider these tips to make your images stand out:
1. Use High-Quality Images
Start with a high-resolution photo. This ensures the blur effect appears smooth and natural rather than pixelated.
2. Keep the Subject Sharp
Ensure the subject is well-defined and in focus. A clear subject contrasts beautifully with a soft, blurry background.
3. Experiment with Depth
If you’re capturing photos using a camera, adjust the aperture settings to create a shallow depth of field. This naturally blurs the background.
4. Match Lighting and Shadows
Ensure the background blur doesn’t disrupt the lighting consistency. This helps maintain a cohesive look in your image.
5. Fine-Tune Edges
If the edges between the subject and background appear uneven after applying the blur, refine them using the editing tool’s brush or masking features.
Bonus: 7 Background Design Ideas To Create Amazing Creative Designs
Overcoming Common Challenges
Challenge 1: Overlapping Backgrounds
Complex or busy backgrounds can sometimes make it hard to distinguish the subject.
Solution: Use tools with advanced AI to automatically detect and isolate the subject.
Challenge 2: Subtle Lighting Issues
Photos with poor lighting may not show a clear distinction between the subject and background.
Solution: Brighten the photo or adjust contrast before applying the blur effect.
Challenge 3: Excessive Blur
Too much blur can make the photo look unnatural.
Solution: Opt for a moderate blur and preview the effect before finalizing.
Frequently Asked Questions
Question: Can I Blur a Background on My Smartphone?
Ans: Yes, many apps like Simplified or Pixlr allow background blurring directly on mobile devices. Simply upload your photo, adjust the settings, and save the edited image.
Question: How Do I Blur Specific Parts of a Photo?
Ans: Some editing tools provide brush or masking features to selectively blur areas of the image, leaving the rest sharp.
Question: What’s the Best Way to Ensure a Natural Blur?
Ans: Maintain a balance by adjusting the blur intensity gradually. Avoid overblurring the background to ensure the result looks realistic.
Conclusion
Learning how to blur the background of a picture is a valuable skill for enhancing images and making them visually appealing. Whether you’re using an AI-powered blur Image background tool or experimenting with manual camera settings, the process is straightforward and effective. Follow the steps outlined in this guide and use the provided tips to achieve professional-looking results.
With practice, you’ll be able to create photos with beautifully blurred backgrounds that focus attention on the subject while minimizing distractions.


