
Whether you are a student, professional, or entrepreneur, the ability to create captivating slides can make a significant impact on your audience. While most people focus on the content, the presentation’s aesthetics play a crucial role in capturing attention and leaving a lasting impression. Google Slides is a powerful tool that enables users to create visually appealing presentations. While the software offers a wide range of features, adding borders can enhance the overall look and feel of your slides.
One effective way to enhance your Google Slides PowerPoint maker is by adding borders. Borders can provide a polished and professional look to your slides, making them visually appealing and captivating. The question remains, how to add borders to Google Slides? In this blog, we will guide you through step-by-step instructions and provide creative tips on how to add borders to your Google Slides presentations effortlessly. By the end, you will have the skills to customize borders effectively, adding a touch of sophistication to your slides.
Bonus: Smart Alignment And Grouping For Effective Design
How To Add Borders To Google Slides
Step 1: Access Google Slides And Select the Slide
- To begin, open your Google Slides presentation or create a new one.
- Choose the slide where you want to add the border. Make sure you are in the editing mode of the slide.
- You can select a single slide or multiple slides, depending on your preference.
- Keep in mind that consistent use of borders throughout your presentation gives a cohesive and elegant feel.
Source: Google Slides
Bonus: Playing Around With Transparency To Level Up Your Design
Step 2: Open the Format Options
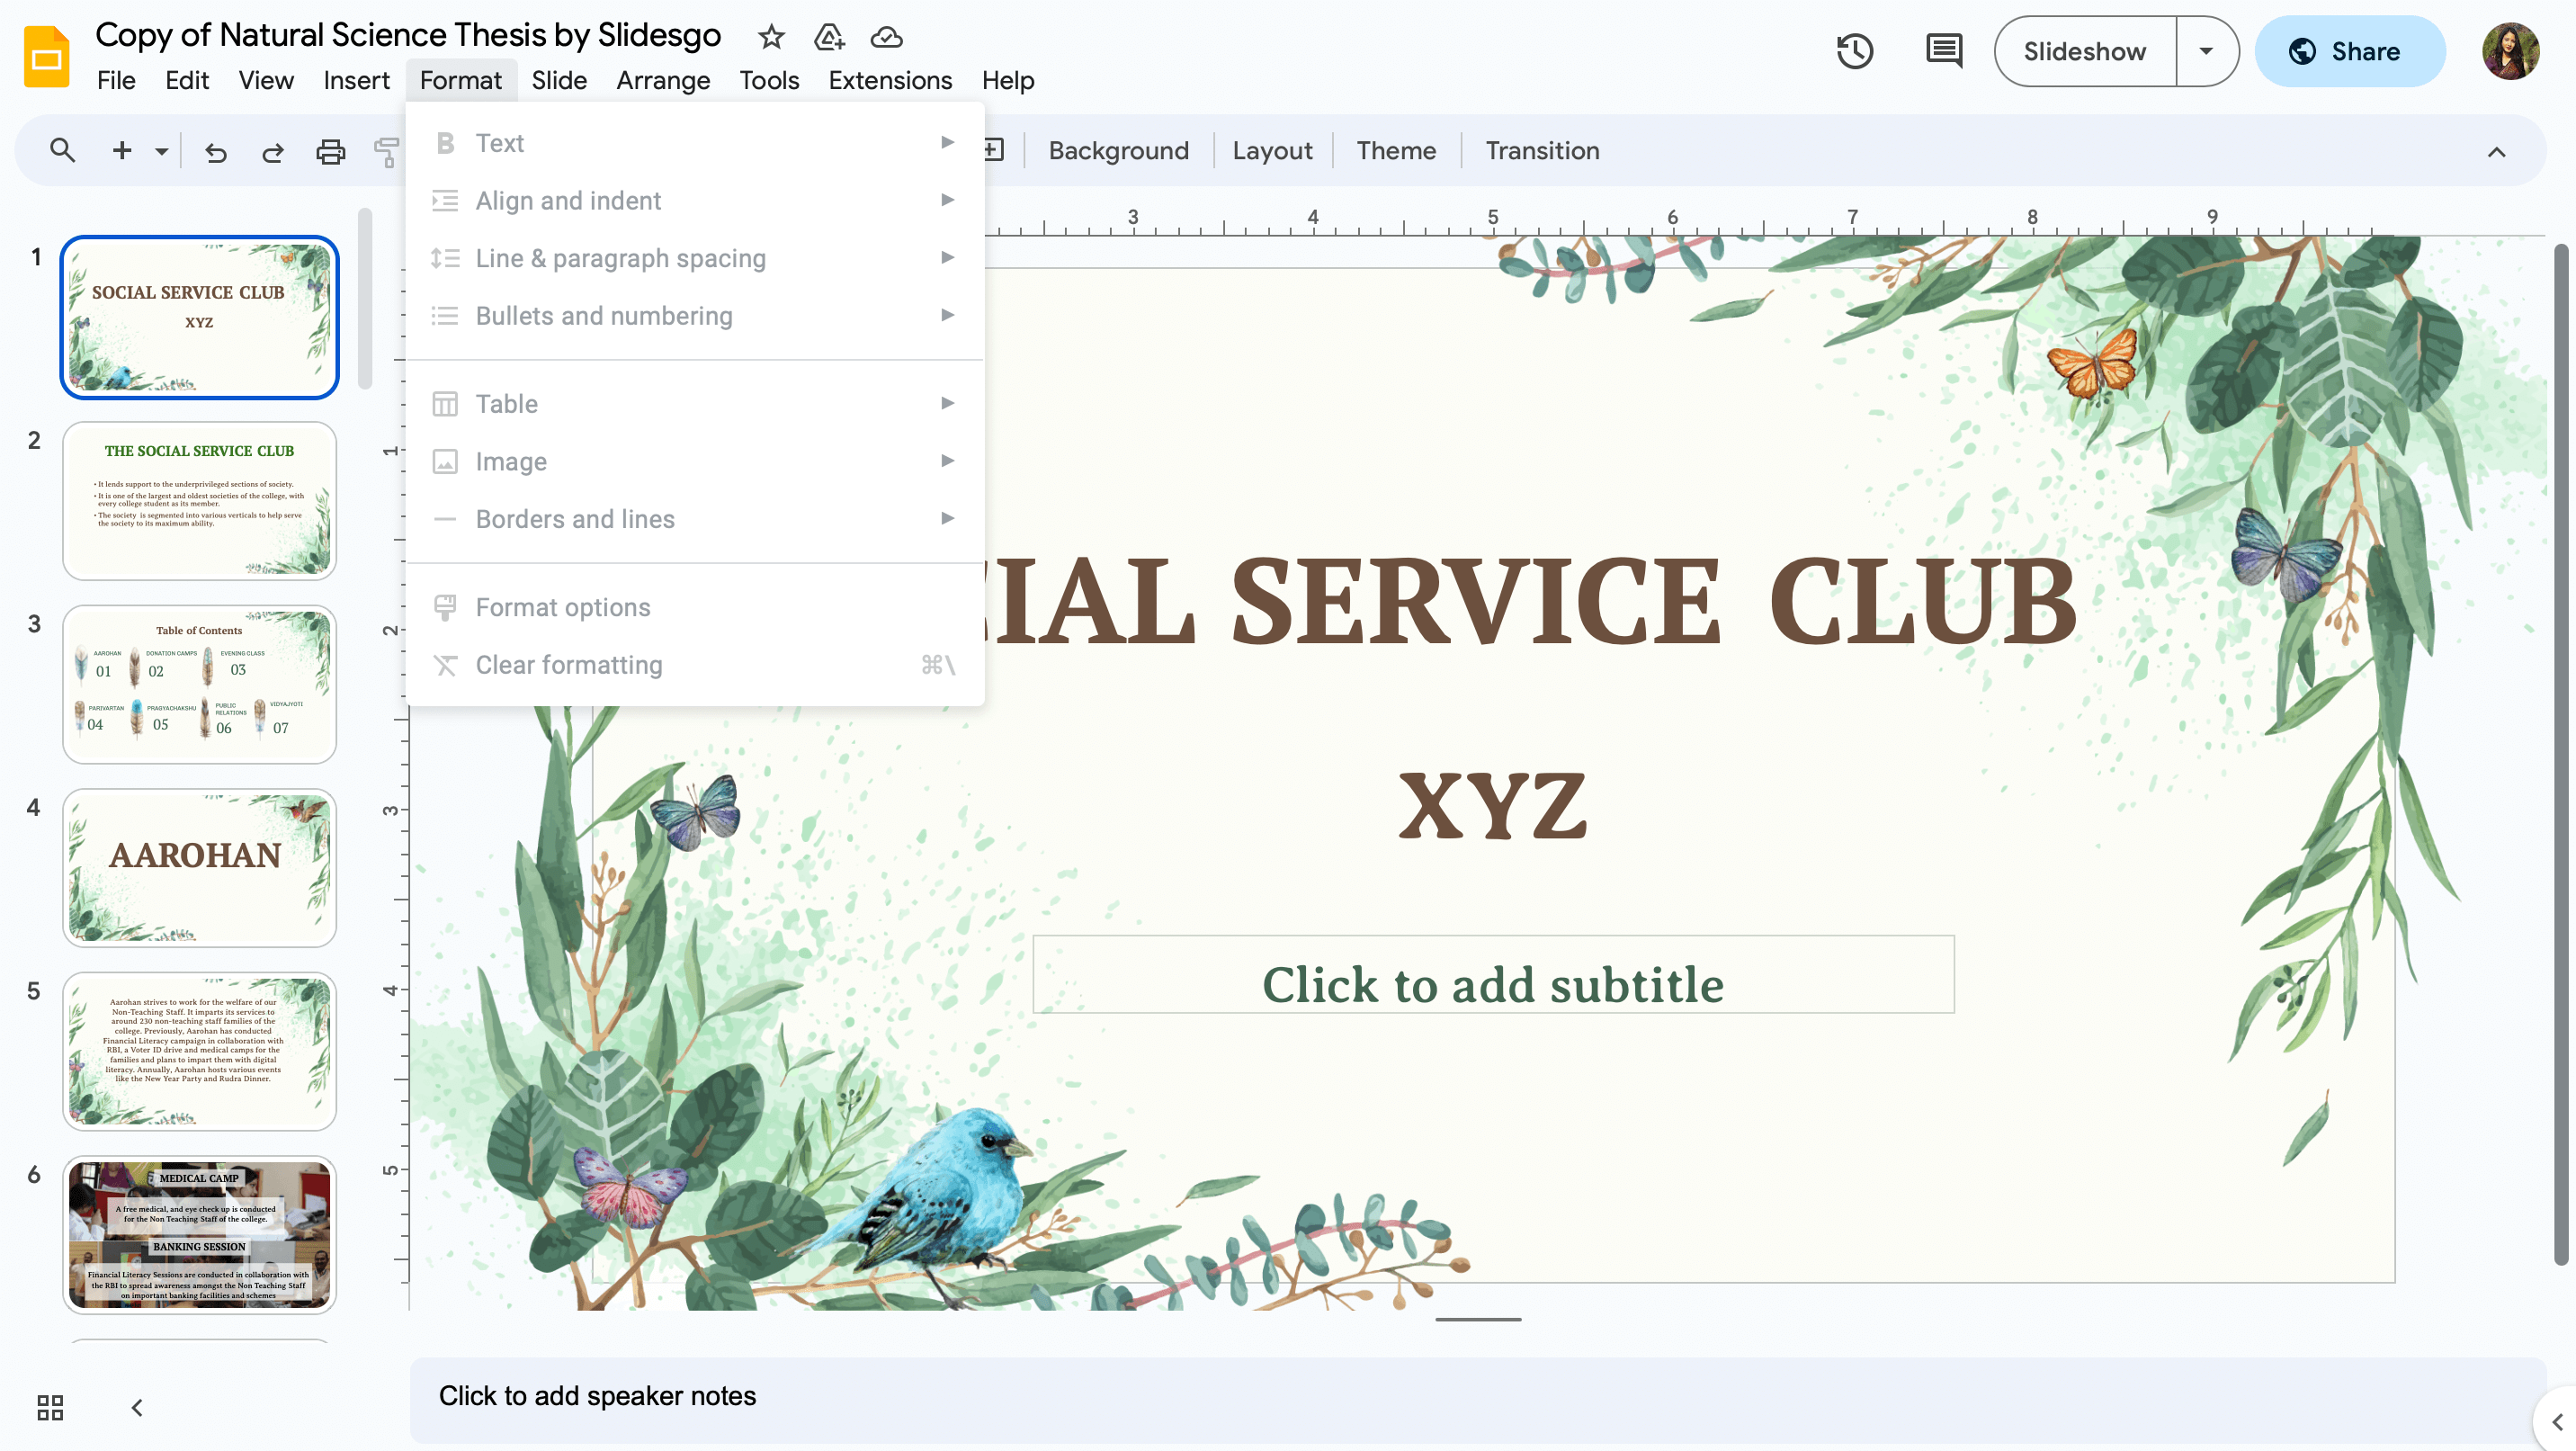
- In the toolbar at the top, click on the “Format” tab.
- A drop-down menu will appear with several formatting options.
- Select “Borders and lines” to access the border customization settings.
Source: Google Slides
Bonus: Copy Anything From Anywhere and Paste on Simplified!
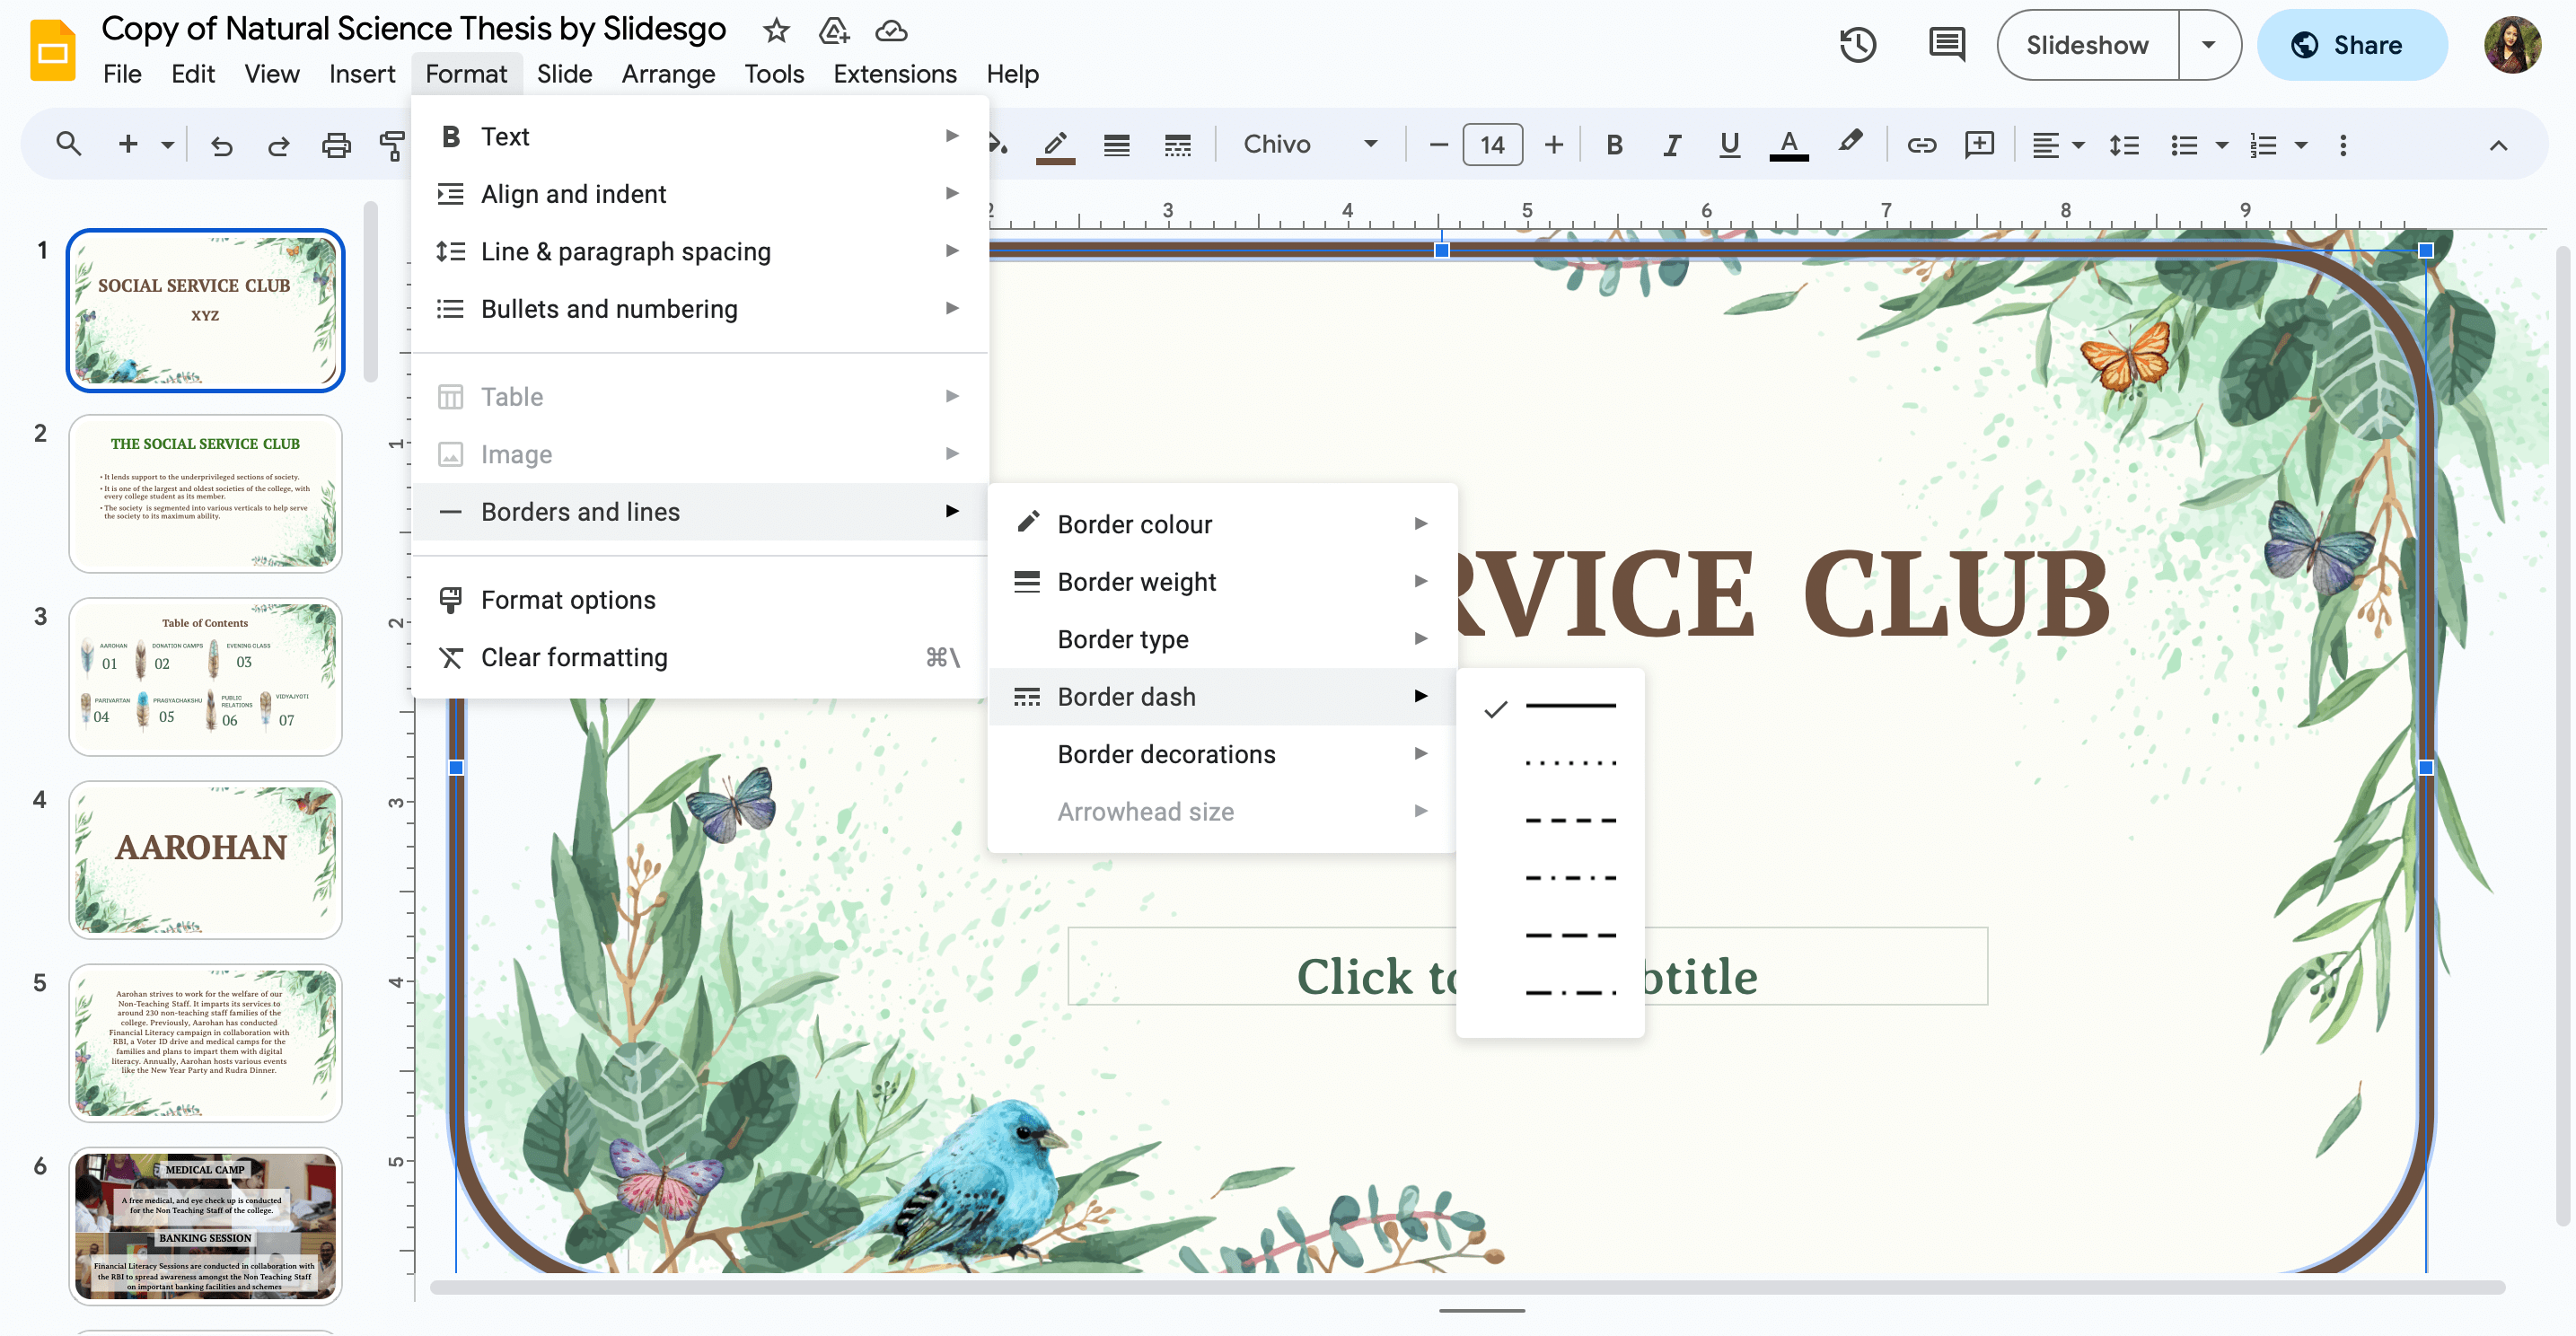
Step 3: Choose the Border Style
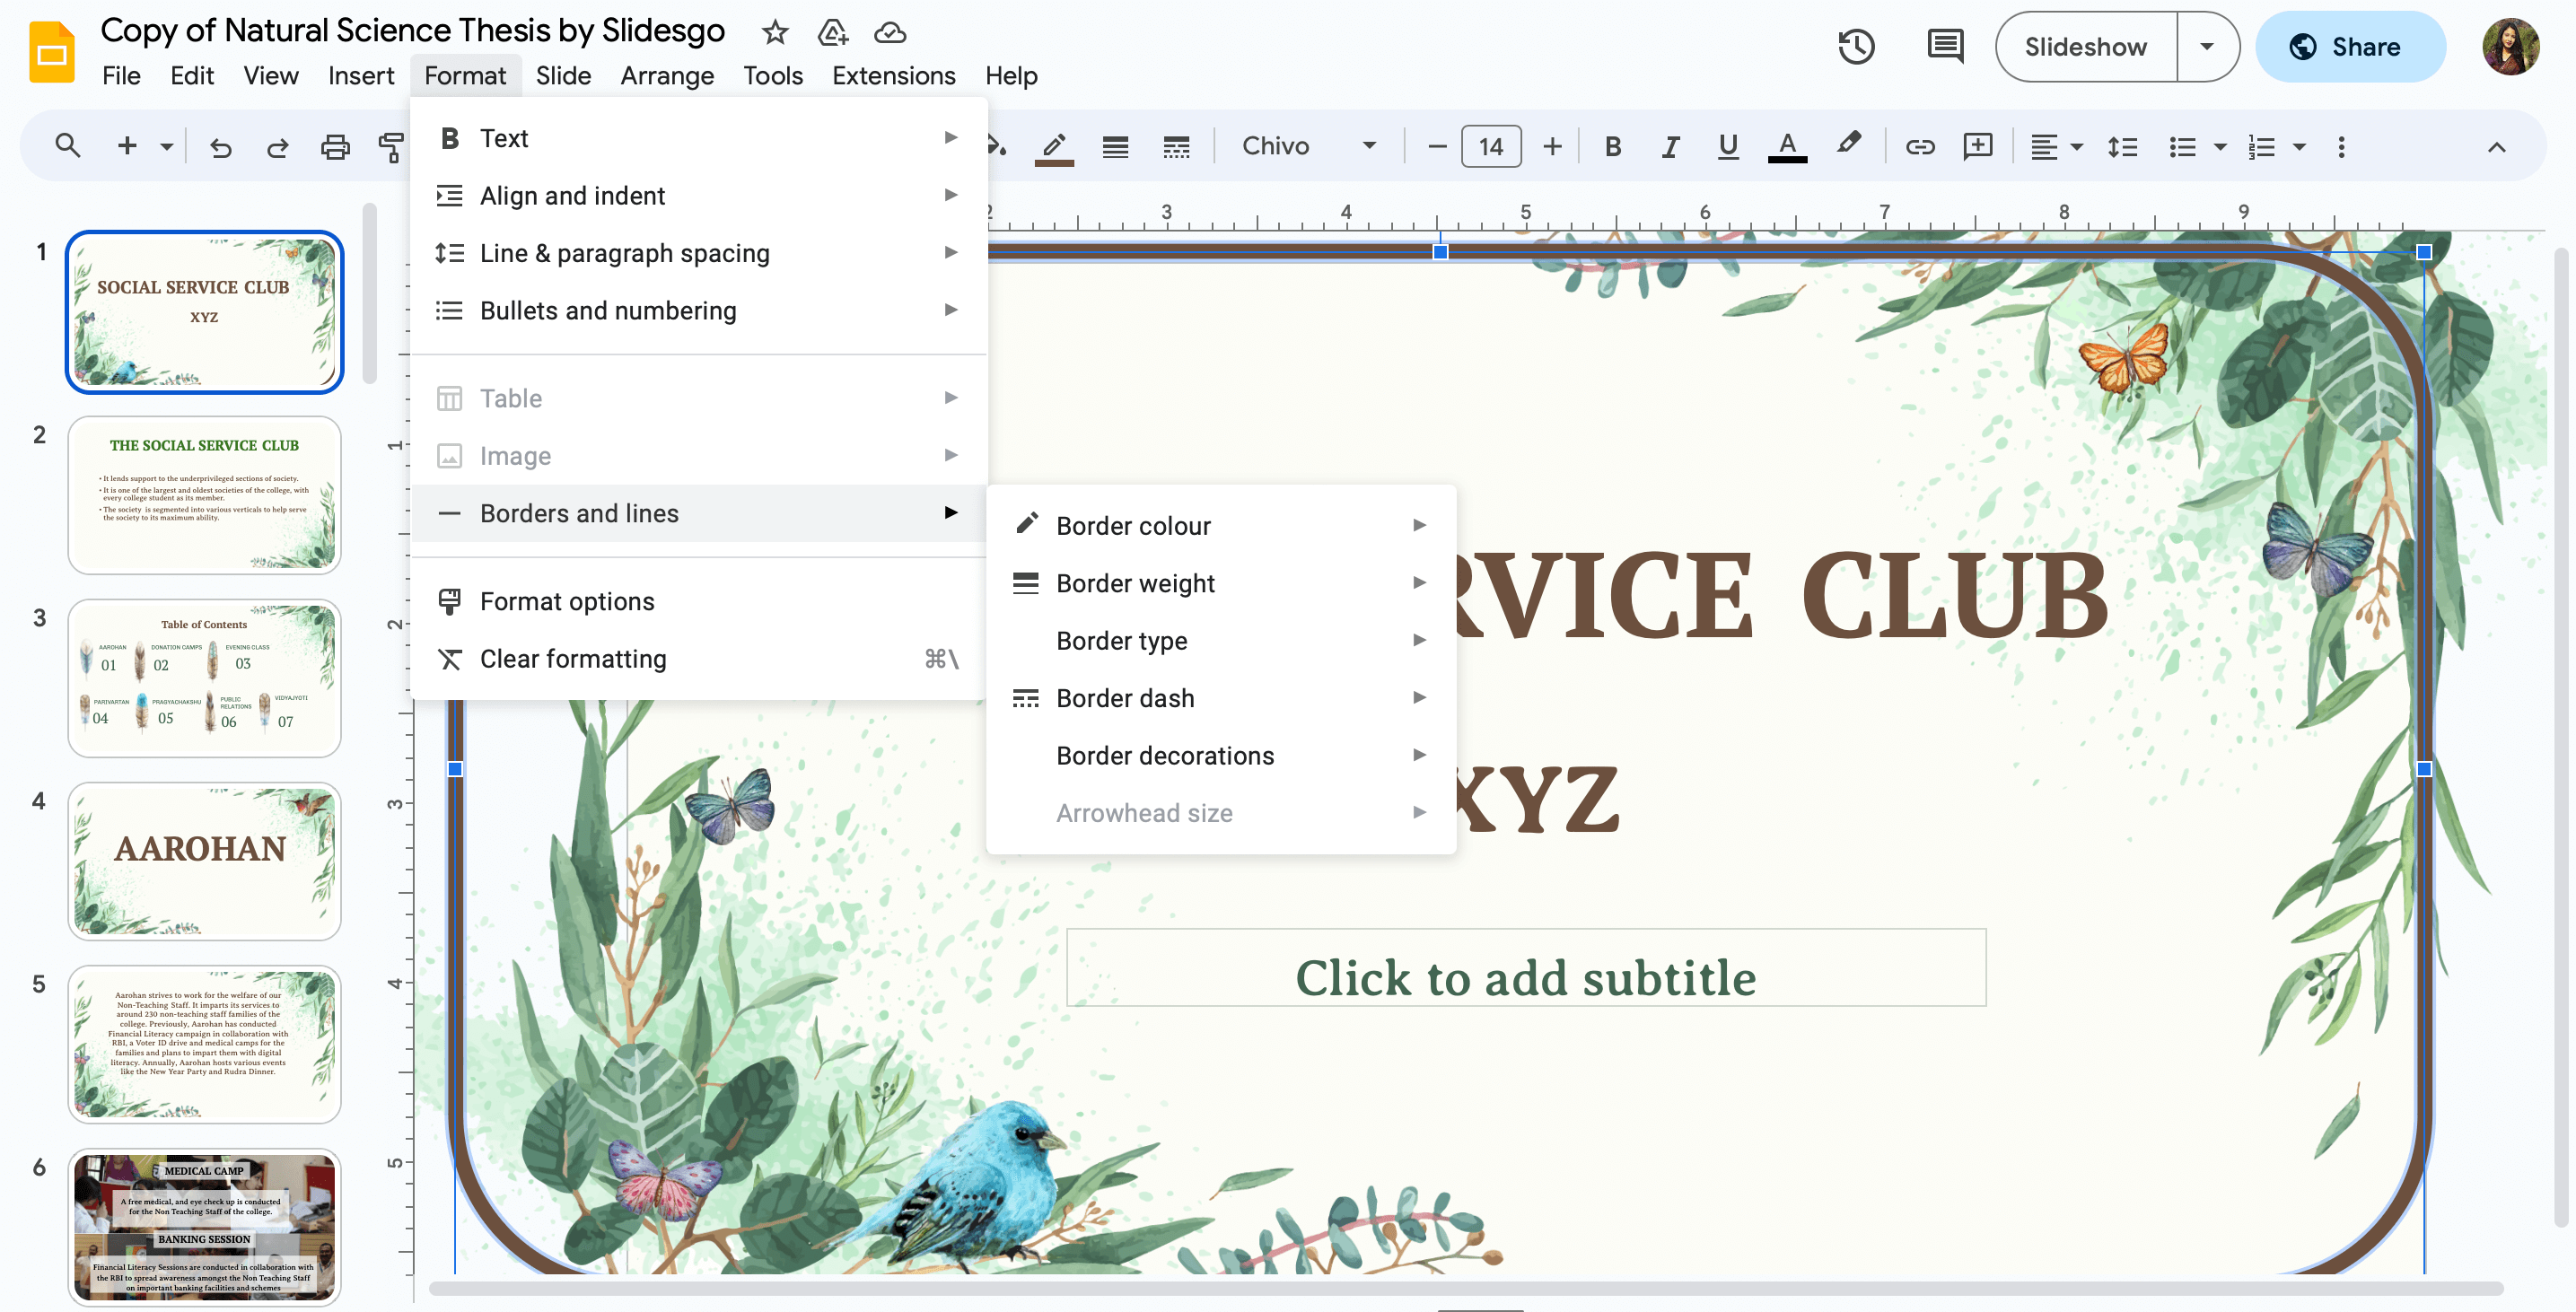
- Once you have accessed the “Borders and lines” settings, you will be presented with various border styles to choose from.
- Google Slides offers options such as solid lines, dashed lines, double lines, and more. Select the style that best suits your presentation’s theme and message.
Source: Google Slides
Bonus: The Ultimate Guide To Clone Your Digital Designs
Step 4: Customize the Border Size and Color
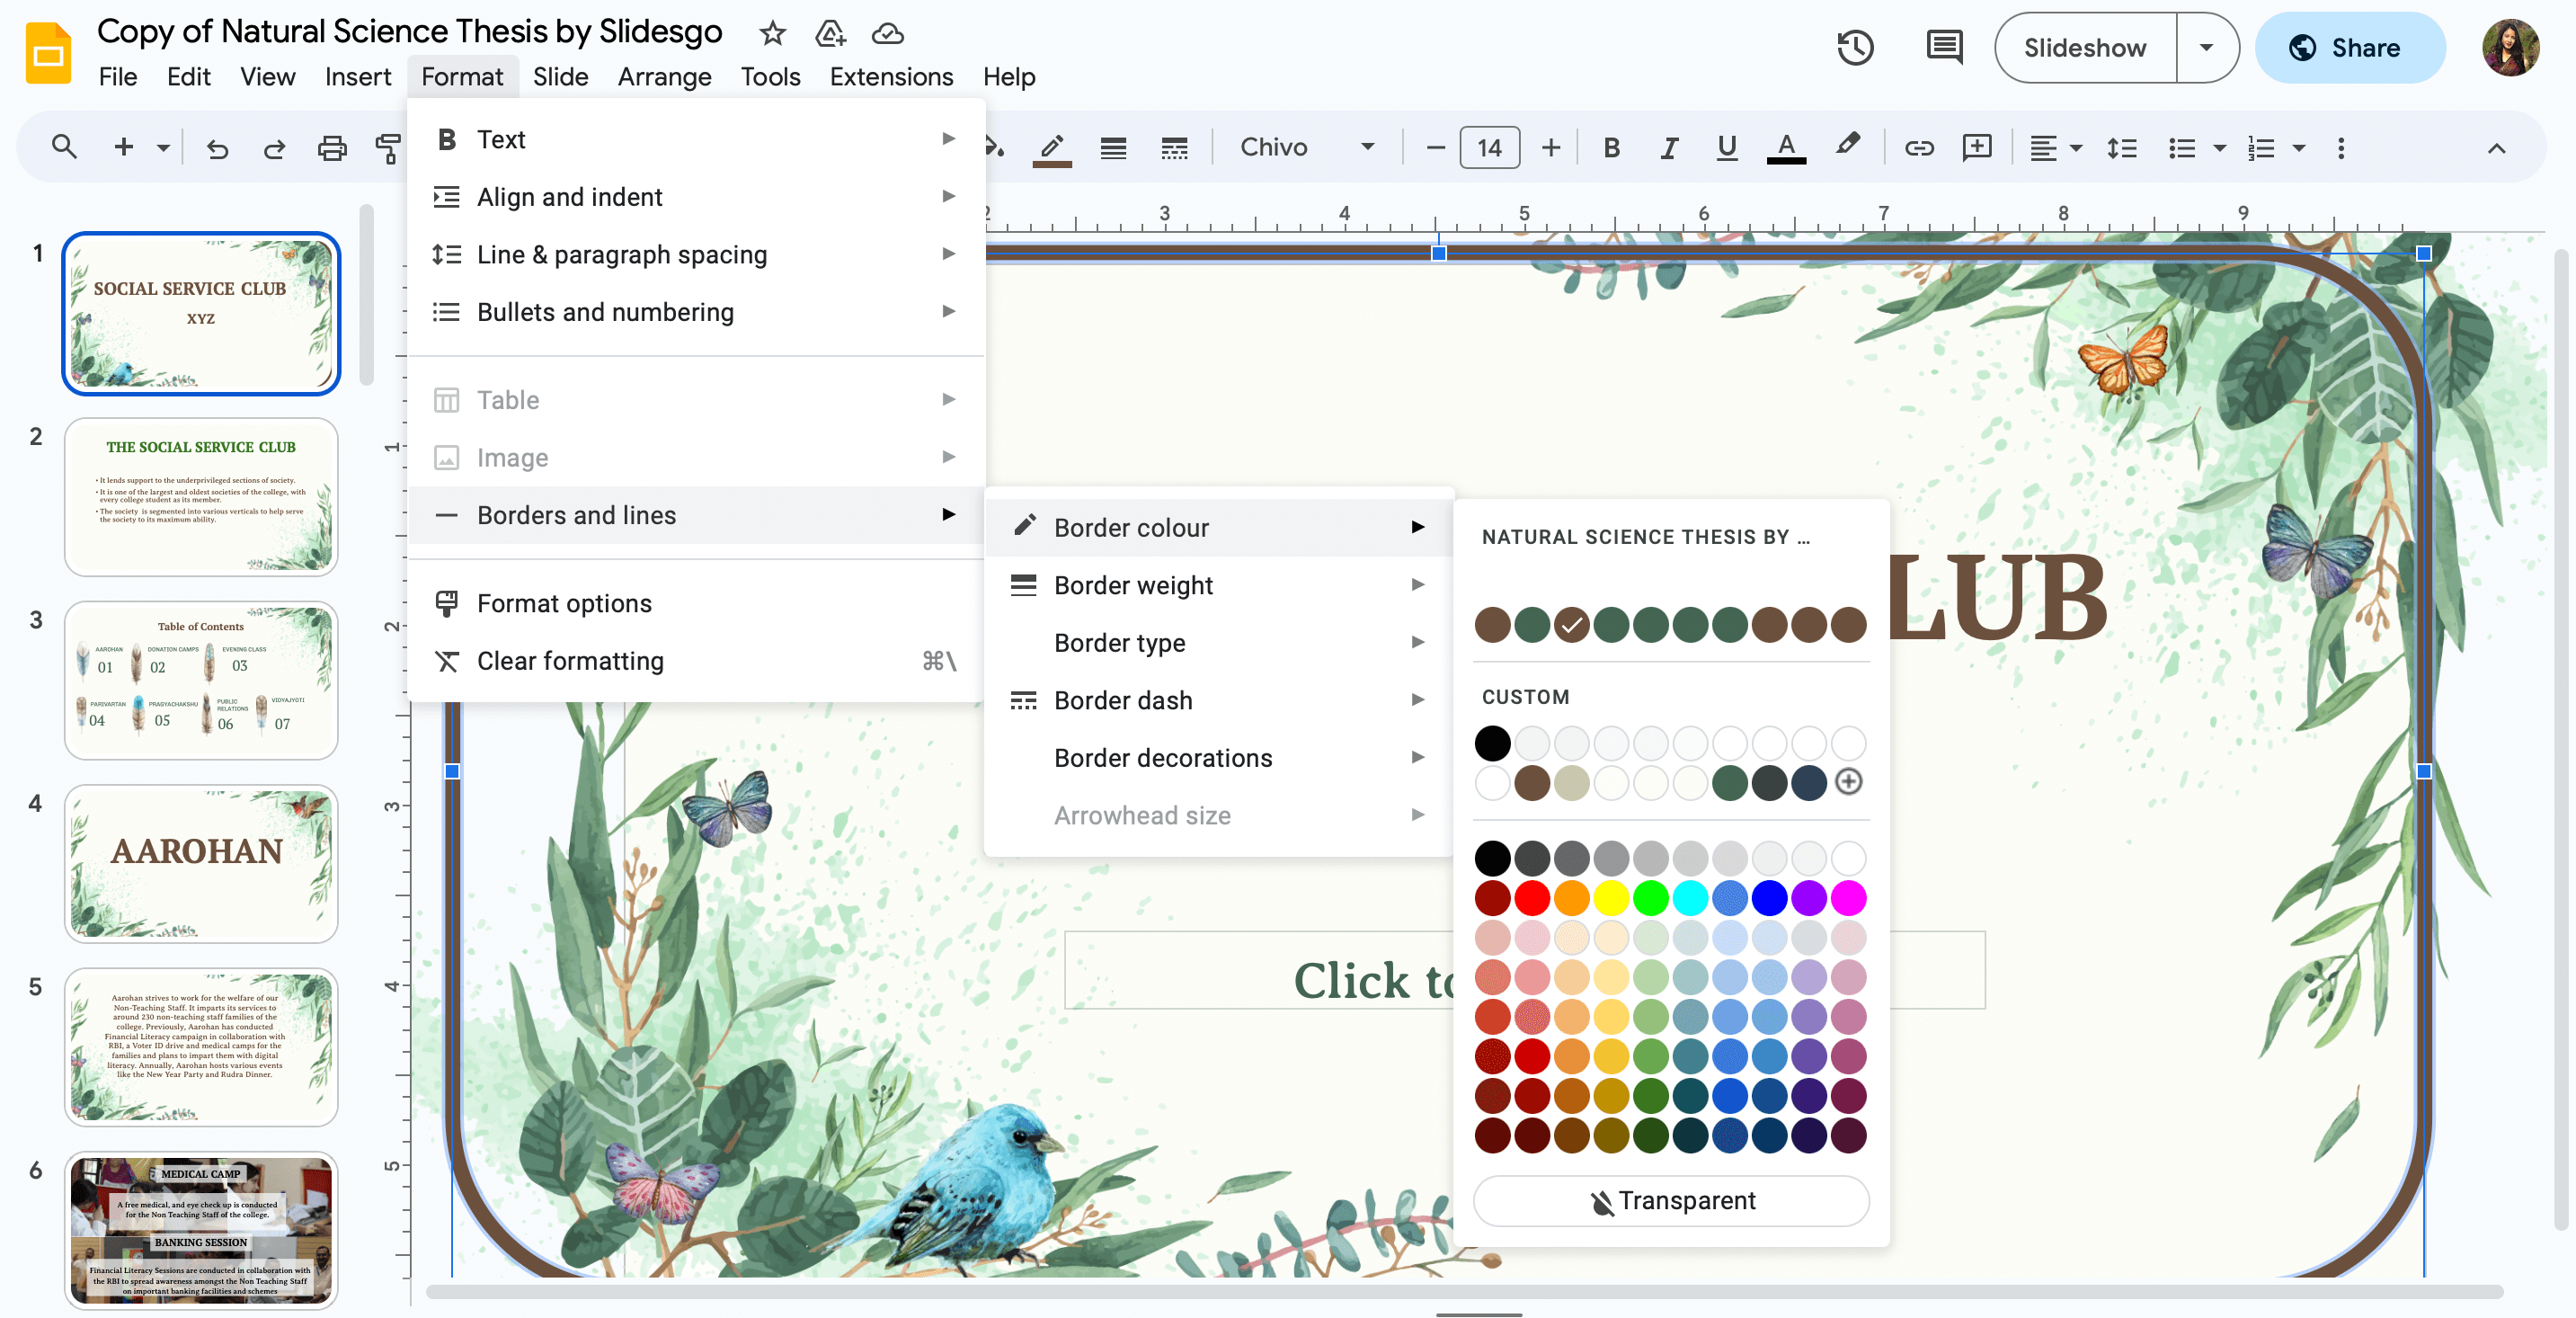
To further personalize your border, you can adjust its size and color.
- Click on the “Border color” option to choose a color from the provided palette or create a custom color using the color picker.
- Additionally, you can adjust the border’s thickness by selecting the desired size.
Source: Google Slides
Bonus: Best Graphic Design Tips For Non-Designers And Beginners
Step 5: Apply the Border
- After customizing the border to your liking, you simply just click the border you want and it automatically applies. You will instantly see the border appear around your slide, outlining its content and adding a touch of elegance.
Source: Google Slides
Bonus: The 10 Best AI Graphic Design Tools You Need To Know About
Creative Tips:
1. Experiment with Different Border Styles
Don’t feel limited to using the same border style throughout your presentation. Mix it up by using different styles for different slides to create visual interest.
2. Use Accent Colors
Consider using an accent color for your borders that complements your slide’s overall color scheme. This will help create a cohesive look and make your content visually engaging.
Bonus: Digital Design vs. Graphic Design: What’s The Difference?
3. Combine Borders with Graphics
Borders can work in harmony with graphics. Try overlaying borders around images or illustrations, enhancing their presence and drawing attention to them.
4. Combine Shapes
Get creative by combining different shapes to create unique border designs. For example, you can create a border by combining rectangles, circles, and triangles. Experiment with different shapes and arrangements to make your slides pop!
Bonus: How Simplified’s Copy Writing AI Can Help You Create Formidable Content
5. Play with Transparency
Instead of using solid borders, consider using transparent borders to create a subtle and sophisticated look. This technique works particularly well when you want to highlight certain elements on your slide without overpowering them. Reduce the opacity slightly to allow your content to shine while still maintaining a professional appearance.
6. Gradient Borders
Instead of using a single color for your border, consider using a gradient effect. This can add depth and dimension to your border, making it stand out even more. To create a gradient border, select the border shape, click on the “Paint Format” icon, and choose the gradient option from the drop-down menu.
7. Don’t Overdo It
Remember that simplicity is key. While borders can add sophistication to your slides, excessive use can overwhelm the audience. Use borders strategically to highlight key points or divide sections.
Bonus: 8 AI Script Generators to Streamline Your Screenwriting Process
By following these step-by-step instructions and implementing the creative tips provided, you can easily answer and implement the question of how to add borders to Google Slides presentations. Borders can help enhance the visual appeal of your slides and add a touch of sophistication. So, why not experiment with different border designs and create visually stunning presentations that leave a lasting impression on your audience? Empower yourself with the skills to customize borders effectively and transform your Google Slides presentations into captivating works of art.
Bonus: 10 Ideas For Impactful Presentation Openings
In Conclusion

Source: Simplified
Simplified offers an AI presentation maker with various features to enhance the overall presentation creation process.
- It can automate and simplify the process of creating entire presentations.
- Simplified includes a diverse library of elements, photographs, videos, and other media options.
- Its AI-powered copywriter feature can be valuable for users who struggle with creating compelling copy for their presentations, as it implies that the tool can generate persuasive content efficiently.
Simplified offers a comprehensive solution for presentation creation, combining AI-powered design capabilities with a rich media library and copywriting assistance. Users looking for a streamlined and efficient alternative to Google Slides may find these features appealing for creating visually engaging and persuasive presentations.


")
")


")


